Category: 1/72
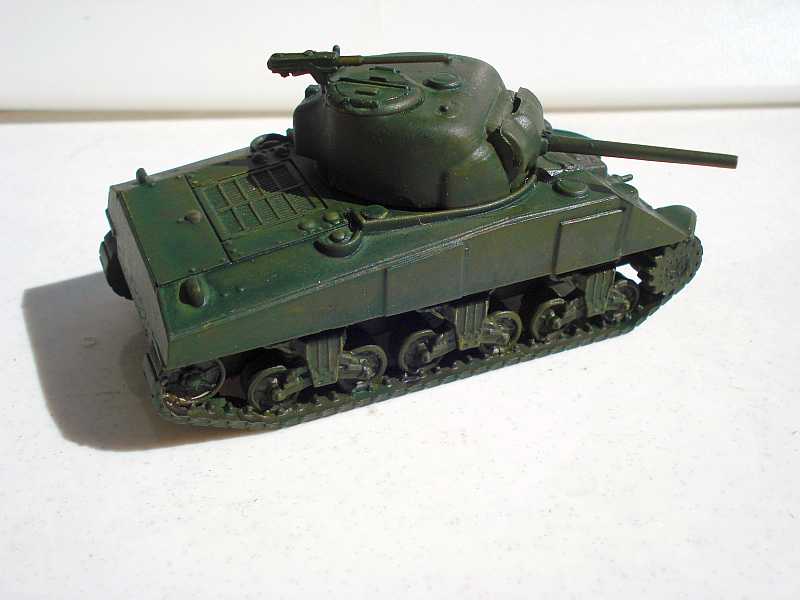
Armourfast Sherman M4A2 75mm
Anyone that’s been reading my blog for a while will know I am a fan of the 1/72 scale Armourfast kits. These are not high quality models. However for 20mm wargaming they are excellent. Cheap, pretty easy to put together, and they come 2 vehicles per kit. If you are going for building up an armor platoon, they are an especially a good buy.
I finally finished up my 20mm Pacific US Marines and wanted to get a tank for my list. I recognize that Stuarts are likely the most popular choice but I wanted something a bit more fearsome, so I went the M4 route.
The Armourfast Sherman kit was a snap to put together. I would say one hiccup was fitting the turret peg into the hull. The turret peg isn’t molded into the turret and instead you’ve got to assemble it. Not an issue, but I found the hull hole where the peg fit into was a bit tight. Filing it down and putting a tad too much pressure meant twisting the turret peg some. I pulled it apart quick enough, straightened everything out, and filed the hole some more for an easier fit. However fair warning and ensure that the peg fits well into the hull before assembling (rookie modeler mistake from me as usual).
The details of the tank are okay. The pintle mounted 50 cal fits well. As per other Armourfast kits the inside tread wheels are more to be desired and are empty molded plastic without any details whatsoever. The plus is that you can’t readily notice them unless looking at the tank from a lower angle. Another plus is that as a single model peice it’s easy to assemble the tread wheels to the hull.
There are no stowage options and if wanting to add some personality to the model, you’ll have to go the route of pillaging other model kits for that. There are also no decals for the kit, so that is another thing I’ll have to pilfer from other kits.
The details of the tank hull stand up to painting well enough. Yet I’m a bit miffed with my choice of a wash. My original base coat had a nice dark shade for the tank treads but the difference between the hull became quite muddled after a wash coat. Still it’s a serviceable tank model for tabletop wargaming and good enough for 20 mm Bolt Action.
1/72 Valiant WW2 British infantry
So a long while back I was scrambling to find a PIAT team for my 20mm British platoon. I settled on using some Italeri models which are pretty nice. The unfortunate bit was they were paratroop models. Now Bolt Action is pretty open to mixing and matching troop types. You could hand wave the entire thing and say they’re a few paratroops that folded into a Normandy group the first few days of the invasion. I was perfectly happy with that, but those minis sort of sparked my interest in working up a British paras force.
I went off and got a platoon of Italeri figs and got another British platoon painted and completed. They turned out nice and the box had quite a few different figures, however I still was missing a few weapon teams to round out my force. I started looking over some other minis to get and picked up on one from Valiant Miniatures.
They are pretty nice figures. There is a lot in the box, 4 complete sprues for a total of 68 figures. There is a nice selection of riflemen and figures with Sten guns, as well as PIAT and Vickers MMG troops. A nice bit is that some separate heads wearing berets are also included. While not 100% accurate with the uniform and kits, I was able to swap out some heads and paint them up to supplement my Italeri para troops. I also could now field some 3 and 2 inch mortars too for medium and light mortar teams, respectively.
As a bonus, I now had a PIAT team to whip up and throw into my other British infantry platoon painted as a proper army uniform team. I’m also thinking of hacking up one of the Vickers MMG to throw onto a Bren carrier. The downside is I now have a gaggle of odd Brit minis. Maybe I’ll find a use for them or hack up parts for other projects.
The Valiant minis are a stiff plastic which is easy to work with and uses regular plastic cement for assembly and basing. The figures are mostly one piece with a squarish base, so you’ll likely have to put them on bases of your own. They are detailed well enough. Some parts are a little blocky and the figures seem well proportioned even if some of the weapons are a little large. The facial features and hands are a tad cartoon looking, but well enough for 20mm figures.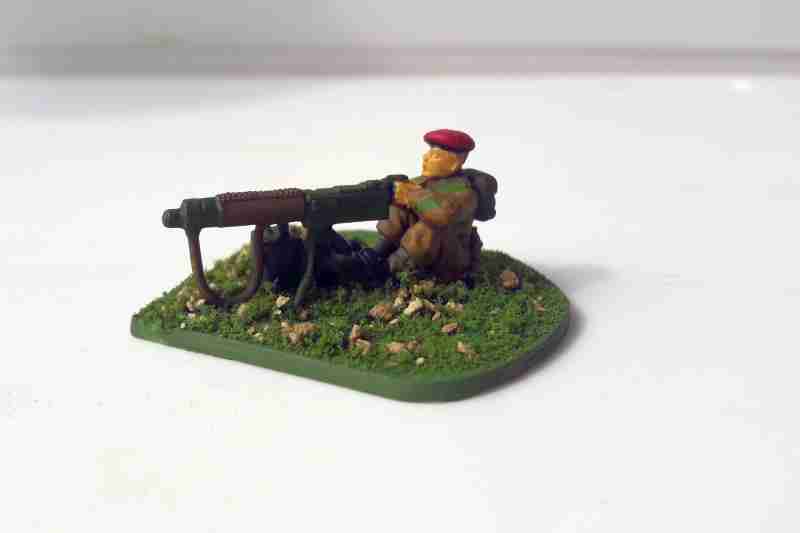
They are somewhat large though compared to other figures, including being a bit over proportioned. I think a few figures don’t stand out too much on the tabletop, but you should be cautioned if trying to mix and match. Below is a comparison with a 20mm Plastic Soldier Co. figure on the left and you can see that the Valiant figure on the right is not only taller but also bulkier.
For wargaming they are suitable minis though and a great price with a decent variety in the box. Another nice point is that they are hard plastic which I’ve always found easier to work with in modifying and modeling. Overall if you’re on a budget, they are a good set to pick up for 20mm wargaming.
Paint scheme reference cards
 This week just a small tip for folks delving into miniature painting. If you are like me you might have a lot of different game systems and army projects going (sometimes several simultaneously). Once an army is done, going back to add a few troops or units is always an option. However it can be a tad difficult to remember what paints were used before for that force.
Another issue is that occasionally your miniatures will get some dings and dents. You may find needing to touch up a miniature or two. So trying to think back what paints you originally used for a base coat along with the proper wash might be a problem. It’s compounded if you’ve been painting a slew of other stuff since then too.
To get around this I use note cards. I write down the paints used for base coats, washes, and highlights. Additionally I pair this information up with the appropriate parts of the models. Along with the name of the paint, I also place a small dab of the paint color on the card.
This way I know exactly what colors I used for say, the webbing on my US Marines, along with the colors used for the drybrush highlight too. The color reference is also there in case I have problems tracking down a specific paint. I then have a hue to compare to if seeking a replacement paint from a different manufacturer. Another plus is I can take the card with me into the shop to directly compare.
They are very handy. I’ve got a slew of unfinished 15mm Russians I’ve been sitting on for a couple of years now. At least with the paint reference cards I have some confidence I can revisit them again using the same color scheme as I had done in the past, ensuring that my army will have a uniform look. So consider keeping track of the paints you use on your minis. While I find note cards handy, but even a notebook is helpful. After all you never know when you might have to touch up a couple of minis (or add another squad to your force).
Drones and Probes for Gates of Antares
I haven’t taken the plunge yet for getting an army together for Gates of Antares. Instead I’ve been using a lot of my 15mm sci-fi stuff as proxy forces and have been having quite a bit of fun. Maybe later I’ll consider eventually getting a batrep done. Seems 15mm is a great way to jump into the game if on the fence wanting to give the rules a test drive.
I’m liking the Algoryns and might work on that faction. However Warlord Games is still trying to expand that model range for them. And sadly the choices for that force are only in metal. While I dig the heft of metal figures, the cost compared to plastic kits is pretty hard to swallow. Might have to clear my bench some of stuff to paint before I consider jumping into another range of models.
Nonetheless one thing I’ve been missing with my proxy forces is a way to represent drones and probes. GoA uses gobs of em. I really dig having some small bonus abilities represented by models on the table. However I wanted to actually get a figure down that I could push around over just using tokens or painted bases.
I picked up some cheap plastic beads I felt would fit the bill for using as probe models. The cost for a huge gross is dirt cheap. Just head to a craft store and check out the craft jewelry section. Being about 7-9mm across, they are perfect for drones.
I wanted to have them floating about though and was considering using some wire, but then I stumbled on some clear plastic tubing for modelling. The material is acrylic and the stuff I got was in 3mm diameter. Perfect for mounting a floating drone onto a base.
The pickle I had however was that the tubing was pretty large so I had to drill and file a larger hole into the plastic bead. Fortunately the beads have a hole already in them (for stringing wire and string through). So I could easily use those as a guide hole when using a larger drill bit. Drilling and filing a portion out of some 20mm slot bases, I was able to use a bit of instant bonding cement to assemble the entire thing.
The downside of using beads is that there is a small hole drilled into the top of my probes. So I had to use a bit of green stuff to fill it it. I also used green stuff to fill in the gaps for the slot base.

A bit of paint, drybrush a tad, some flock for the base, and bam…there’s a spotter drone. One thing I like about the model is I can use a variety of colors to indicate different types of drones and probes. The downside is that the beads have a particular pattern on the surface making my painting schemes a limited some. This was a quick prototype and I didn’t quite get the pattern and look to what I’d like, but I can touch it up later.
Hope folks find this helpful. It was super easy to do and pretty cheap. Considering you can end up with a lot of spotter drones for your units, along with support choices, I think you’ll end up needing quite a few drones for your typical GoA force. This isn’t a bad way to get a lot of models assembled for your force quickly (and cheaply).
Hotz Mats felt fields
A long while back I mentioned that I picked up some battemats from Hotz Mats and wasn’t that impressed with them. At the same time I made my order, I decided to pick up some flocked felt field sets from the same company. Despite me not being keen on the treated felt mats, I gotta say that I do like the flocked fields they offer.
I bought 2 sets of the 20-30mm range felt fields. The fields vary in sizes and colors that look pretty good for that scale. Seems they offer smaller scale mats for 6-15mm. The pics I have here are of 1/72 scale Germans. It does seem that smaller models would look a little off with the larger scale mats.

The felt fields are durable though and the flock is tightly adhered to the material. Mind you I keep them stored relatively flat tucked in a box of other terrain, so if tightly rolled up I’m not sure how they would hold up. But I have to say they’ve been through some heat and humidity and still look nice. Through normal gaming wear and tear you’d likely have some fields that would last for years.

The felt fields range in size having one large section, 2 smaller fields (a little over 6″ long), and a mid-sized field. A good mix for a set which looks nice. Throw in some small stone walls or bocage and you’d have a nice bit of rough terrain or light cover for your table. If looking to get some rural terrain and not too keen on modeling your own, they are a good option and worth picking up a set or two.

Jungle terrain using plastic plants
I’ve been slowly working on some more Pacific-themed terrain for Bolt Action. One stickler for me was getting some appropriate woods for a table together. I’ve got some decent trees that could work for deciduous forest, but really nothing that would work for jungle terrain.
Cruising through a small pet store I stumbled on some inspiration finding fish breeding bedding for aquariums. This lead me to also hitting up a local arts and crafts store to buy some plastic floral arrangements.
With a craft knife and a hot glue gun, I was able to remove sections of plastic plants and mount them on metal washers. A coat of plastic primer and flat green paint, along with a simple drybrush of a lighter green and I was able to whip up quite a few stands of jungle trees and overgrowth. I cut many sections at varying heights and mixed and matched them to provide a little more realistic look.
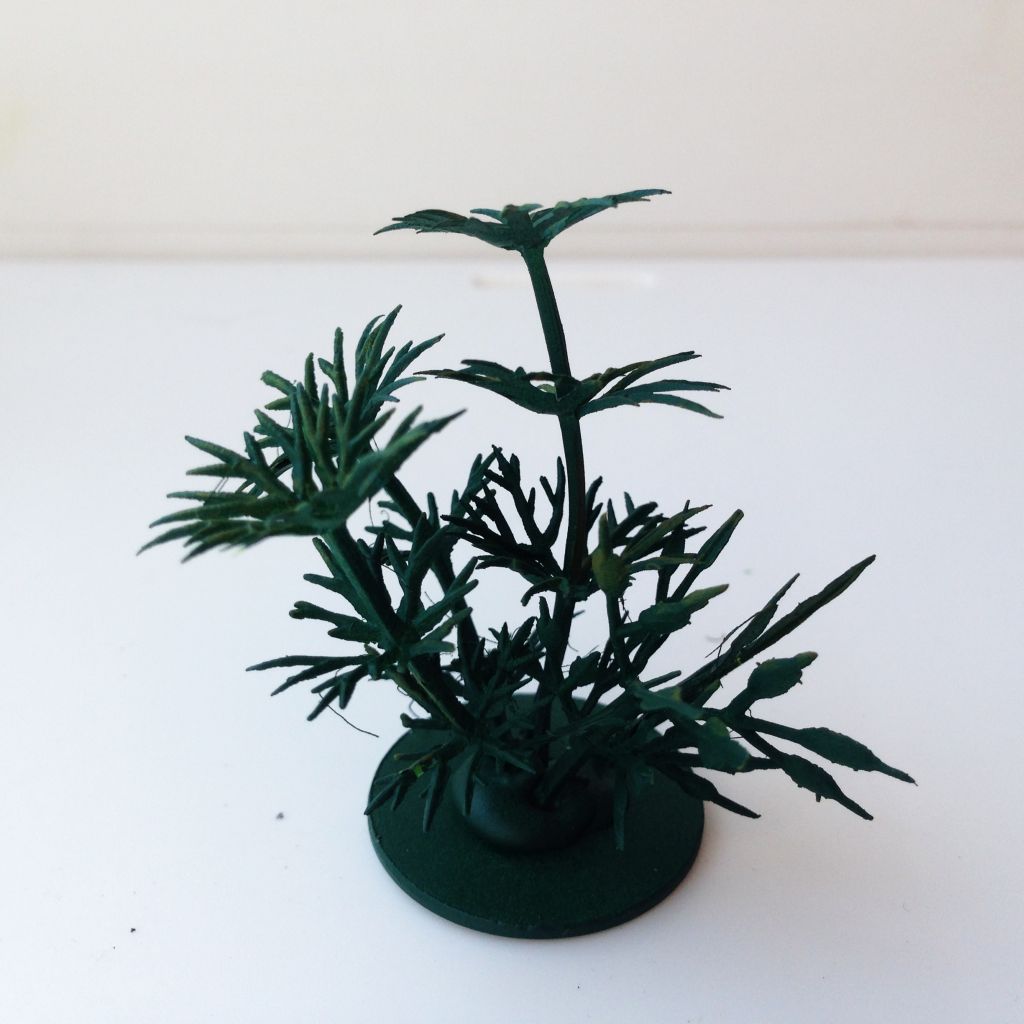
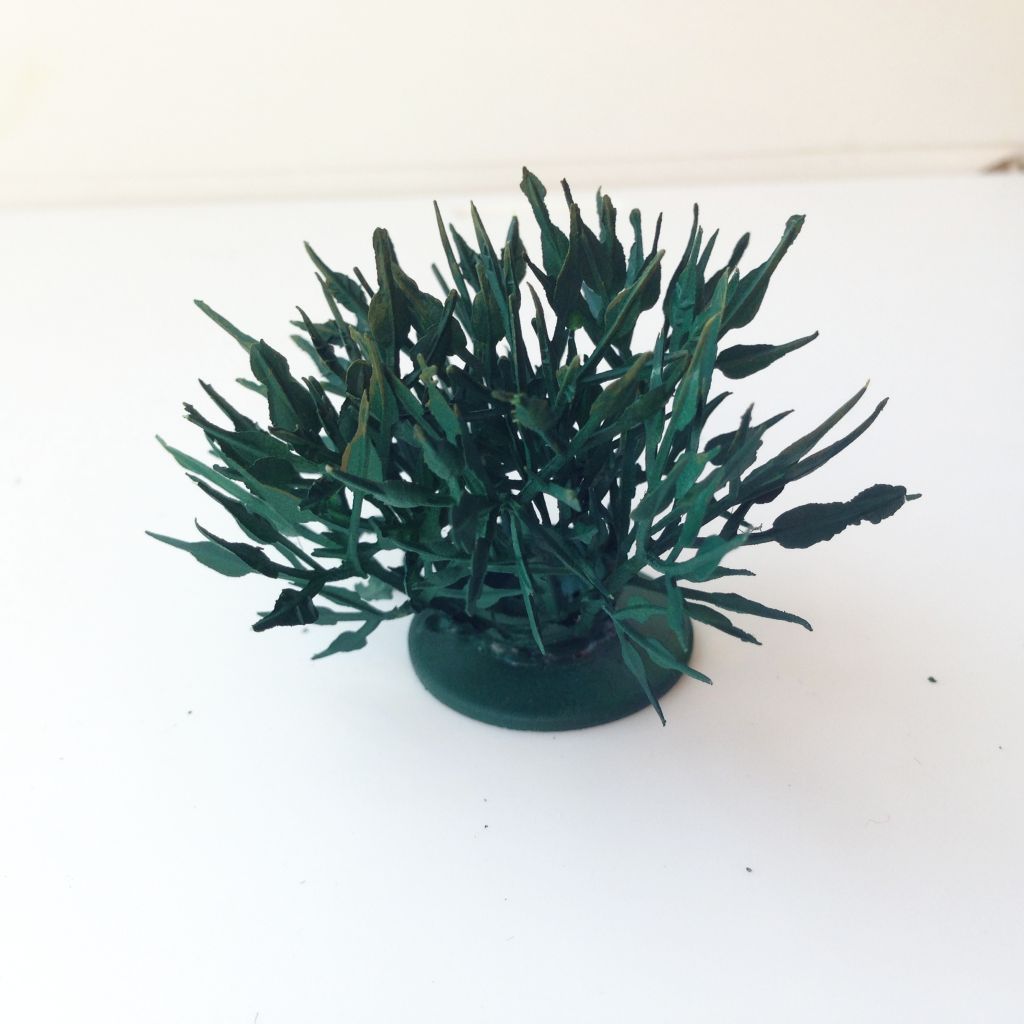
They really look pretty well and being on separate bases, I can move them around to accommodate larger teams and vehicles. Next to some 20mm Japanese troops I painted up, they’ve got an appropriate height and occupy a good chunk of area to offer cover. They were also a snap to get together. Certainly one of my more easier terrain projects to complete. Making trees and jungle terrain this way is easy and offer some decent terrain for your Pacific theater games.

Airfix forward command post
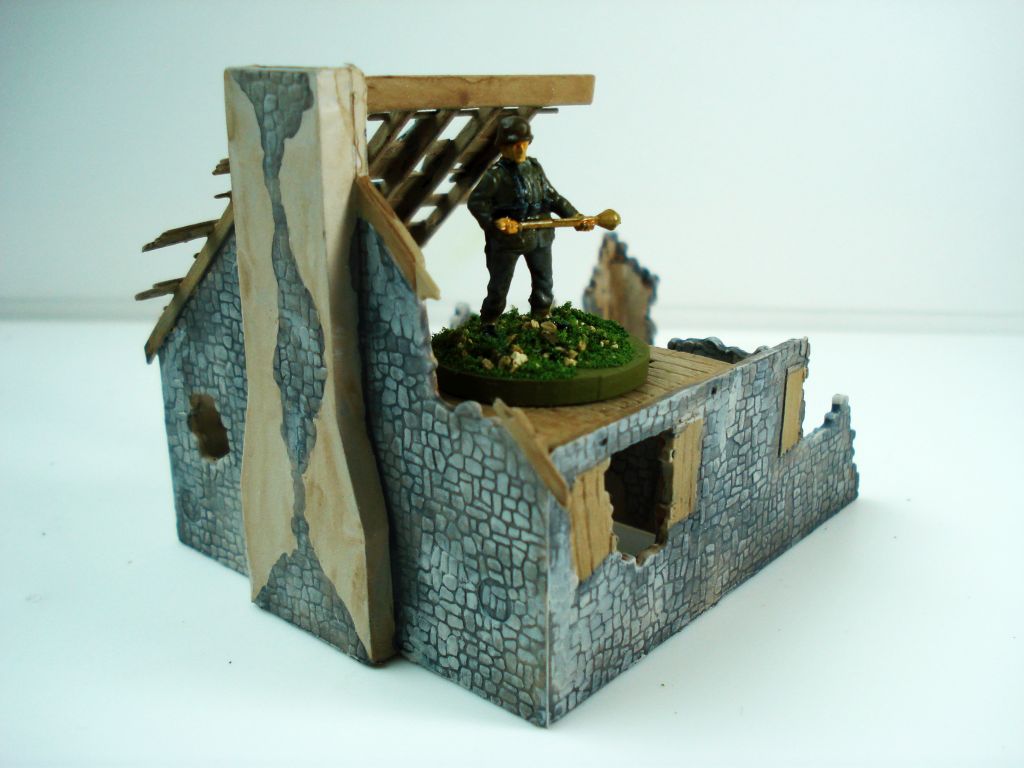
In my continuing quest for Bolt Action terrain, I’ve been slowly accumulating different model kits. One that stood out for me was the 1/76 scale Airfix forward command post. It’s a nice kit with a lot of little extra bits including a cool looking bombed out house.
One sticking point for me is I wanted to stretch out the usage for the model. There was a second floor to the house model, however the roof section was a little cramped to the point I couldn’t place a miniature in it. I opted to move the roof section to the other side, opening the second floor up. Perfect position for an arty observer or a sniper.
The kit assembles very well and paints up nicely. With a decent amount of detail and texture on the walls. It really is a diorama kit however. I had to shore up some of the wall angles with other bits of plastic.
As mentioned the kit comes with a fair amount of extra detail bits, including various signposts, wooden barricades, crates, fuel drums, coiled barbed wire. There are lots of nice details you can add to the house model, or throw them onto other figures for that extra touch.
One complaint I had was with the sandbag corner piece that was hollowed out and had no back section. I figure this was likely designed to go on a building corner, or be a detail part for a diorama (which would typically have a fixed point for viewing). So I had to plop mine onto some styrofoam and paint like it was built up earth.
The corrugated tin roof sections gave me a great idea using it as a possible objective. I placed mine on a section of styrofoam with it textured to look like an earth bunker of sorts. With a smattering of fuel drums and crates, it made for a nice little objective to plop down on the table.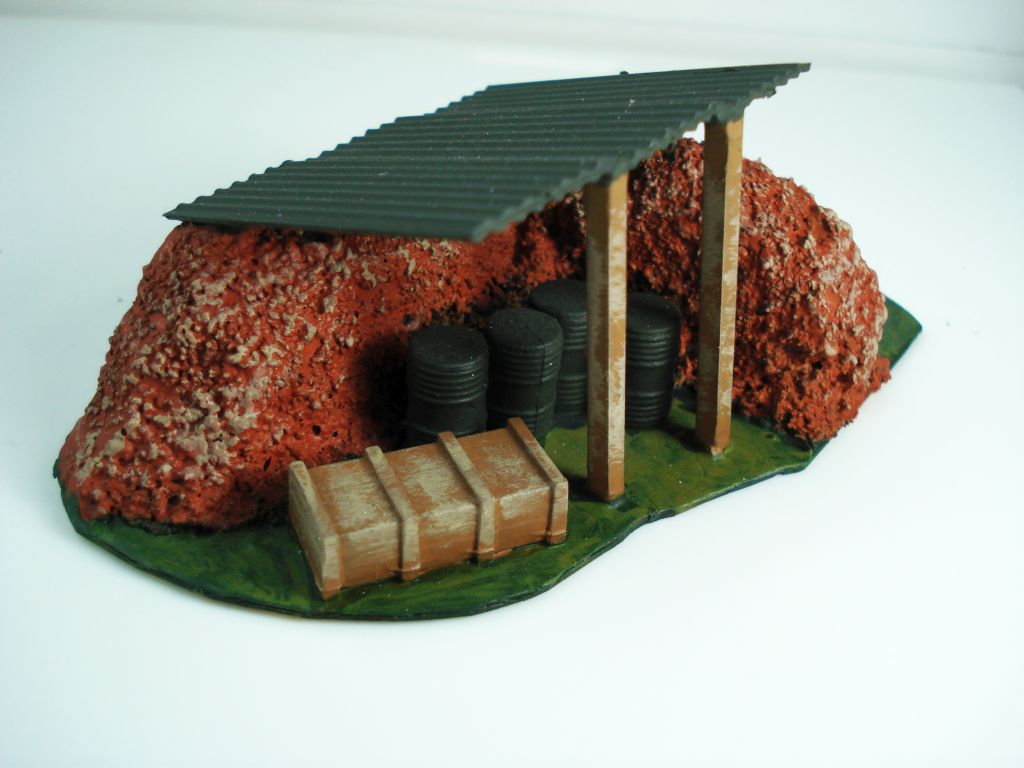
The kit is very good for 20mm troops, if being a little small for more bulkier figures like the Plastic Soldier Co. Germans I have pictured here. Unfortunately, unlike the Armourfast House I do not think this would work well with 1/48 figures. It’s simply too small. Airfix looks like it has the same model with less extra detail pieces at 1/32 scale which sadly might be a little too big for Warlord figures. However if you’ve got figures on a thicker plastic base, that’ll add about 3mm to the height and maybe not look too shabby compared to a larger scale house. It really is a nice model and might work well.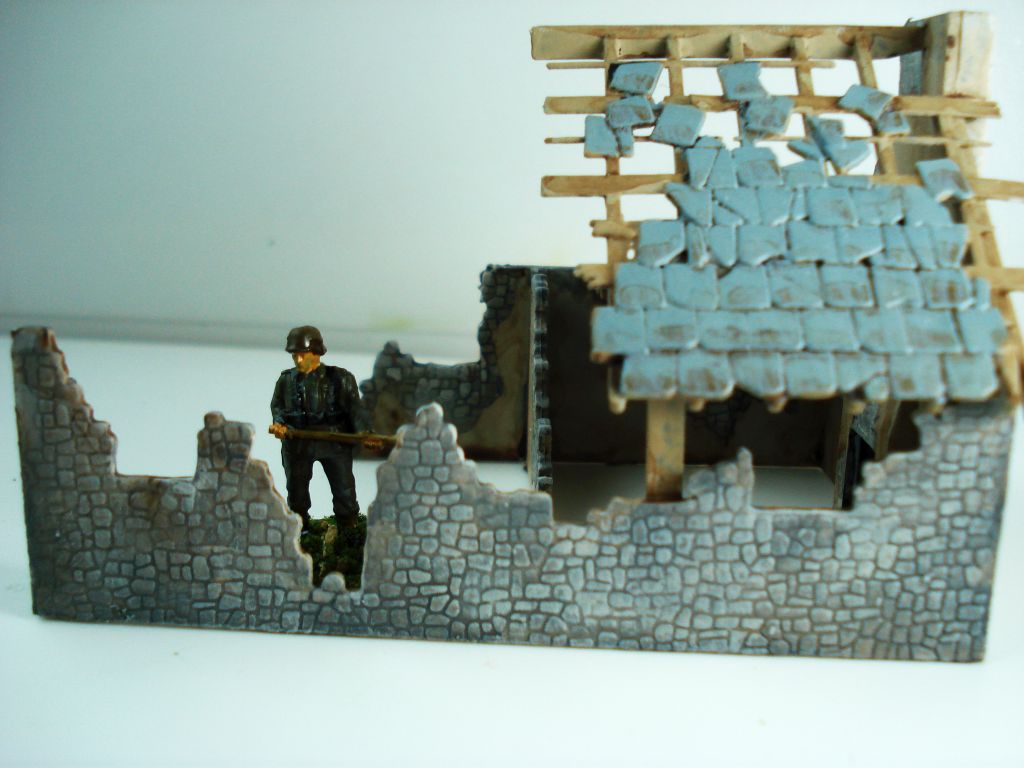
From a 20mm war gaming standpoint, while the kit is designed to serve as a centerpiece for a diorama, it can work very well as a terrain piece too. It’s got a lot of nice additional details you can add to flesh it out, or throw onto other models. All of which makes for a nice addition to add to your terrain collection.
Armourfast Panzer IV G
I’m a bit of a fan of the Armourfast kits. They offer a cheap price for a chunk of models suitable for the game table. Working with my German platoon for Bolt Action I wanted to have a few tank options and getting a Pz.Kpfw. IV was certainly on the list.
First off I will freely admit that the detail on these are pretty parsed down. The tracks and tread wheels are molded as one piece. Overall though, the detail of the kit is pretty decent. The turret hatches can be modeled open for a commander if wanted. The hull pieces are done well, with hatches shown in enough detail to stand out. The kit is also pretty easy to put together and fits well when fully assembled.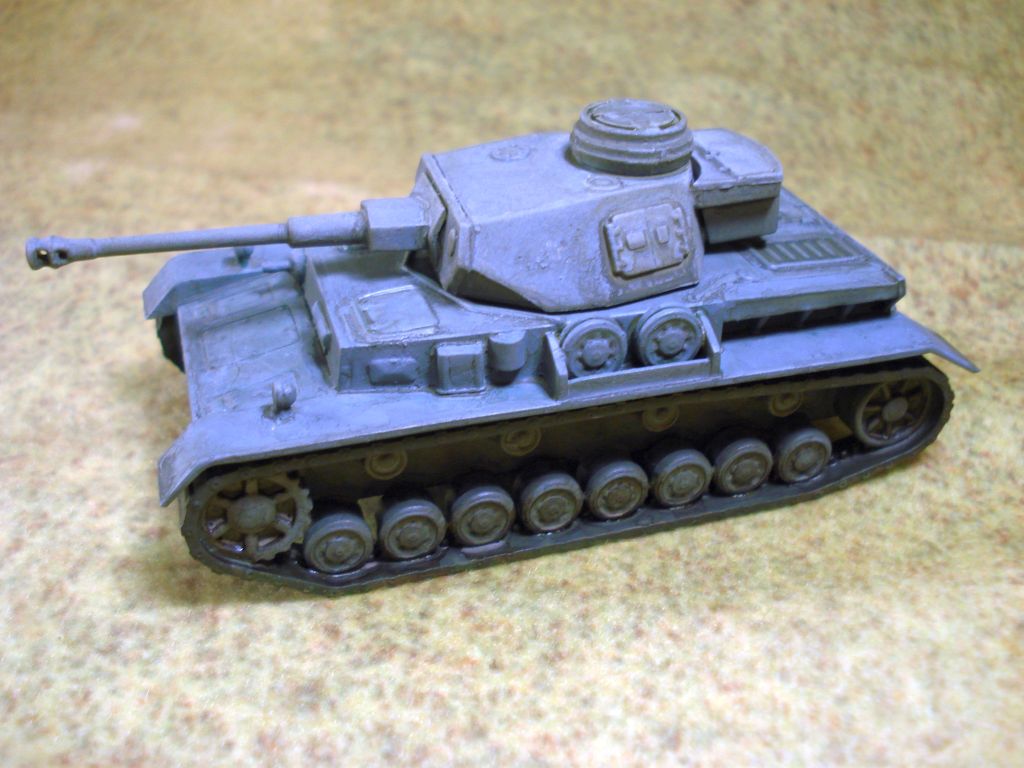
What stands out some of the front tread wheels which stick out from the hull. They lack any central axle making it look like a free-floating disk. It’s not much of a detraction but can be spotted if looking at the right angle. Also, no armored skirts come with the kit.
Still, you get 2 tanks of pretty accurate detail. As with other Armourfast kits they really are a wargamer’s model. You aren’t going to get a super accurate, highly detailed model in this kit. You will however get 2 tanks of nice quality plastic that paint up very well. I can’t piss and moan too much about the kit as I’ve got another tank on it’s sprues aching to get worked on. I might try my hand at a little converting and whip up a passable Panzer IV D or F1 for an early war tank.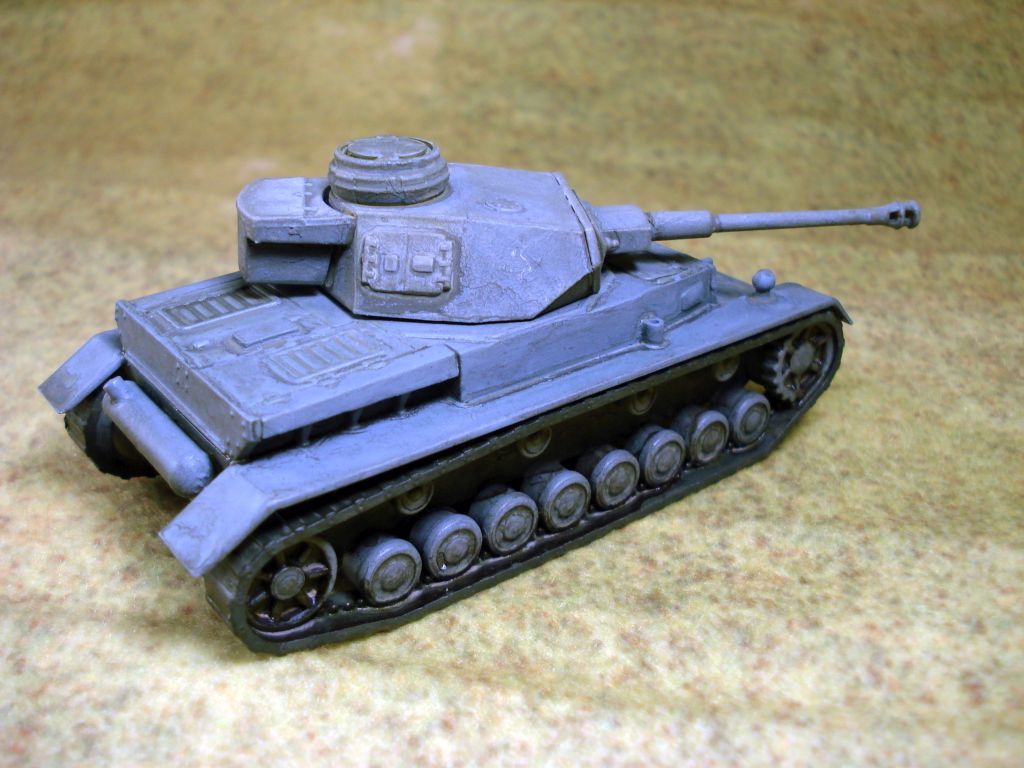
WW2 bamboo hut terrain
One thing I’ve discovered difficult for my Pacific Bolt Action games is finding some appropriate buildings. I simply cannot find anything in 20mm scale. There are some Quonset huts that I had gotten that will certainly be appropriate. However I wanted something a little more rustic
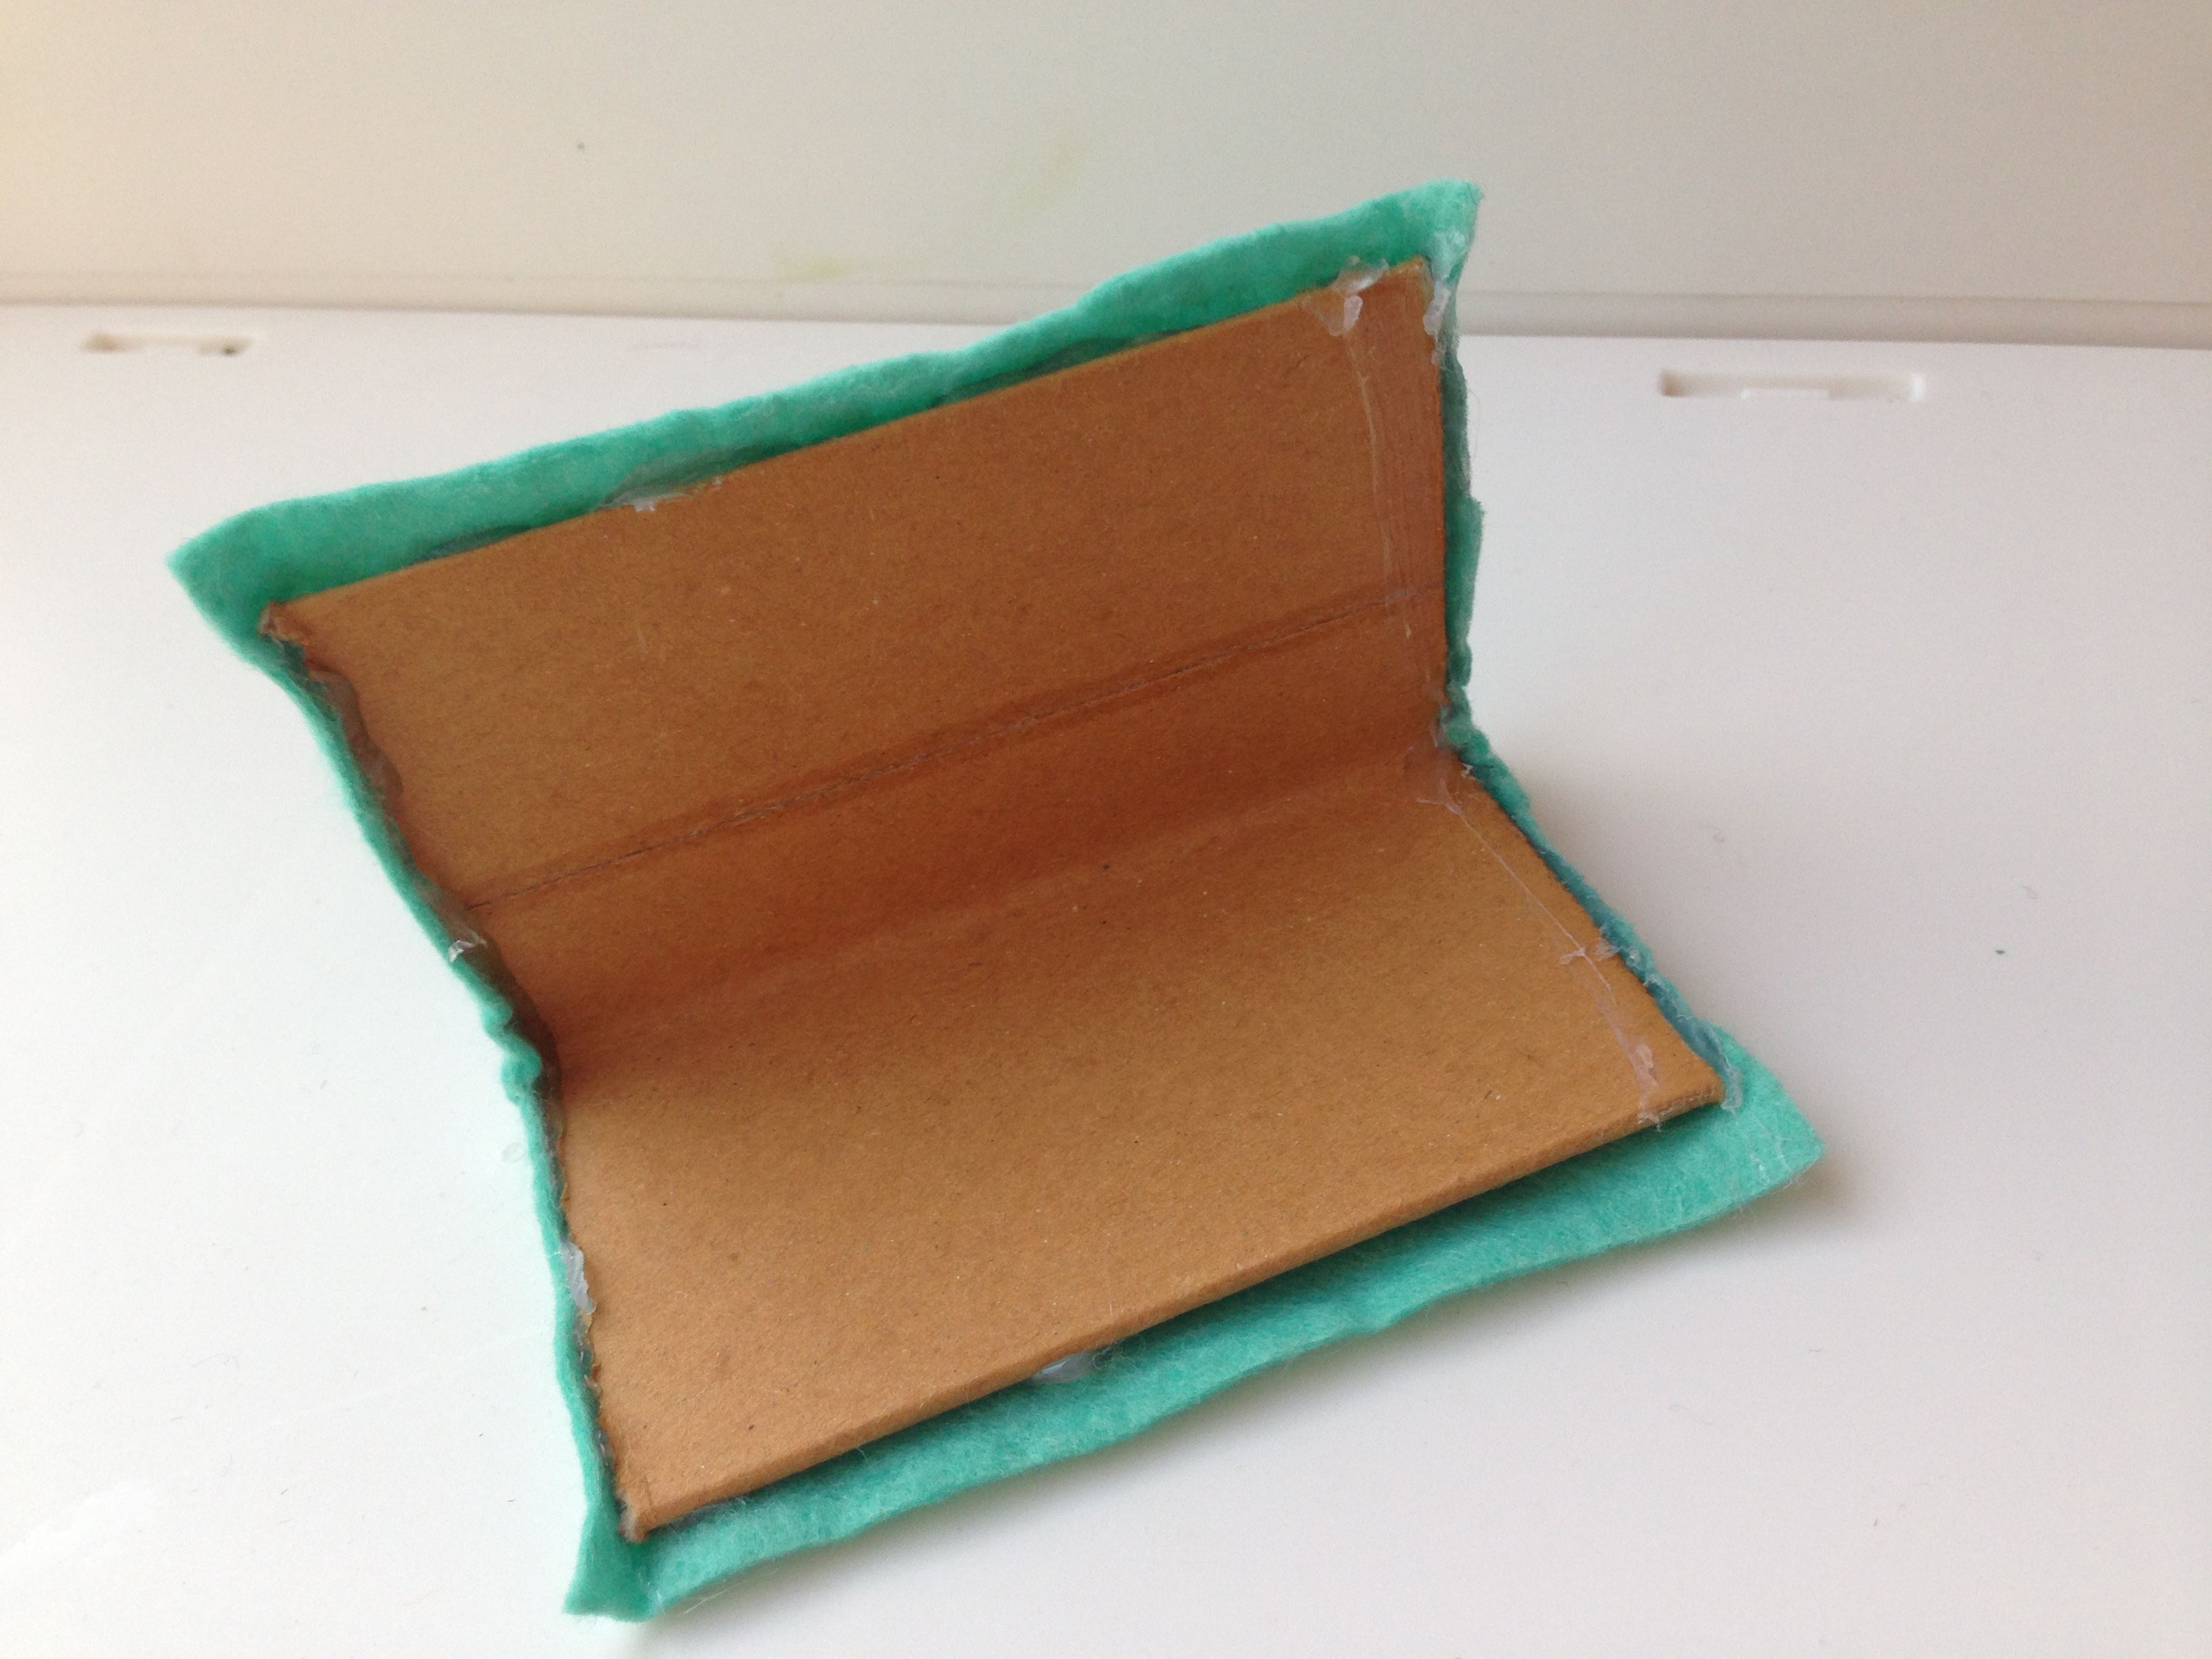
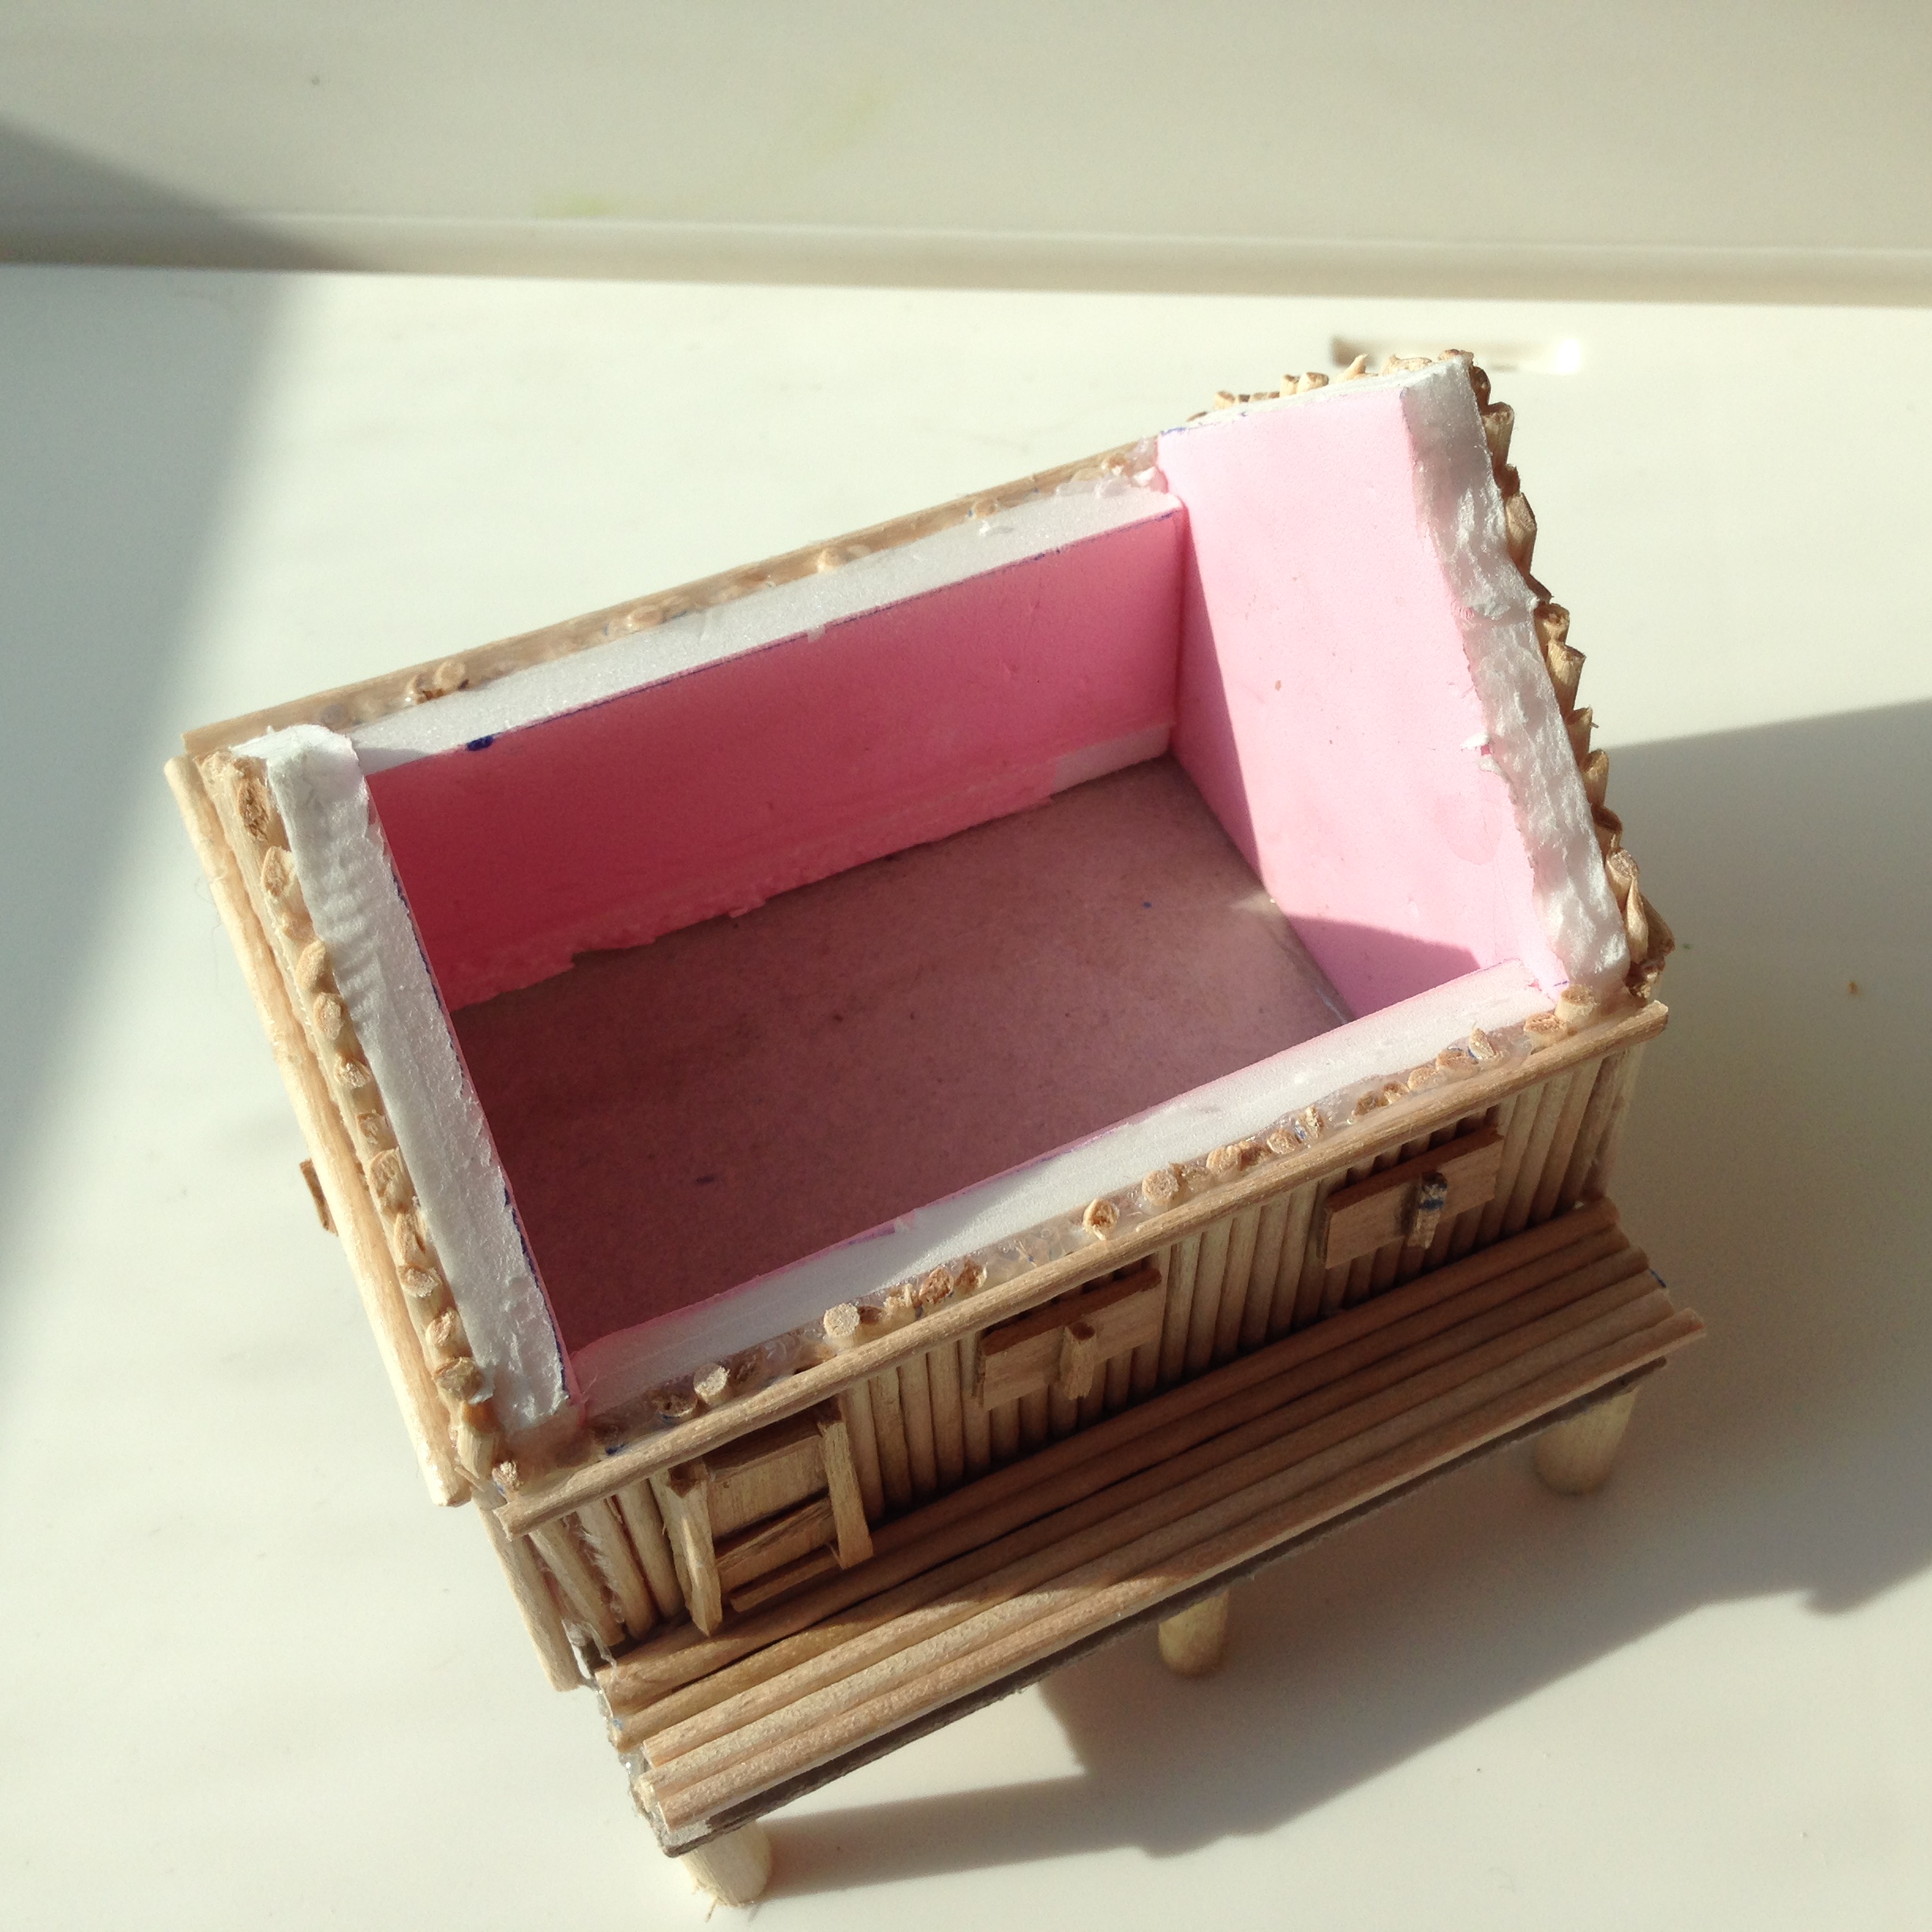
I opted to try my hand at building some structures myself. Using a frame of foam core board, I was able to get a simple structure assembled. I also lucked out and had gotten some thick cardboard at an angle which would work great as one piece roof sections.


One thing that stands out with these type of buildings is that they’re usually on raised platforms. Hanging onto some sticks I picked up from hitting a street food vendor (gotta love late night munchies after drinking soju in Korea), I was able to cut sections to simulate logs that a hut would stand on.
 This lead me to trying to figure out a way of making bamboo walls. I had gotten some wooden food skewers that were about the thickness of a toothpick. Cutting pieces of an appropriate length, I got a pile together to make up the outer walls of the hut.
The trick of course was gluing them to the foam board. I could do this gluing them individually using PVA glue, but I figured that would be tedious. Instead I lined them up side by side using a ruler to create an even edge at the base. Slathering hot glue onto the foamboard, I could then lay the base of the hut down even with the lower portion of the wooden skewers, and carefully press the entire wall section flat onto the wood pieces. They would then be firmly affixed to the foam core walls.
I did this for all four sections of the hut. To hide some of the uneven pieces, I framed the top of the walls with a single piece and was also done on the sides of the hut. This way, I could frame the entire hut with sections of wood with relatively the same length.
For the wall sections that were peaked however, I had to glue those one by one after cutting each section individually with a slight angle. This was a little time consuming but at least I only had two small sections to work on rather than the entire walls of the hut.
After completing the outer walls, I placed the hut onto a thick cardboard base. This base would be used to create the platform for the raised hut. One section was longer to simulate bamboo flooring for the front of the structure. Cutting out larger sections and gluing them individually, I was able to make the entry flooring easily. I then used PVA to adhere the wooden supports to the hut floor.

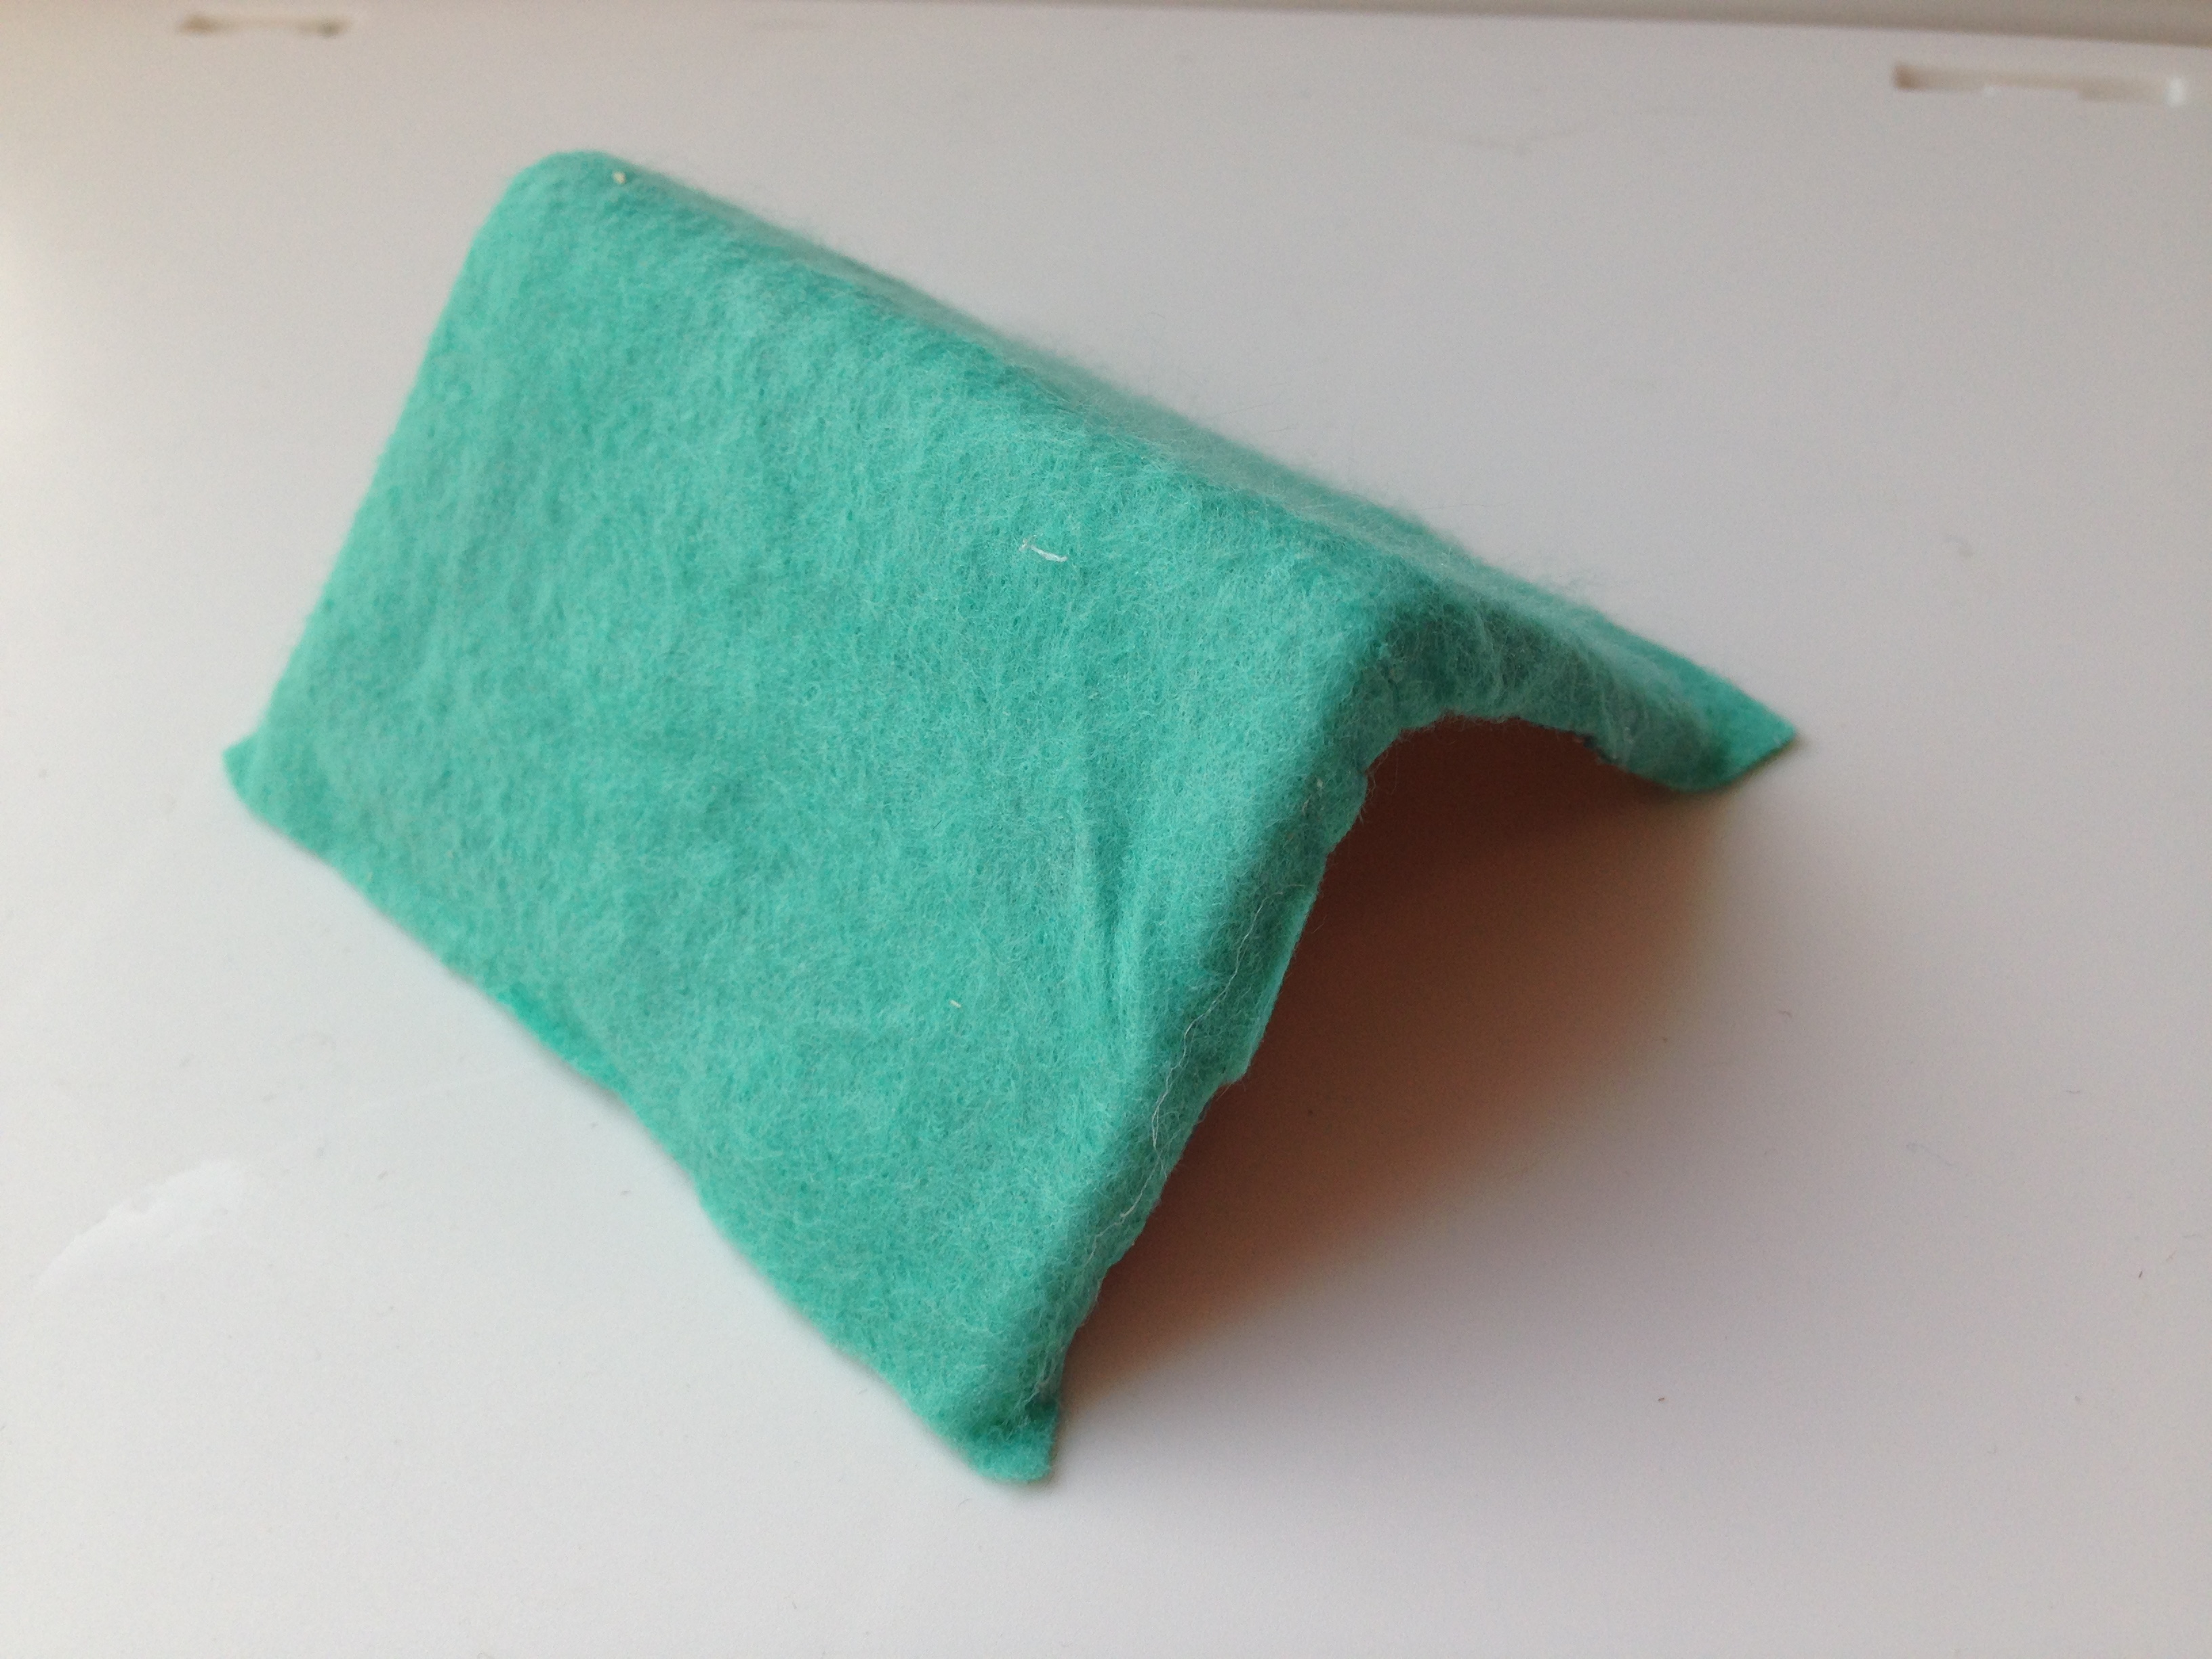
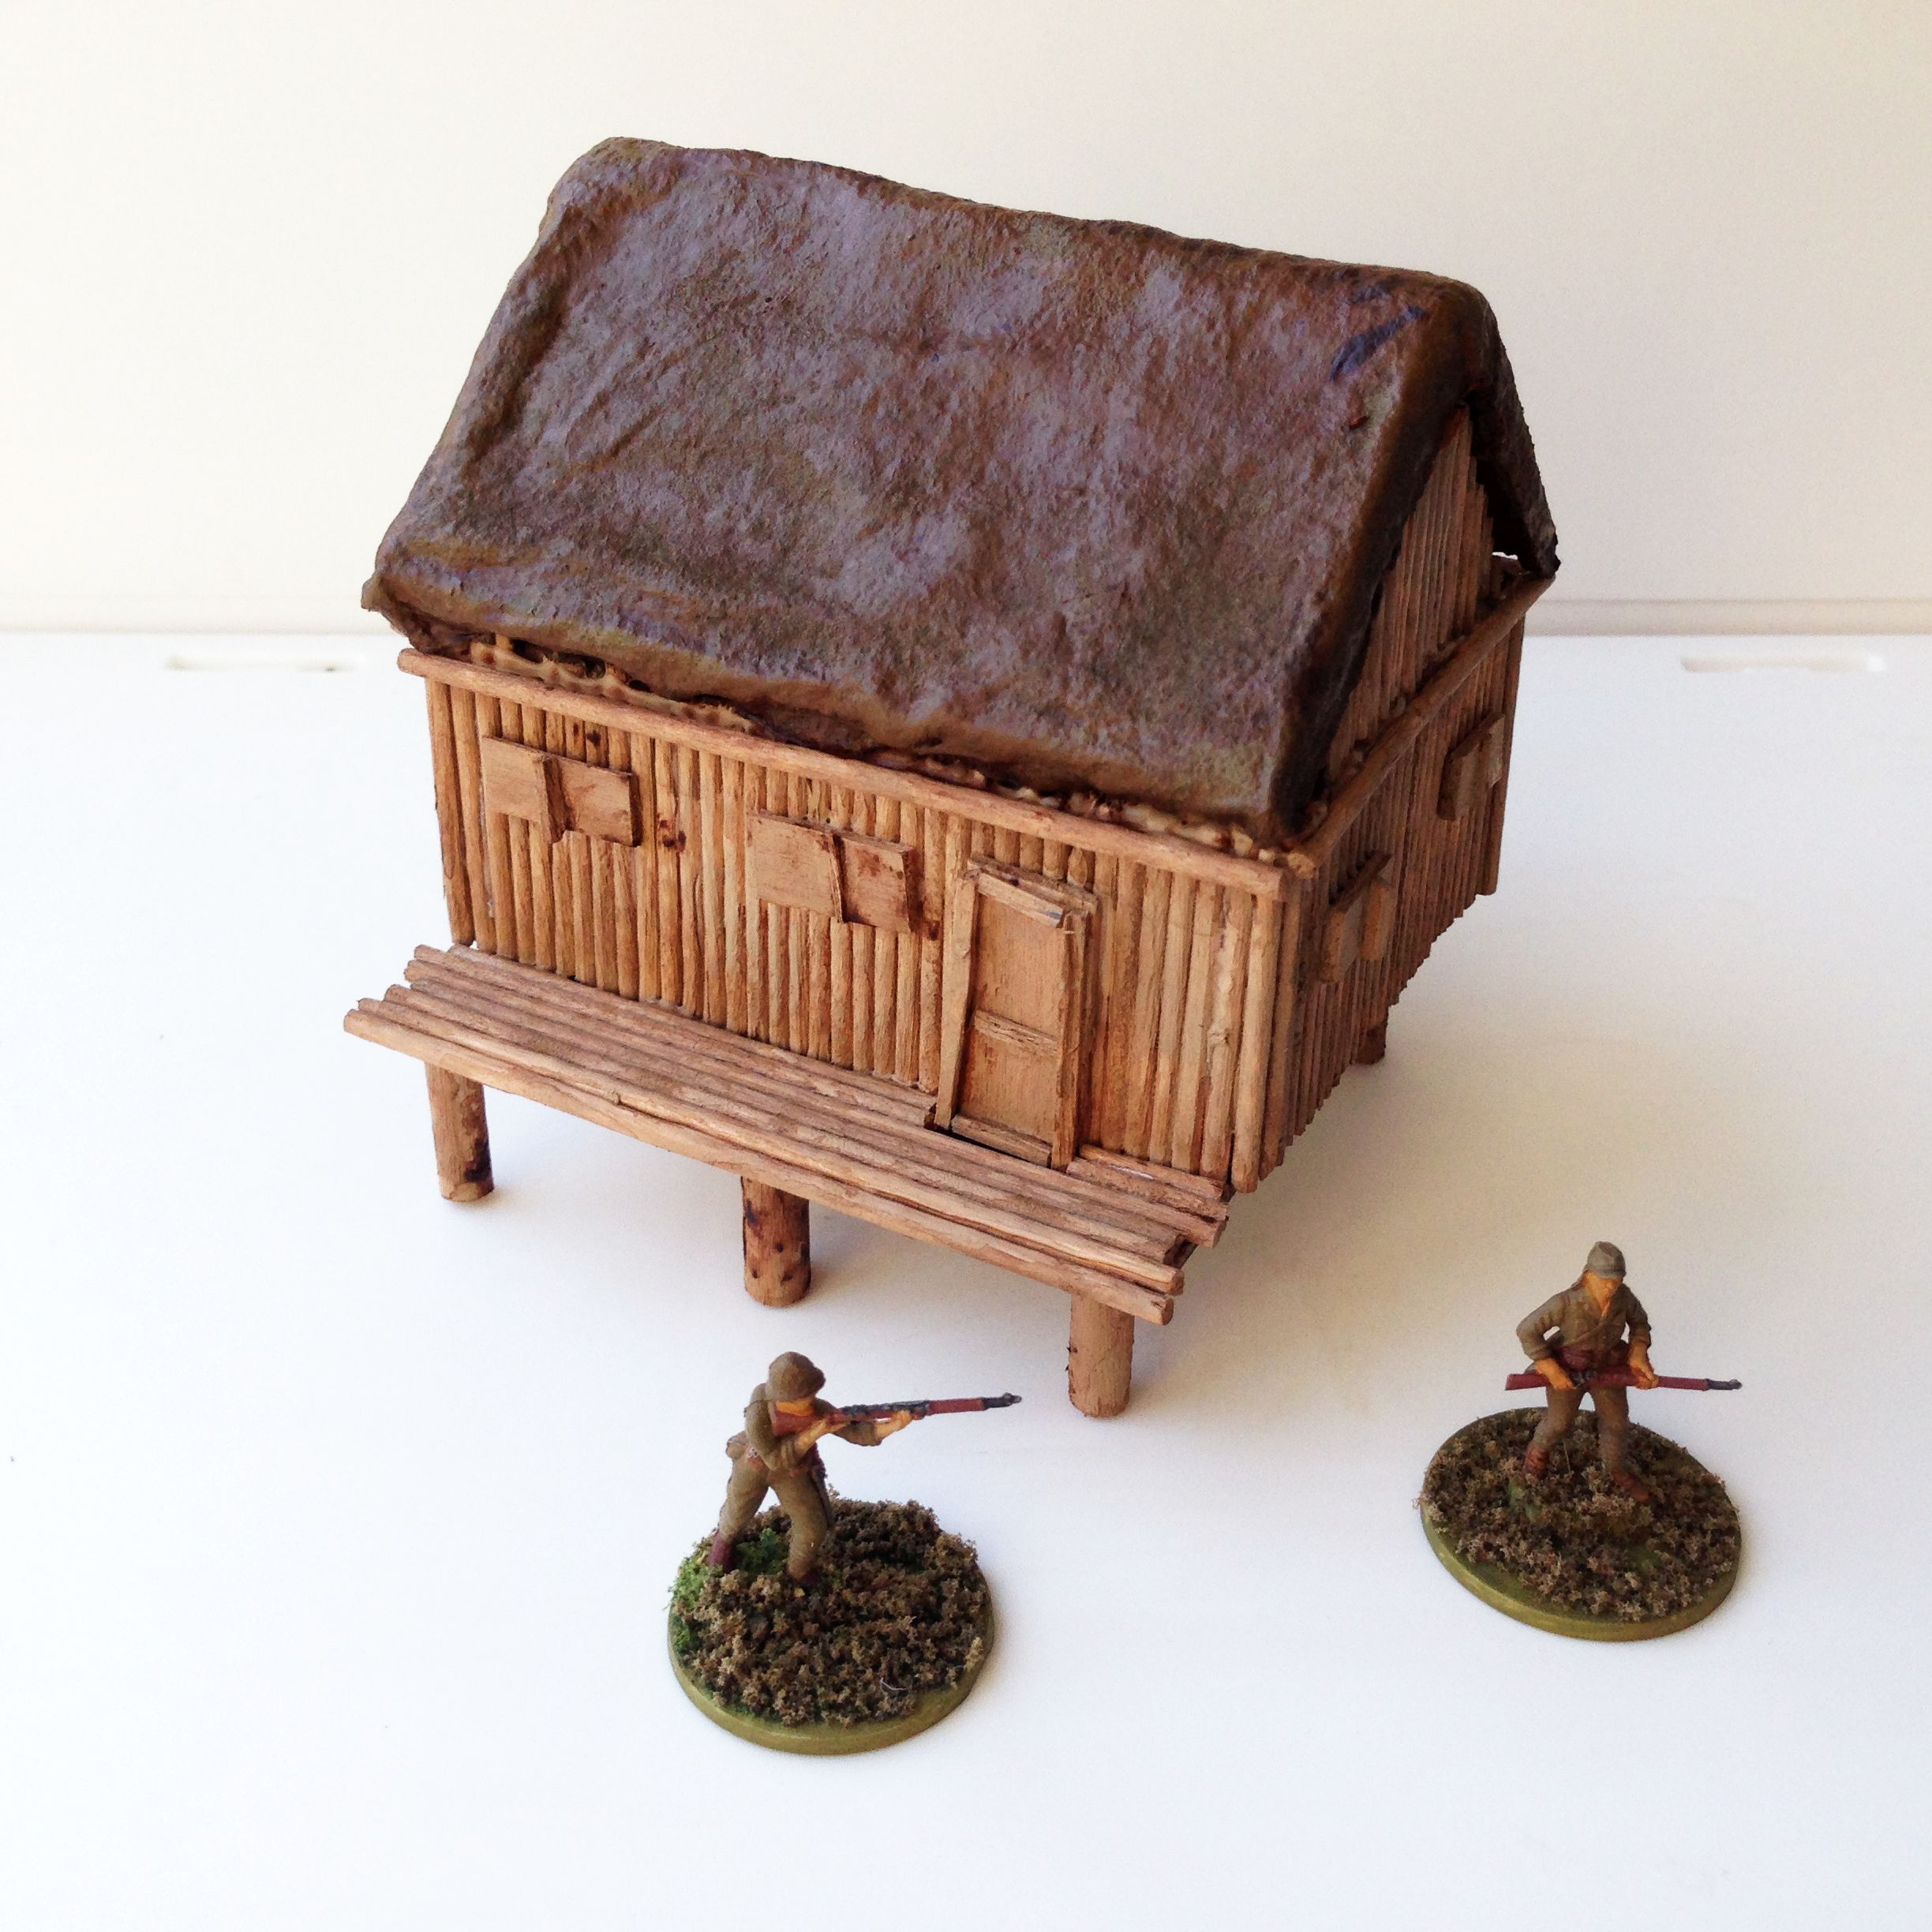
The roofs would need a little work. I decided to go for a grass look and glued a section of cleaning cloth onto the roof piece. Being cloth however, I would need to do something to seal up the surface, otherwise it would absorb all the paint. I gave the entire surface of the roof section a coat of watered down PVA glue. After drying, this created a coating all over the roof providing a simple barrier to prevent paint from being just soaked up.
I now needed to create some windows and entryways. If I had the gumption, I would have cut our sections in the foamboard. However this would also require me to cut and glue individual wooden pieces. Instead I cut sections of popsicle sticks with very thin sections to be used for the door frame and shutter supports. Gluing them onto the sides of the hut walls, they could provide openings for troops inside to shoot out of or mark the location of the building entrance.

 Some coats of paint and a basic wash, the hut was done. I opted to keep things simple with painting and gave the interior of the bamboo hut a simple black coat. I’m pretty happy with the results. The roofs fit okay and come off allowing me to place troops inside. The structure itself is pretty sturdy, however I think the real weak parts are the platform supports. Throwing the bamboo huts around in a plastic tub for storage and transportation seems like a great means to snap them off. I’ll have to be sure to keep them wrapped in some bubble wrap.
 I’ll also admit the windows and doors a little lacking. It would likely be far better looking if I had cut them out. Instead I opted to go the less fiddly route but the huts turned out okay. While I would love to give a lot of attention to the buildings, I am happy just getting something together that would look decent on the table. I’d much rather spend extra time modelling and painting miniatures than dedicating a lot of time towards terrain. So while my bamboo huts won’t win any awards, they do offer fair looking structures that are flexible enough to allow troops to be put inside, and also handle your typical gaming wear and tear.
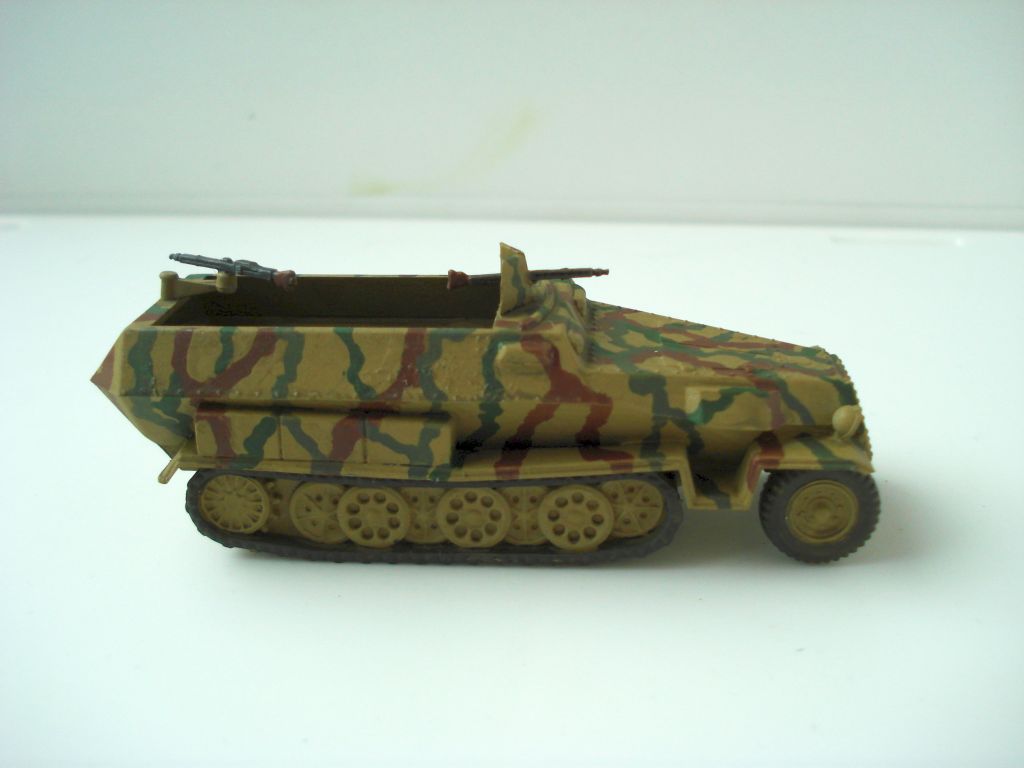
Armourfast Hanomag
So I’ve been slowly accumulating different units for my German platoon. I’ve been wanting to dabble a bit in transports. With the new Tank War book out in the wild, I also wanted to think about fielding an armored platoon with mechanized infantry units. So having a few German halftracks would be ideal.
For a while now I’ve been a fan of Armourfast. As with many of the other models I picked up from them, they offer a wargamer-grade replica. This is not a super accurate kit, but a model that has decent detail that looks good enough on the table.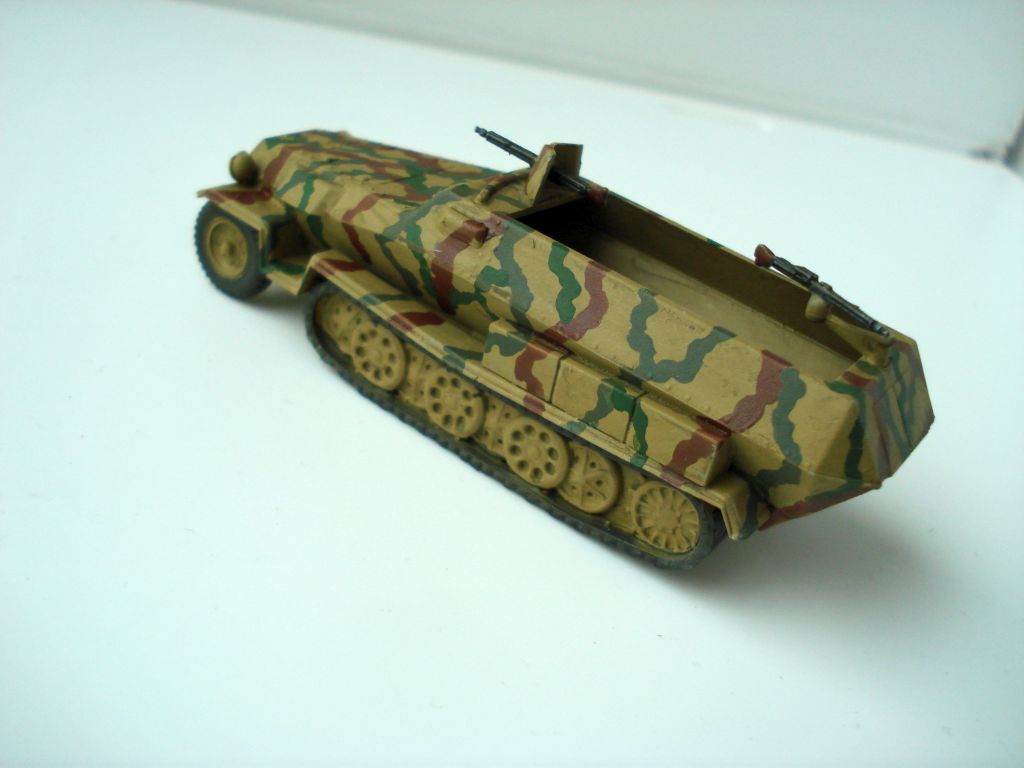
The kit does not offer any crew, with a simple troop compartment. The half tracks include a rear pintle mounted MG42 in addition to a forward mounted MMG. The treads like other Armourfast models are fitted as one piece. The outer side looks good, but the inside tracks are open with struts to support the tread section. When assembled it’s really hard to see the inside tread but if you look really closely at a low angle you can see it. As typical models from the company, they are great for tabletop gaming, but nothing you want to put in a diorama.
The half tracks are a snap to put together and don’t have any gaps. If anything, the port visor guards are a little tricky to mount. There are mounting bumps on the hull of the model, but they really aren’t pronounced so it’s easy to have the ports slip a little when cementing them into place.
I gush a lot over Armourfast. However, for 20mm models you really can’t beat them. They are nice kits for very reasonable prices and given they are transport options for a Bolt Action force, perfect at two half tracks per box.