Category: 28mm
Painting Miniatures: Priming
Now that you’ve gotten your miniatures glued and assembled, you’re ready for painting right? Nope. Simply put, there is no point in painting your miniatures if you are not using primer. Primer is formulated to bond tightly to a surface. Alternately paint has some similar properties, but is mainly designed to provide a uniform color. Especially for metal miniatures, it’s possible to rub off paint that is coated directly on the figure. To ensure a better and more uniform bond of paint to the model, you need to prime it first. Priming will also allow for more consistent color over the entire figure, particularly in open and smooth surfaces of the miniature.
So using a primer is important, but what color should you use? It will depend on the overall base colors you are using. Generally white is good if predominantly the model will be painted using bright colors. Black primer is good for darker or more muted, neutral tones. While gray primer is a good middle ground if wanting an all purpose primer color.
Black primer can also be used for speed painting miniatures. You can cut corners using black primer as it can accentuate the details of the figure (by leaving a trace about of black between sections of the miniature). This can be expanded by using colored primers to help reduce painting times. Companies like Army Painter have a variety of shaded primers which essentially work as a base hue for the figure and is great if painting a lot of miniatures using a similar color scheme. While there are plenty of miniature paint primers out there, Krylon also offers good primer sprays which work well and are easy on the wallet.
Working with primer spray cans, you want a well ventilated area and in weather that is dry and not exceedingly cold. Make sure to mix the primer well. I hold the spray can upside down initially hitting it against the flat of my hand, and then continue shaking upside down letting the ball bearing inside mix the paint. Don’t skim on shaking time, you want to shake for a good minute or so at least.
While spraying primer you want to shoot for an even coat, spraying about a foot away from the miniatures. Spray in short even bursts, about 1-2 seconds using a smooth sweeping action. You want to avoid a static position while applying spray as this can cause too much primer to pool up on parts of a model. I like to placing figures on an old pizza box, so I can angle the primer at lower angles to ensure good coverage. Once primed, as you’d expect, let the primer dry completely (most spray primer will dry in an hour or so). If you’ve found areas that aren’t covered, you can position them with the exposed area up and give a quick primer touch up.

Alternately you may want to use paint on primer such as Reaper’s paint on primer. I would consider at least investing in a bottle to have handy. You might see a spot on a model that didn’t quite get any spray primer and need a quick touch up. The other plus is you aren’t dependent on the weather if wanting to prime a model. But between a paint on primer and spray, I would use spray primers to save time and get more uniform results.
Mind you, some figures may not need to be primed. Reaper Bones are created with a particular plastic which the manufacturers claim primer is unnecessary. However using a primer won’t hurt, and can provide a better foundation for certain colors.
Painting Miniatures: Assembly, glues, and filling gaps
Plastic has become more popular and accessible for miniatures which I love, but man you can end up with a pile of plastic bits. Now that you’ve trimmed and cut them from sprues, how do you go about assembling them? Generally you want to invest in two types of glue: cyanoacrylate, instant curing glue (super glue) and plastic cement (model glue).
Instant curing glue is pretty much an all purpose glue for your miniatures. They can instantly bond to a variety of materials and are great for metal figures as well as soft plastics. If you dabble in 1/72 scale wargaming, commonly the plastic miniatures you get are ‘soft’ plastic. As RPG miniatures go, Reaper Miniatures Bones is another similar type of soft plastic that instant glue will work well on.
Super glue cement will form a quick bond. Apply a little to each joint and then set the pieces together holding with gentle pressure for 10-15 seconds. Even though you will get the parts to hold, you want to let the glue completely dry for an hour or so. A small tip, be mindful that too much instant curing glue can seep out, filling in gaps and obscure details on your miniature. Use the glue sparingly and if you’ve added too much you can draw up the excess using a paper towel. Simply twist an end to a fine point and dab it into the glue. Through adsorption the towel can quickly draw up the excess if working quickly. Don’t let the paper towel set in the glue for 10 seconds or so, otherwise you’ll end up with a chunk of paper towel on your mini!
Plastic cement is made specifically for polystyrene miniatures or your ‘hard’ plastics. This glue will essentially melt the plastic and once dry, create a bond that mixes the plastic from each part together. For plastic miniatures I prefer using model cement as it makes the bond unbreakable. You can also really go to town kitbashing and altering figures, as the cement will create a rock solid bond with the parts you use. A small tip, if in doubt that plastic cement can be used for the miniatures you are working with, glue two pieces of the plastic sprues together. That way you can determine if the bond that forms is good enough before trying it out on your minis.
When working with plastic cement use gentle pressure and hold parts together for around 15 seconds. Like with superglue, you can get the pieces forming a bond quickly but be sure to let the miniature dry for at least an hour before painting. You also want to use the glue sparingly and dab up any excess that might spill out. I personally like working with plastic cement when I can. Instant curing glue can be tricky to work with and you can easily get fingers stuck to the miniature or glued together. With plastic cement this isn’t an issue.
Another tool for your bench worth having is a pair of tweezers or forceps. Especially with plastic models, you can get some small parts that are difficult to handle with just your fingers. Using tweezers allows for more precision in placing that part just so on a miniature.
Some other tips with assembling miniatures. Take the time to look through the sprue and/or assembly instructions. Many manufacturers will have labels on the sprue indicating with a letter or number the part and which piece they line up with. Once cut from the sprue, take care to line up your pieces with the figure you are working with. It can be too easy to slip into assembly line mode cutting tons of bits from sprues only to end up with a pile of hopelessly mixed up arms and legs.
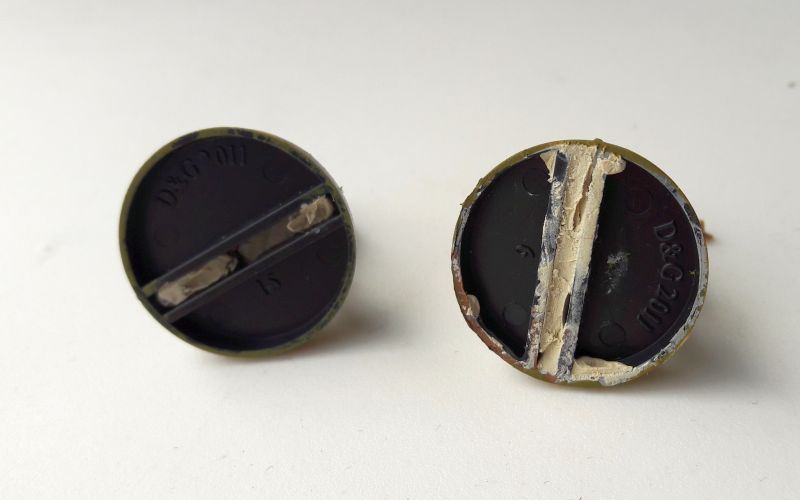
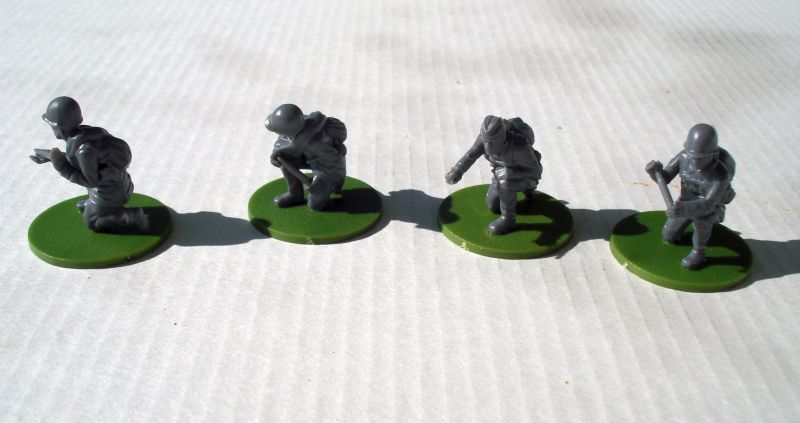
Many miniatures will also come with bases. Most are textured, but you might have some that have a smooth surface. This can be difficult to get a solid bond with the figure. To get around this, I would score the surface of the smooth plastic with sandpaper or a hobby knife. This will create a rough texture allowing more surface area that the glue can seep into, creating a stronger bond. If you look at the bases of the figures below you can see the score marks I put on the bases for my hard plastic miniatures.

Some bases might have slots which need to be filled in. Similarly, you may have joints that don’t quite fit snugly leaving a gap. Even a small thin crack can become an unsightly detail once painted up. Another hobby supply you should invest in is green stuff putty. This is a two part epoxy that comes as a clay material. Through kneading the two colors together in roughly equal ratios, eventually you will get a uniform green color. The putty can easily be worked with and once dried overnight, you get a solid material that will take up paint well. The material can also be sanded if needed.

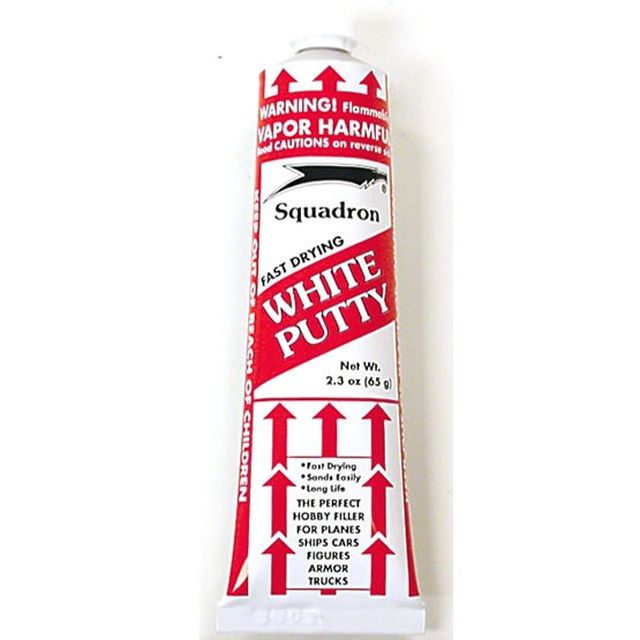
If you have a lot of open gaps like certain bases, you might want to invest in squadron or white putty. This is more a serious scale modelers tool. Like green stuff epoxy putty it can easily fill in gaps. Once dry it can be painted or sanded down. Some types are a little toxic to work with though. However if you’ve got a ton of gaps to fill in (like with these slotted miniature bases pictured below), it’s far easier to use squadron putty than green stuff.
Painting Miniatures: Cleaning, cutting from sprues, and prep work
Last post was an introduction of sorts. I’m going to kick off this series talking about miniature preparation. The things you should do to get your miniatures cleaned and prepped before putting any coats of paint on them. I’ll be splitting this into two separate posts, one will be assembly and this one will deal with cleaning up your miniature.
Lead miniatures of old have molds split into two halves. In order to ensure an even distribution of molten metal and being able to pop cleanly out of the mold, a small amount of mold release agent is added during the manufacturing process. This is also quite common for resin miniatures and plastic model kits. It’s not quite common for modern plastic miniatures, but that can vary depending on the production process.
If left on the figure, essentially you have this material that forms a barrier between the miniature and your primer or paint. With enough handling, you can rub off sections of that grand paint job you applied. So a way to avoid this is to give your miniatures a bath and a scrub.
Get a container of warm water and add a few drops of dish detergent, just enough to be able to work up some suds. Using an old toothbrush, place your miniature sprue into the soapy water, and give the figures a light scrub. Nothing too frantic or vigorous just a gentle brushing, focusing especially on the nooks and grooves as these recesses in a figure can capture a lot of mold release agent. Once you’ve gone over the entire sprue, give the models a final rinse of water and let them dry.
Cutting plastic parts from the sprues can be tedious. You will want to invest in a quality craft/hobby knife (Xacto knife) with plenty of spare blades. Be sure to cut on a good work surface. I use old plastic kitchen cutting boards. And also be sure to cut away from you and from fingers holding the figure or sprue. Sharp knife blades cut safer. If you are getting a lot of resistance when you cut, you likely have worn down the edge of the blade. Consider switching it out for a new one and use the ‘duller’ blade for work that doesn’t require a lot of force like removing flash (more on that later). You might even want to have 2 sets of knife blade handles. One for removing figures from sprues, and another for other general hobby work and cleaning mold lines from figures.
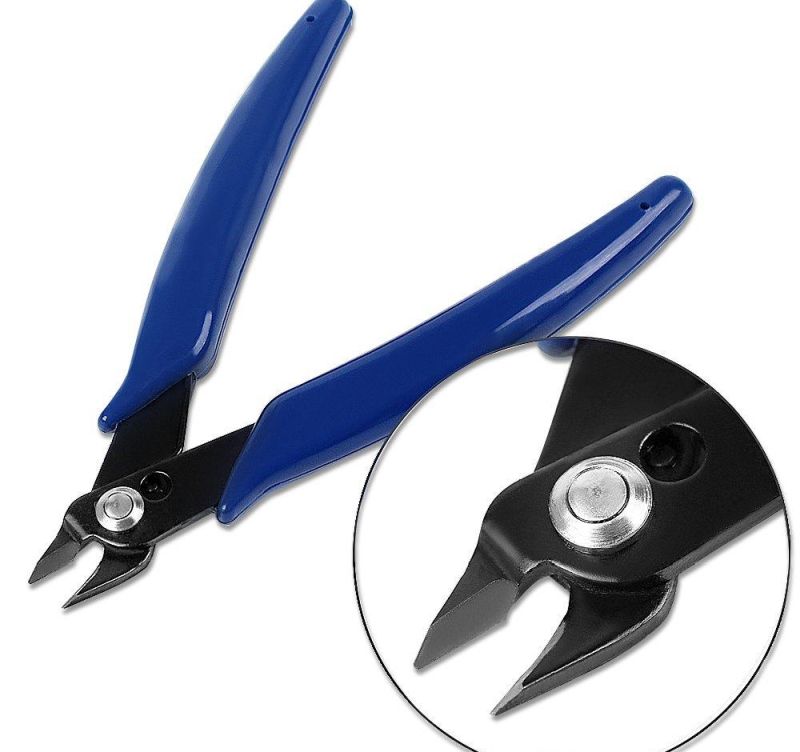
I would recommend investing in special cutter pliers. You can purchase cutters for plastic model kits like from Tamiya. However you can also hit up your local hardware store and buy electrical cutting wire cable cutter pliers. These pliers have both a flat and angled edge. With the flat edge towards the miniature part, you can quickly snip plastic parts off their sprues. It’s much easier (and safer) compared to using a hobby knife as occasionally there can be thick plastic parts which can require a lot of force when cutting
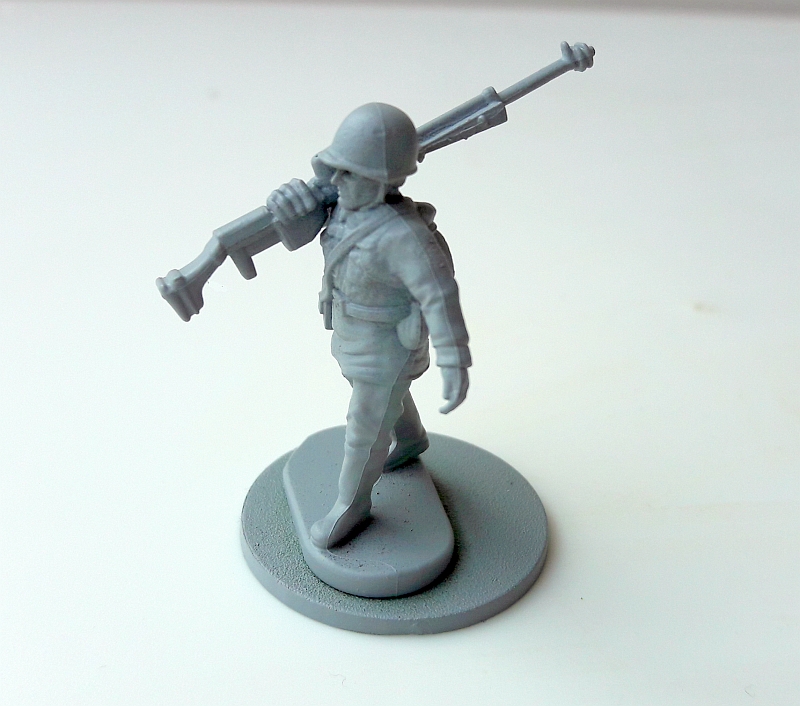
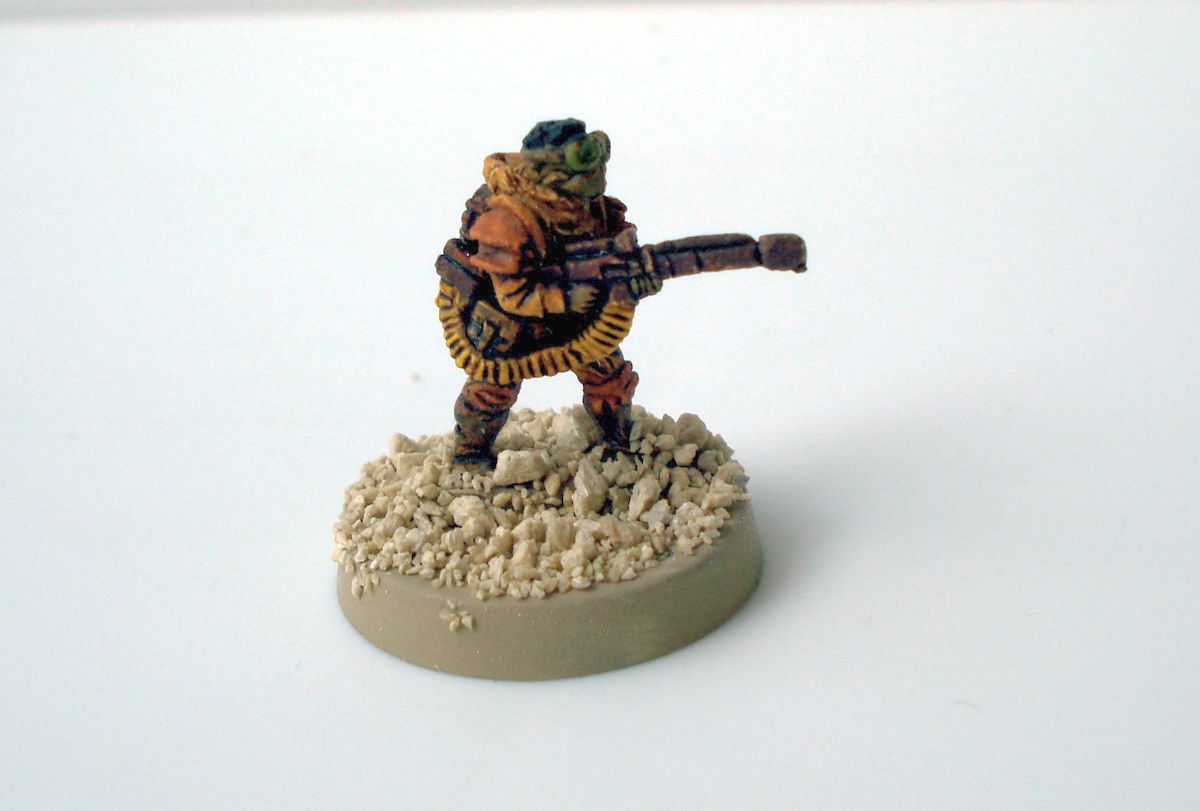
Once you’ve cut pieces from the sprue, you will want to clean up any flash from the miniature. As mentioned before, molds of miniatures come in two sections. Occasionally the seal of the mold can allow some of the figure material to seep out during the casting process. This forms a thin line on some sections of the miniature. With this Russian AT rifle figure below, you can make out a faint line on the profile of the figure that goes from the head all the way down to the base. If left alone, this can add a jarring detail to the miniature when it gets painted, accentuating the flash line.
You want to clean that up by carefully removing the excess. A hobby knife can be sufficient but some care is needed. You want to avoid gouging into the figure cutting too much material from the model. With a deft touch you can gently scrape away any flash lines. Alternately for really tight sections or areas that have a curved surface, you will want to use sandpaper or an emery board.
Obviously for metal miniatures you can’t use sandpaper. So if frequently working with metal figures, you might want to invest in a precision needle file set. These can be bought at hardware stores and typically come in sets with files of different types. Aside from flat or triangular faces, these sets may also have rat tail files (circular files) which are great for those odd curved surfaces.

I also would invest in a brass wire brush. After using a file, you can gently brush along the teeth of the file head (make sure to match the angle and not go against the ‘grain’ of the file teeth). With plastic this isn’t an issue however with metal eventually you will ‘fill in’ the surface teeth of the file. Essentially making the file’s teeth no longer able to scrape away any material. Occasionally cleaning out any excess can keep those file edges in good form.
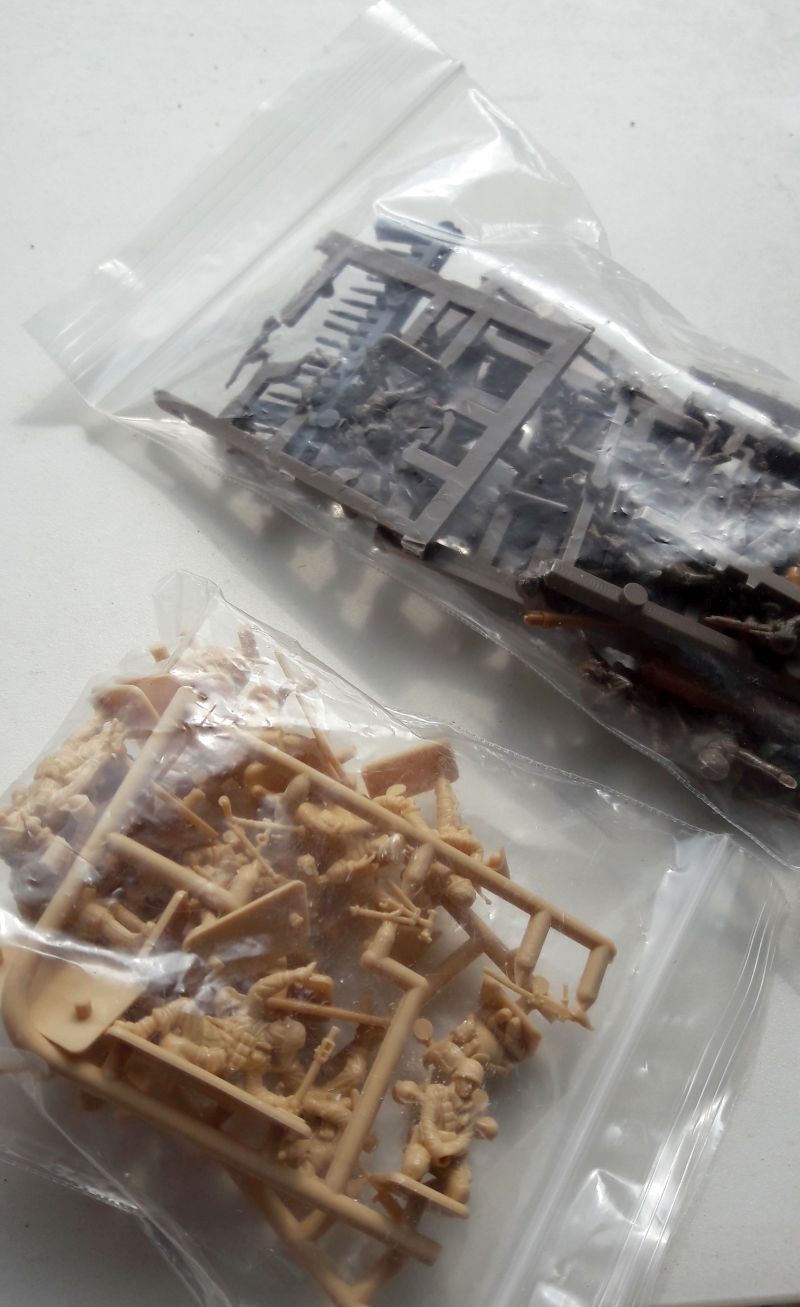
Depending on the amount of flash and intricacies of miniature pieces, you might want to assemble your mini first and then clean up the figure. Next post will cover points on glue and figure assembly. One last tip, save your bits. I typically cut all the excess pieces from a sprue and squirrel them away in a ziplock bag. You never know when you might want to do some kitbashing, need an extra weapon, or a particular angled arm or leg.
Painting Miniatures: Focus of series
I see a lot of people asking for help and information on painting miniatures, be it for those dipping their toe into wargames, or folks looking to add some bling to their board games. Honestly I’ve found most recommended sources offering advice that’s all over the place. To be fair miniature painting as a hobby can throw you down a geek rabbit hole.
You’ve got folks out there that focus on speed painting, cranking out tons of rank and file figures in the shortest time possible. You’ve got people presenting high end talent, geared towards those looking to get into competition class painting. You’ve got fans of airbrush painting. You’ve got military history folks talking about that elusive mixture to produce accurate dunkelgelb. Trying to wade through all that content as a painting neophyte can be daunting.
I’ve been into miniature wargaming for a while. I am not even close to a high skill, Golden Demon class type of painter (hats off to you, Ansel Elgort!). Nope. I’m pretty much at the ‘one foot rule’ skill level (looks good enough if you hold it 1 foot away). But I’ve been around the miniature painting block a bit and over the years picked up some tricks and tools of the hobby.
Throughout the next few months I’m going to put up a series of posts walking through the basics of miniature painting. First off, as any long time reader of my blog will know, I’ll be discussing how to paint up your figures to a tabletop standard. That is, figures looking decent enough to place on the game table. These will not be tutorials on techniques to produce phenomenal painted miniatures suitable for Games Workshop-type competitions.
It will however cover the basics and touch on what I call the ‘big three’ techniques of painting. Using these 3 painting techniques, you can produce some nice paint jobs. Nothing fancy, but enough to add some zing to those unpainted figures you might usually push around the tabletop. It will also go through every step of the process, from cutting plastic bits from the sprue (the ‘frame’ for plastic figures which are channels that plastic flows through when poured into a mold), to that final finish of matte spray. I hope folks find the information useful.
1/48 Hobby Boss 1942 KV-1
Now that my mid-war 28mm Russian platoon has been painted up, I figured I needed a tank to go along with it. The KV-1 was an obvious choice for historical reasons, however given Bolt Action is pretty much Hollywood history with the point platoons, I’d have to settle on fielding it for 1,200 point games. The KV-1 is a monster tank on the table, but it’s a chunk of points. For 1,000 point games I’m going to have to settle on a T-34 instead.
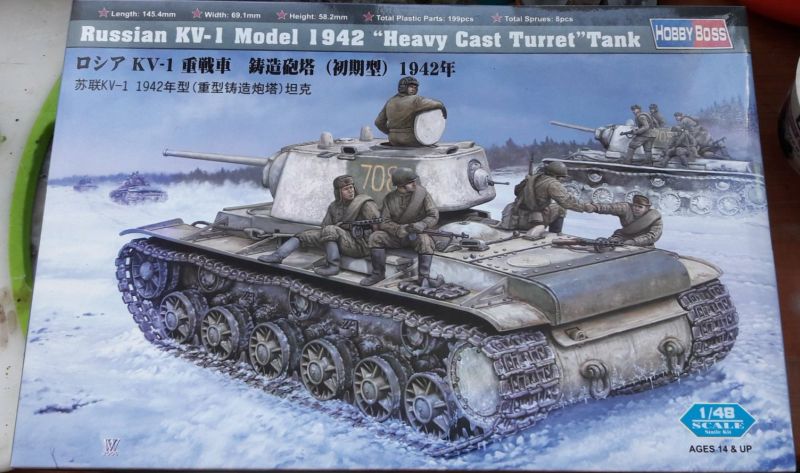
I picked up a 1/48 kit from Hobby Boss. It’s a really nice kit which I would garner needs a tad more modeling skill to assemble. I’m still pretty much a novice and some of the sections (especially the treads) were a bear to assemble. Nonetheless the instructions were clear and the parts labelled well. Some of the tread sections had individual links, but you had jigs included to help with assembly. Another fiddly part were the side struts over the track skirts. These were metal and I had to break out superglue to get them on.
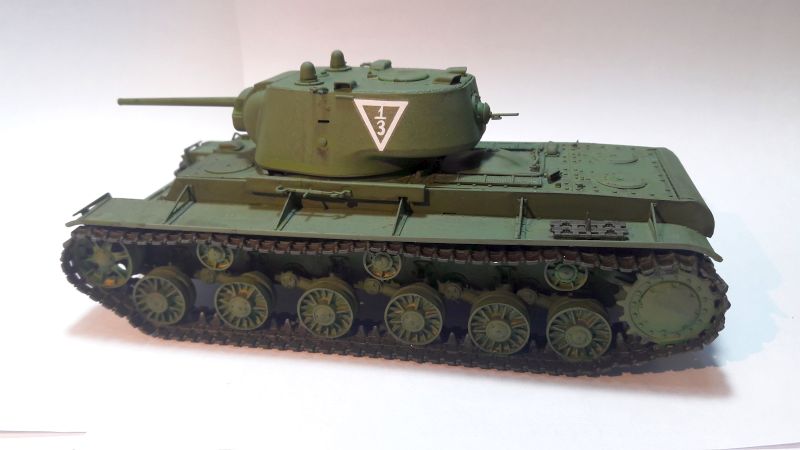
I gave it a simple paint job using Tamiya spray Field Gray TS-78 and a wash with Vallejo Military Green. The treads I used a heavy wash of Tamiya Dark Green XF-61 and drybrushed with Vallejo Gunmetal Grey. I also gave the treads and some sections some weathering with Modelmates mud. I need to work on how to weather decals more. The color sections under the transfer didn’t quite seem to match up, even after a matte spray. Still it turned out pretty good and the model is a huge chunk of plastic on the tabletop. It’s a beast!

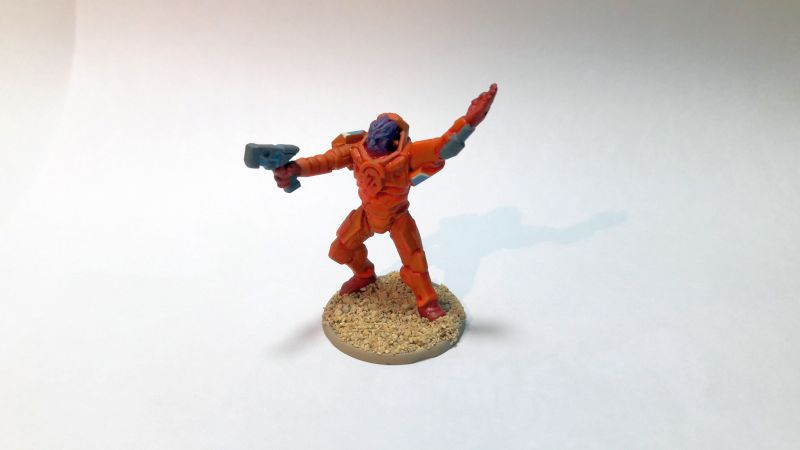
Algoryn AI Unit
I’ve been making slow and steady progress on my Algoryns for GoA. Thankfully for my wallet, Warlord has released plastic kits for rank and file units. They offer quite a few poses and aren’t too difficult to assemble.
Out of the box you get a command unit with choices to arm them with a mag gun, mag repeater, or a mag pistol (with a X-sling option), while the rest of the sprue provides mag rifles and a couple of micro-X launchers. You also get a spotter drone along with bases for all the figures. Overall they piece together pretty well. My only complaint is that it can be a little tricky to figure out the ‘proper’ way to assemble the chest and back pieces, as the heads have a lot of play on the chest peice (and lack of assembly directions or pics of the figure’s rear).
I went with a super simple painting scheme. I’m still not too keen on it and likely will retouch the chest pieces some. I’m using a stark highlight of orange over base coat like what I used for my Russians, but even after drybrushing it doesn’t seem to pop much. It’s a very subtle effect which doesn’t photograph well (using a crappy phone camera doesn’t help much either).
I’m also on the fence some with the micro-X launchers. Likey retouch them up again with some OSL effects on the weapons to give them some life. Regardless, they’ve been languishing too long on sprues, packed away. Glad to finally get some of the figures assembled and a coat of paint on them.


28mm Plastic Soldier Co. Russian 45mm AT-gun teams
I’ve been a long time fan of playing Bolt Action in 20mm. However I figured if I ever jumped into a local gaming scene I might be in a bit of a pickle using minis at that scale. I had a hankering to field a Russian force and decided to do it in the ‘proper scale’ of Bolt Action using 28mm figures.
There are lots of choices out there for models and I went with some cheaper plastic sets. Looking to round out options I wanted to try and get some different unit choices. One of which was a small AT gun team. I’ve freely admitted my love of Plastic Soldier Co. before and used their models extensively for my British and German 20mm platoons. For Russians, PSC makes kits both in 15mm and 28mm, so I was in luck.
The 45mm AT-gun team kits have parts to make 2 guns and a total of 8 crew members. It’s a very flexible kit for light AT guns, as there are barrels to make a 43mm M-1937 and a 45mm M-42 AT gun. Yet, the box name is somewhat a misnomer as there are barrels to also make a 76mm M-1943 (OB-25) regimental gun which could be used as a light howitzer. 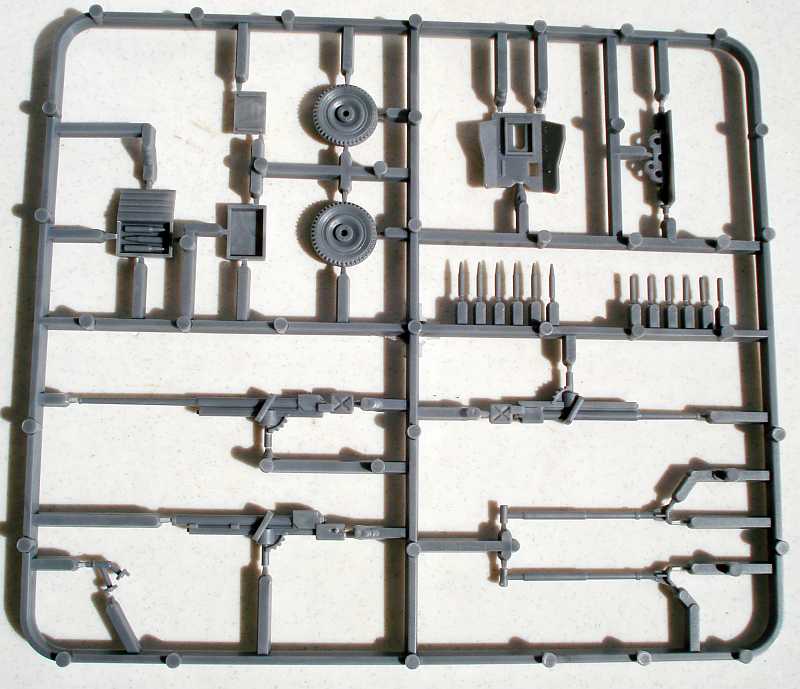
I went ahead and made a M-42 45mm AT gun (pictured left below) and a light howitzer (pictured right below). While the M-42 was made throughout the war, it was certainly phased out as German tank armor was improving. If going the min/max route most folks would likely spend the points for a ZiS-3. But if focusing on an early war platoon, this kit is a great resource.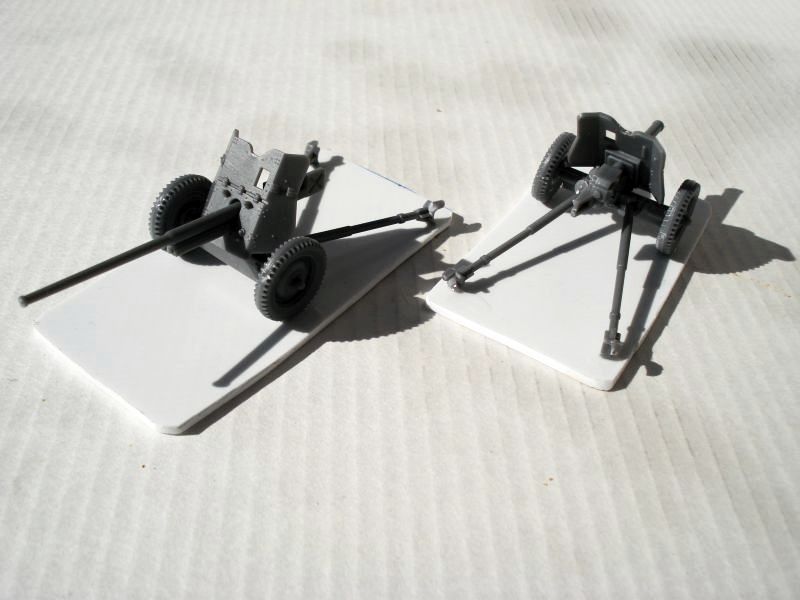
The details on troops are a little muddied but not bad for digital sculpts. Another small quibble is there is no instruction sheet/diagram for assembly of the guns (but not too difficult to work out). Assembly was pretty easy but the barrels and trail supports had to be sanded down some to fit within the gun frame.

Despite my small niggles, overall it’s a great kit for the value and wonderful for wargaming. A good buy if looking for early-mid war AT options for Russians in 28mm.
Chain of Command – Making jump off points
I picked up Chain of Command and been digging it. Likely later I’ll get some thoughts on the rules written down. For now I’m busy modeling some 28mm Africa platoons and other bits I’ll likely use for the game.
CoC has a mini-game of sorts at the beginning where the table is cordoned off in areas allowing for forward deployment using markers. Some markers will end up becoming staples on the table once the battle starts. Right now I have some paper disks you can download for patrol markers. But I decided to whip up some simple markers to represent jump off points.
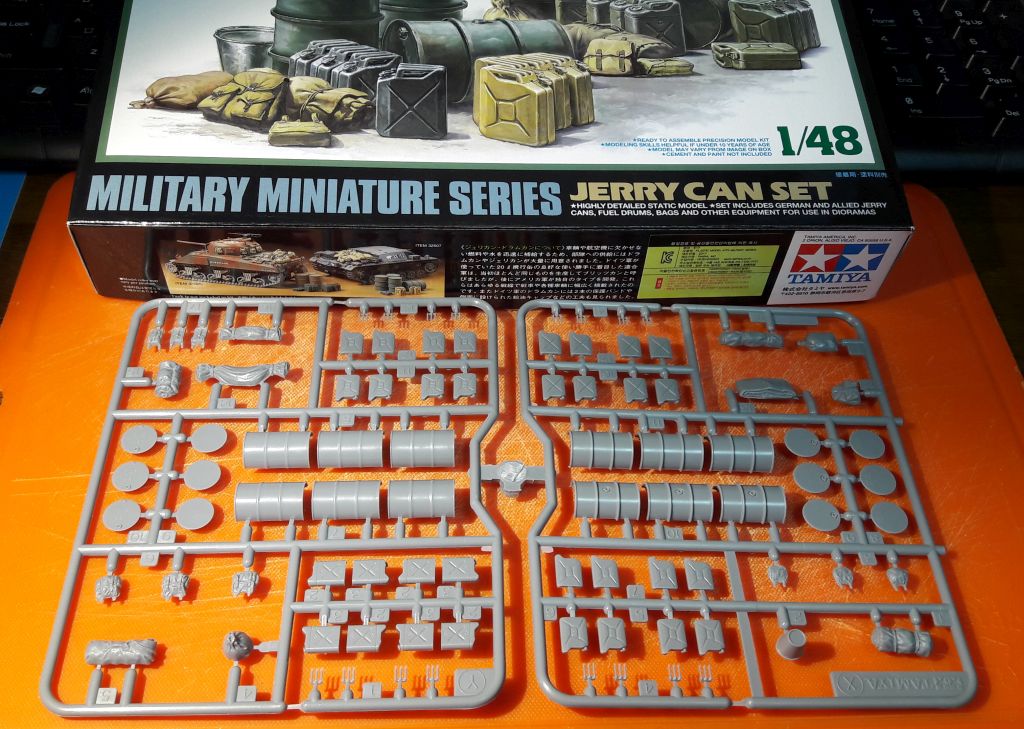
I picked up a 1/48 oil drum and jerry can set from Tamiya to use for modelling the markers. They have a lot of small bits which are well detailed (almost too much so for my purposes). A bonus is it also includes stowage for axis and allied vehicles which I’ll likely use on other kits. All in all, a decent spread of stuff to add to terrain and vehicles.
I traced out circles on plasticard and cut them out with scissors. Using some sandpaper, I buffed the rough edges to even them out some. Being plasticard, I could use model cement to glue oil drums and fuel cans directly to the card.
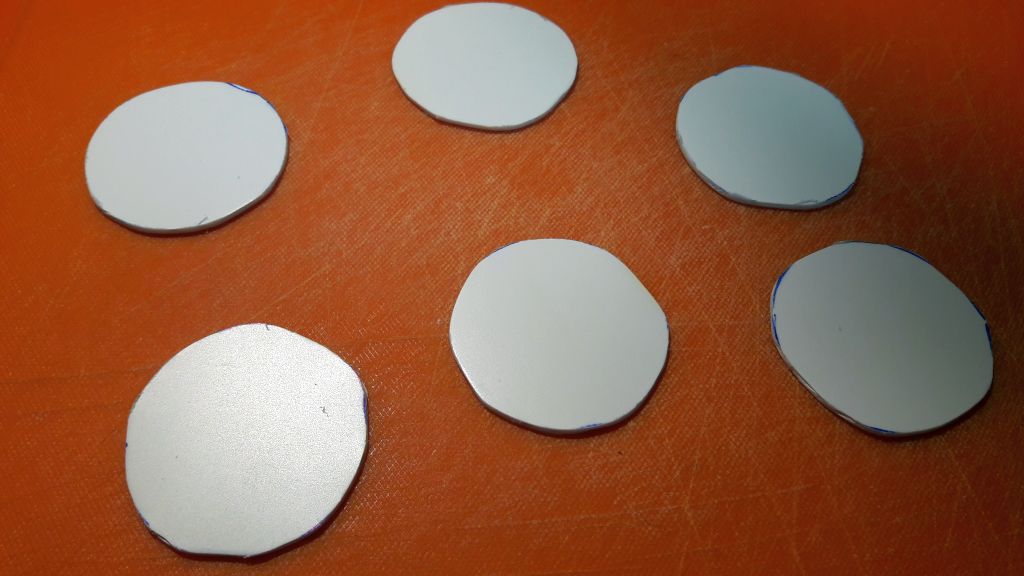

After priming, I used a base coat of gray and olive drab to the respective axis and allied jump off markers. A wash of sepia ink gave them a little more depth and all I had to do was dress up the bases a bit more. In addition to a flat green and a dabble of flock, I also painted the edges of the bases with different shades of brown. My intention is that each color will be used by one player, just in case there’s a little confusion as to which model drum represents which nation.

The end result looks pretty decent. I have lots of spare weapons and other bits I can add later if I want to. Likely I’ll chalk that up on my possible-but-not-likely list. I’d rather put more modelling effort into armies instead of terrain and markers. Still they look pretty nice and blend a little more into the battlefield over paper tokens. Now I need to try and get some CoC games in!
1/48 Tamiya Russian infantry and tank crew set
 So a long, long, long while back I picked up a handful of 1/48 Germans and Russian infantry from Tamiya. I was thinking about having a couple of squads to do some quick and dirty skirmish gaming with some odd rule systems. This was long before Bolt Action was on my radar and they sort of languished in a pile of unopened model kits. As I started working on a full Russian platoon in 28mm scale and decided to add these models into the mix of my force.
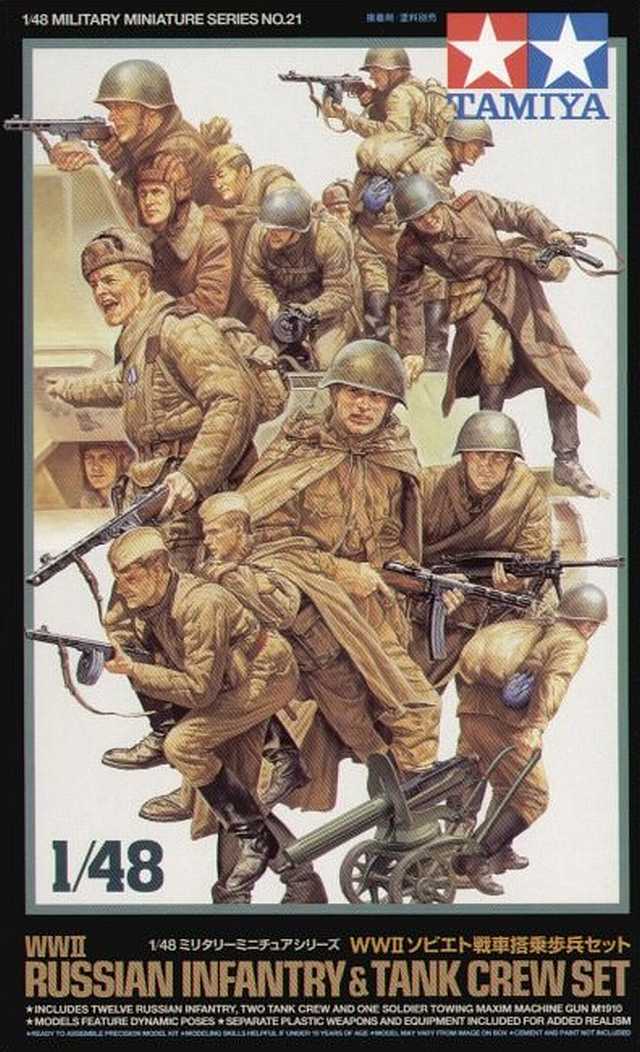
I’ve got a metric ton of Wargames Factory Russians which are pretty good figures. So having some other miniatures from a different manufacturer would be cool to add a little variety. There are 13 figures in the kit including a couple of tank crew members. For the most part they are in light, cold weather garb with a few light cloaks and a couple in winter coats.
Most are armed with PPsh-41 smgs and a few have Mosin Nagants. One carries a DP lmg and there is also a soldier pulling a Maxim mmg. As functionality for independent models to push around on bases, there are a few in sitting positions, so it’d require some base modelling to make them work. However on the flip side it’s great to have a few sitting models as I can use them to indicate a tank is carrying tank rider troops.


I ended up having 8 models including a soldier with a lmg to form just that, a tank rider squad. They have a lot of nice detail. Scale wise they match up pretty well with Wargames Factory figures (right) however against some 28mm Plastic Soldier figures (left), they are a little smaller in bulk.
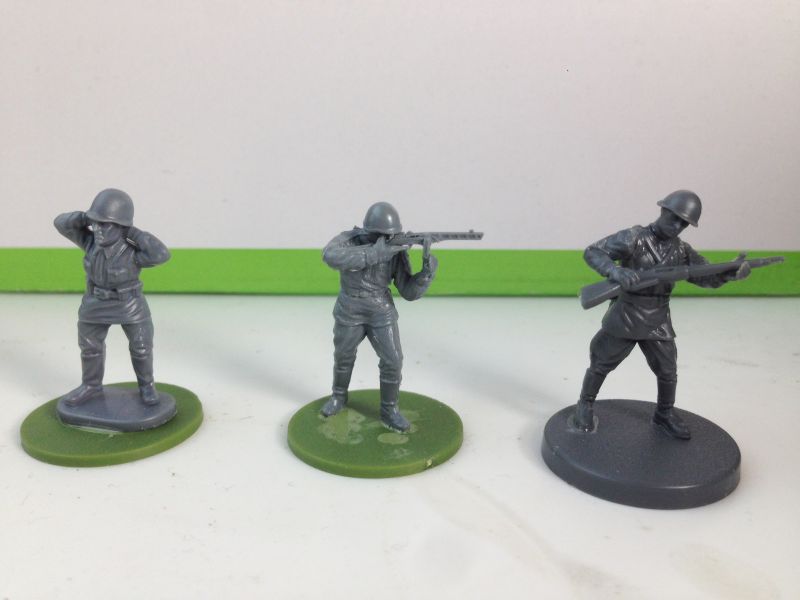
If you wanted to pick up a few figures that were smg-heavy, this is a nice kit to get. Also, if you wanted a few figures to represent tank riders, it’s certainly a great kit to buy. They have good detail and are pretty easy to put together. Mind however that you’ll also have to get a few bases though. If looking for a small squad in winter gear to supplement your force with a scout squad or tank riders, check these figures out.
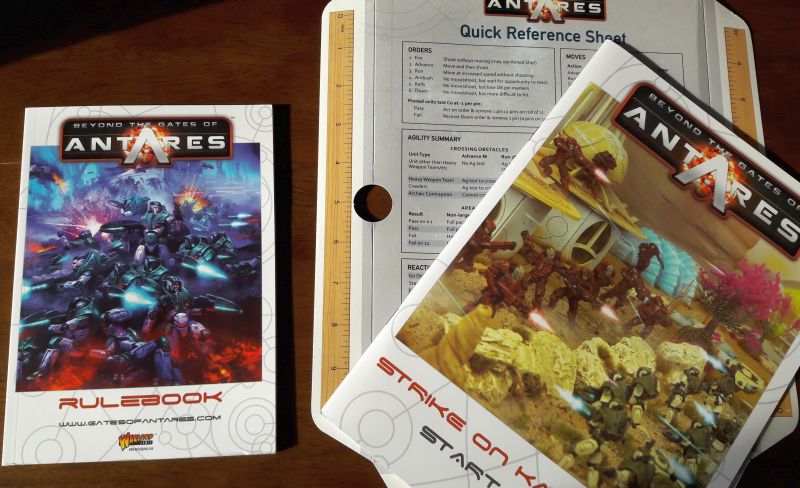
Review: GoA Strike on Kar’A Nine
Warlord Games a while back released a starter box set for Beyond the Gates of Antares. It’s a smaller set with fewer models and designed more to be an introductory product. Strike on Kar’A Nine is focused on Concord and Algoryn forces and provides a more ‘complete battle in the box’ compared to its other starter set.
First off I’ll commend the choices for armies within the box. Algoryn verses Concord is a better choice of introductory forces compared to the Ghar. The Ghar are cool. But they play completely different from just about every other faction. Even worse, new players will likely get stomped by them and their near impenetrable battle suits until opponents learn to play against their weaknesses (cough… net ammo… cough) and turn the tide, making Ghar difficult to play effectively. This faction just takes a bit more finesse to tune and play compared to other armies. As an introduction to the universe, Concord/Algoryn troops are better matched.
I won’t spend much time covering the minis in the set. You can likely dig around and find that info elsewhere. You get 10 Concord troopers and 15 Algoryn with a full spread of drones (plus 2 light drone platforms for the Concord). The figures are plastic and are nice sprues with a full range of options for weapons and gear. I’m really happy to see the Algoryn get plastic for rank and file minis. It certainly keeps the cost down when building up a force and they’re nice minis.
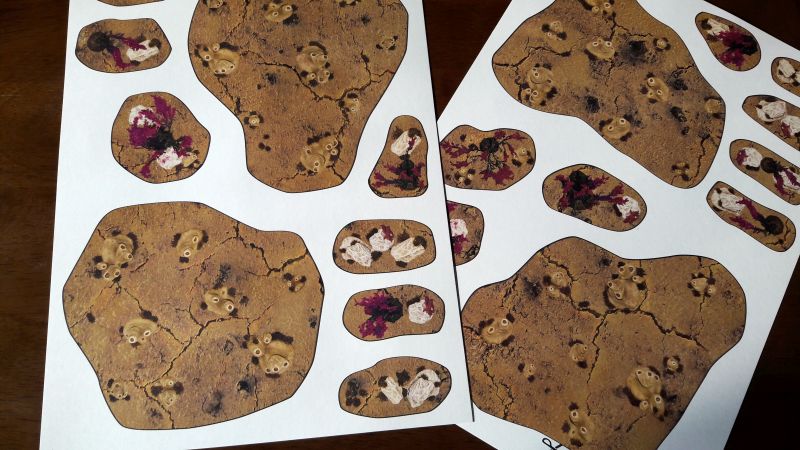
Aside from the minis you get a set of templates, pin markers, a full set of dice, including a few special order dice (which I’ll use for distortion dice as I’ve got sets in other colors for Bolt Action). Included is also a paper playmat and cut out terrain. There are also a few printed rulers and a cardstock reference sheet. A decent battle-in-a-box spread of goodies to allow people to get cracking (once they assemble all their multipart figures of course). The battle mat also has a full art poster so you’ve got something to throw up on the wall if you’ve got your own battle mat.


Along with this are several books. A short booklet covering the modeling aspects for assembly and painting tips/color schemes, an A5 (pamphlet size) edition of the rules, and an introductory scenario booklet. The introduction scenarios break the rules up into short chunks. They offer a short narrative setup and give precise force lists for most of them. If the rule basics aren’t covered in the scenario write up, they recommend the players to read specific sections. The first few scenarios just use a handful of models and cover movement and shooting at the basics.
As how the 5 scenarios progress, more rules and larger forces keep increasing until the full range of models in the box are used. It’s a good way to get people exposed and learning the game. Instead of dumping a full rulebook at their feet along with a 20+ forces to paint and assemble, they can learn the game in bite sized bits of information.
The scenarios are really small, truncated engagements. The first scenario has only 3 models (each with their own order die) for one player, while the other players has 2 two-man squads. The rules cover just the movement and fire rules with one player only trying to get their Concord troops off the table.
The second scenario ups model count introducing ambush orders and squad drones. The Concord player is trying to get to the deployment area of Algoryns with destroyed squads offering points. The third scenario presents larger forces including support drones. This third fight adds pins and details the full complement of orders like Down and Rally. It’s a big fight, but bonus victory points are awarded for getting forces off the enemy table edge.
The fourth scenario is more of a narrative battle. The Concord are recovering a drone while Algroyns need to destroy it. This adds sprinting and assault rules. Lastly, the fifth scenario is an all out battle adding additional ammo types for leaders and their mico-x launchers. Each scenario is designed to build on the previous, just adding additional rules once some basics are out of the way. A pretty clever implementation to make the experience of learning the game a bit easier.
Now onto the rulebook. As mentioned it’s a softback small sized edition that is somewhat truncated. The book covers much of the rules including terrain (a full 4 and ½ pages). They do provide a short overview of each faction and a smattering of the universe background. The rules do not have army lists which is fine. Otherwise complete rules save one thing, no vehicles.
This omission for the rules kills the set for me. I can’t imagine the extra 4 pages and a bit of added art layout would be a deal breaker keeping the costs down. Honestly I feel it would leave a sour taste that you buy into the game, a touted rule book included being somewhat the carrot to entice your purchase, only to find out vehicle rules are missing. You have to buy the PDF or hardback edition to get the full set of rules. It’s a poor decision on what could have been a great product.
Otherwise Strike on Kar’A Nine is a solid set. You have base forces for creating two armies, where you could focus on one faction and still have a handful of models to teach the game. You have a smattering of paper cutouts and battlemats to provide a full experience to GoA, all of which is portable and leaves a small table footprint. It’s just marred by an incomplete rule book.
So I have to make a plea. Hey Warlord, do a right for your customers and release the vehicle rules as a free PDF. It’ll be a nice nod of thanks to new players that bought into Gates of Antares through the Strike on Kar’A Nine boxed set.
