Category: Bolt Action
Armourfast Panzer IV G
I’m a bit of a fan of the Armourfast kits. They offer a cheap price for a chunk of models suitable for the game table. Working with my German platoon for Bolt Action I wanted to have a few tank options and getting a Pz.Kpfw. IV was certainly on the list.
First off I will freely admit that the detail on these are pretty parsed down. The tracks and tread wheels are molded as one piece. Overall though, the detail of the kit is pretty decent. The turret hatches can be modeled open for a commander if wanted. The hull pieces are done well, with hatches shown in enough detail to stand out. The kit is also pretty easy to put together and fits well when fully assembled.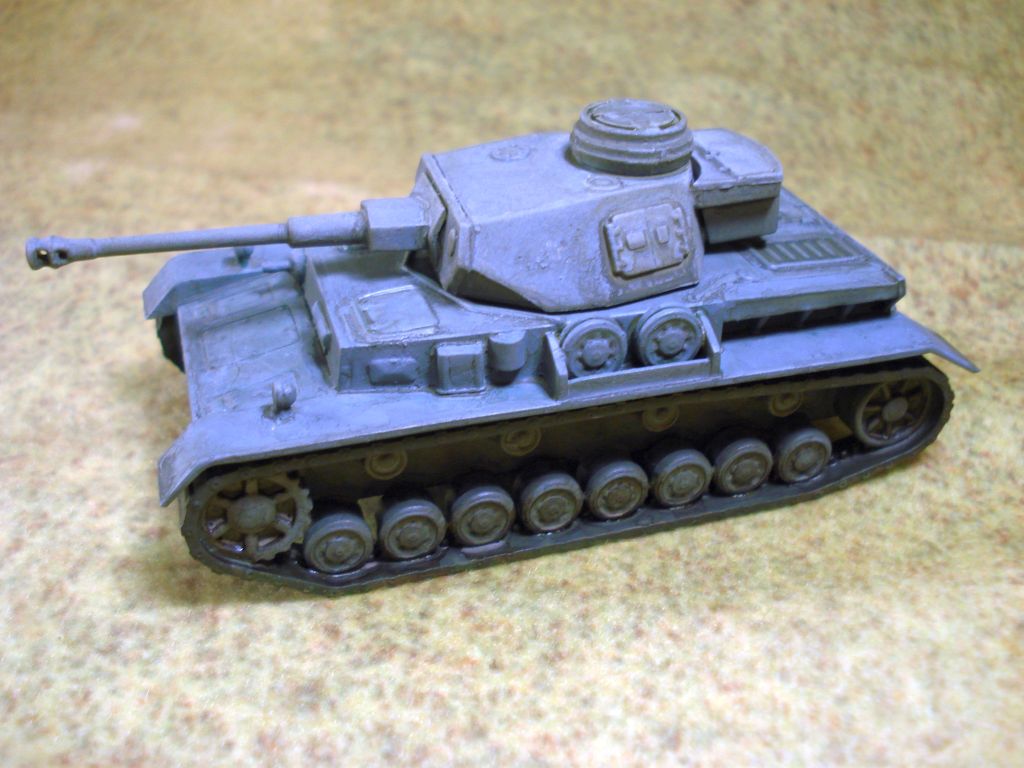
What stands out some of the front tread wheels which stick out from the hull. They lack any central axle making it look like a free-floating disk. It’s not much of a detraction but can be spotted if looking at the right angle. Also, no armored skirts come with the kit.
Still, you get 2 tanks of pretty accurate detail. As with other Armourfast kits they really are a wargamer’s model. You aren’t going to get a super accurate, highly detailed model in this kit. You will however get 2 tanks of nice quality plastic that paint up very well. I can’t piss and moan too much about the kit as I’ve got another tank on it’s sprues aching to get worked on. I might try my hand at a little converting and whip up a passable Panzer IV D or F1 for an early war tank.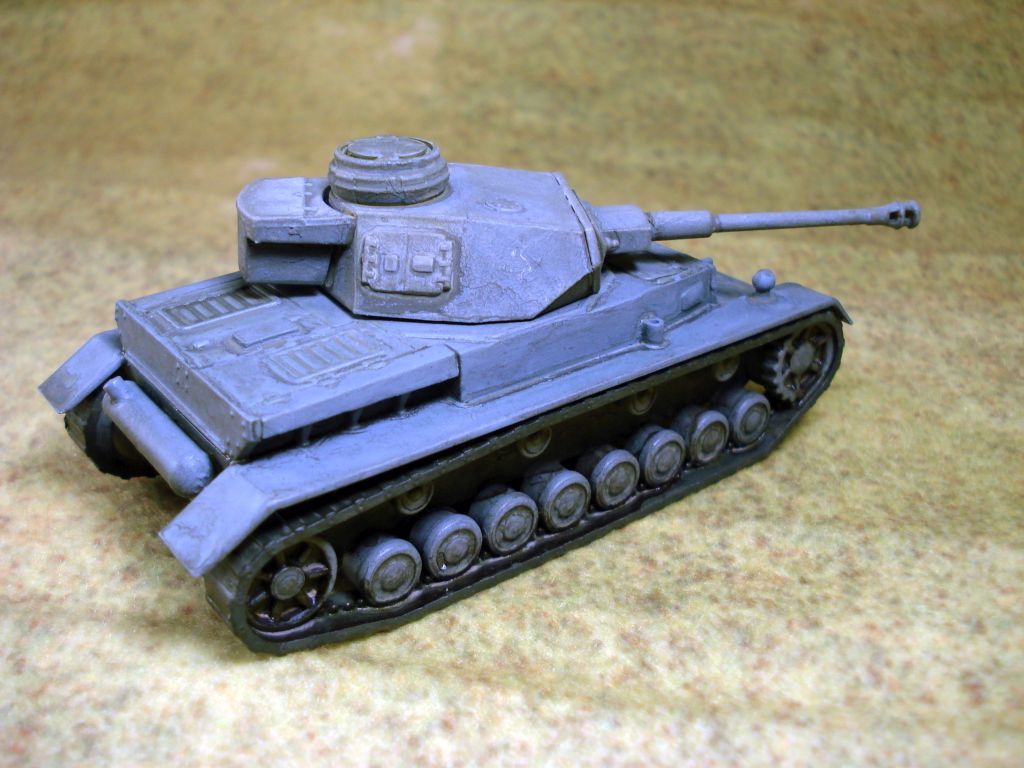
WW2 bamboo hut terrain
One thing I’ve discovered difficult for my Pacific Bolt Action games is finding some appropriate buildings. I simply cannot find anything in 20mm scale. There are some Quonset huts that I had gotten that will certainly be appropriate. However I wanted something a little more rustic
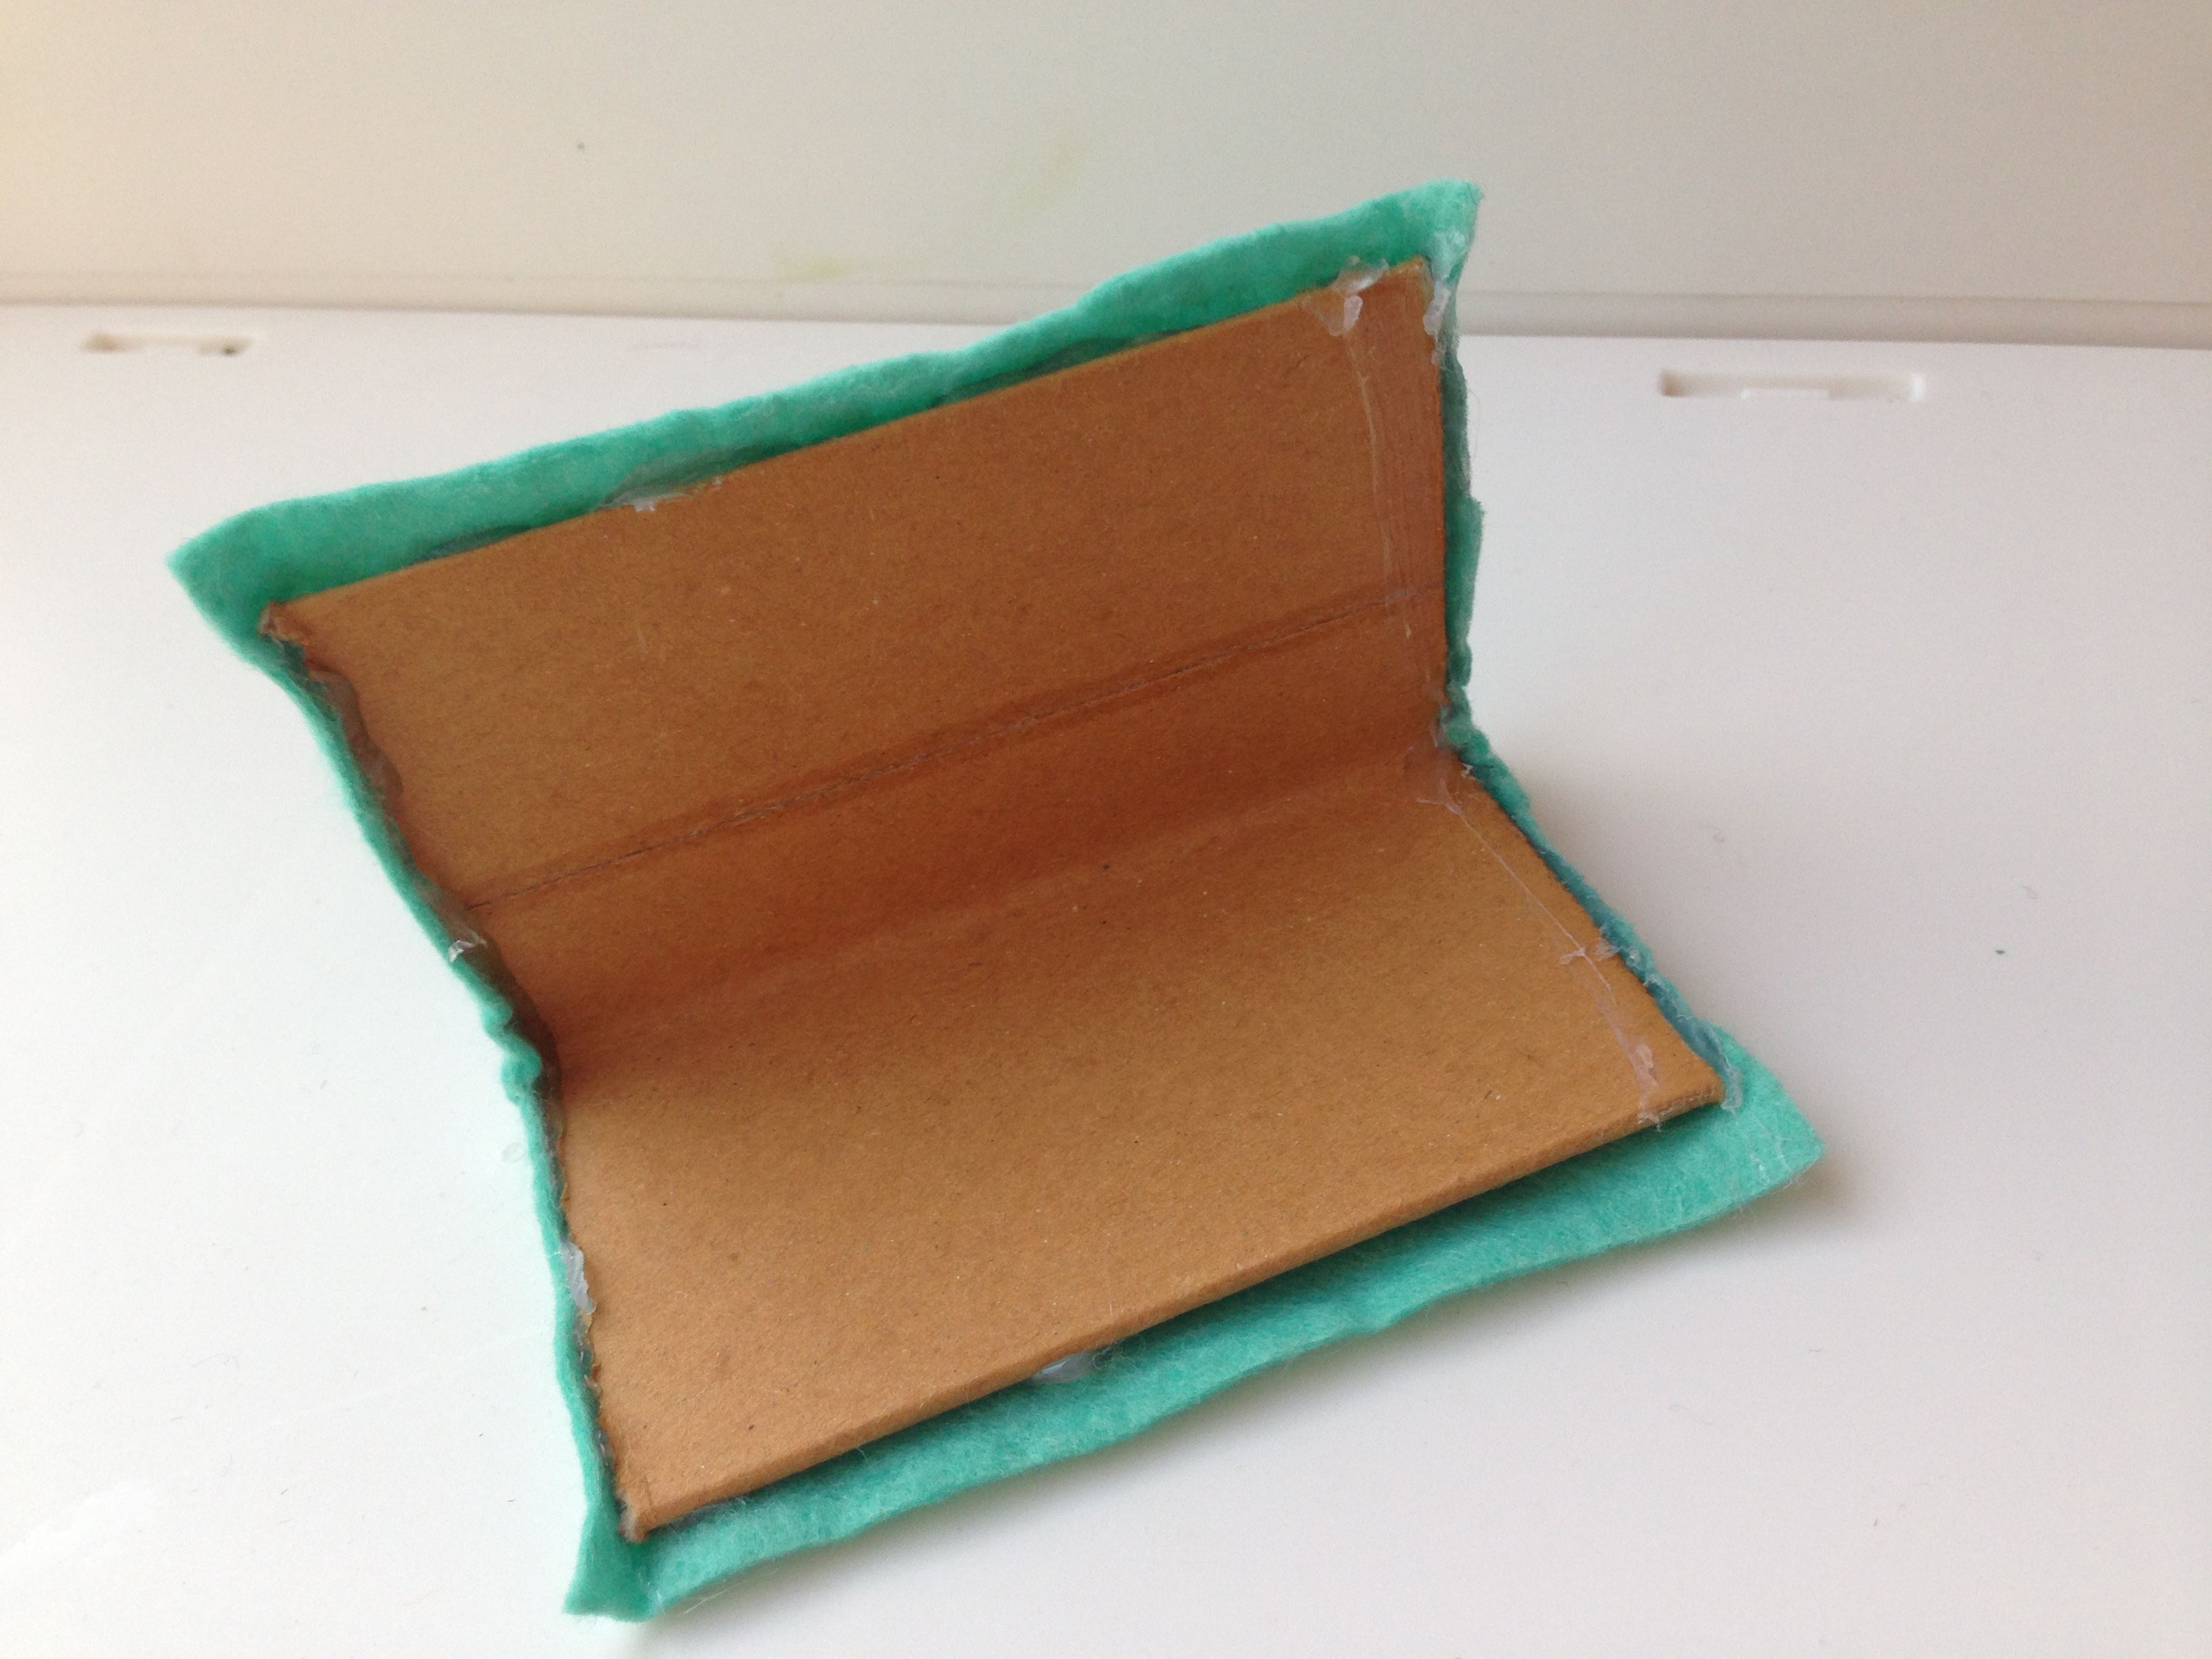
I opted to try my hand at building some structures myself. Using a frame of foam core board, I was able to get a simple structure assembled. I also lucked out and had gotten some thick cardboard at an angle which would work great as one piece roof sections.


One thing that stands out with these type of buildings is that they’re usually on raised platforms. Hanging onto some sticks I picked up from hitting a street food vendor (gotta love late night munchies after drinking soju in Korea), I was able to cut sections to simulate logs that a hut would stand on.
 This lead me to trying to figure out a way of making bamboo walls. I had gotten some wooden food skewers that were about the thickness of a toothpick. Cutting pieces of an appropriate length, I got a pile together to make up the outer walls of the hut.
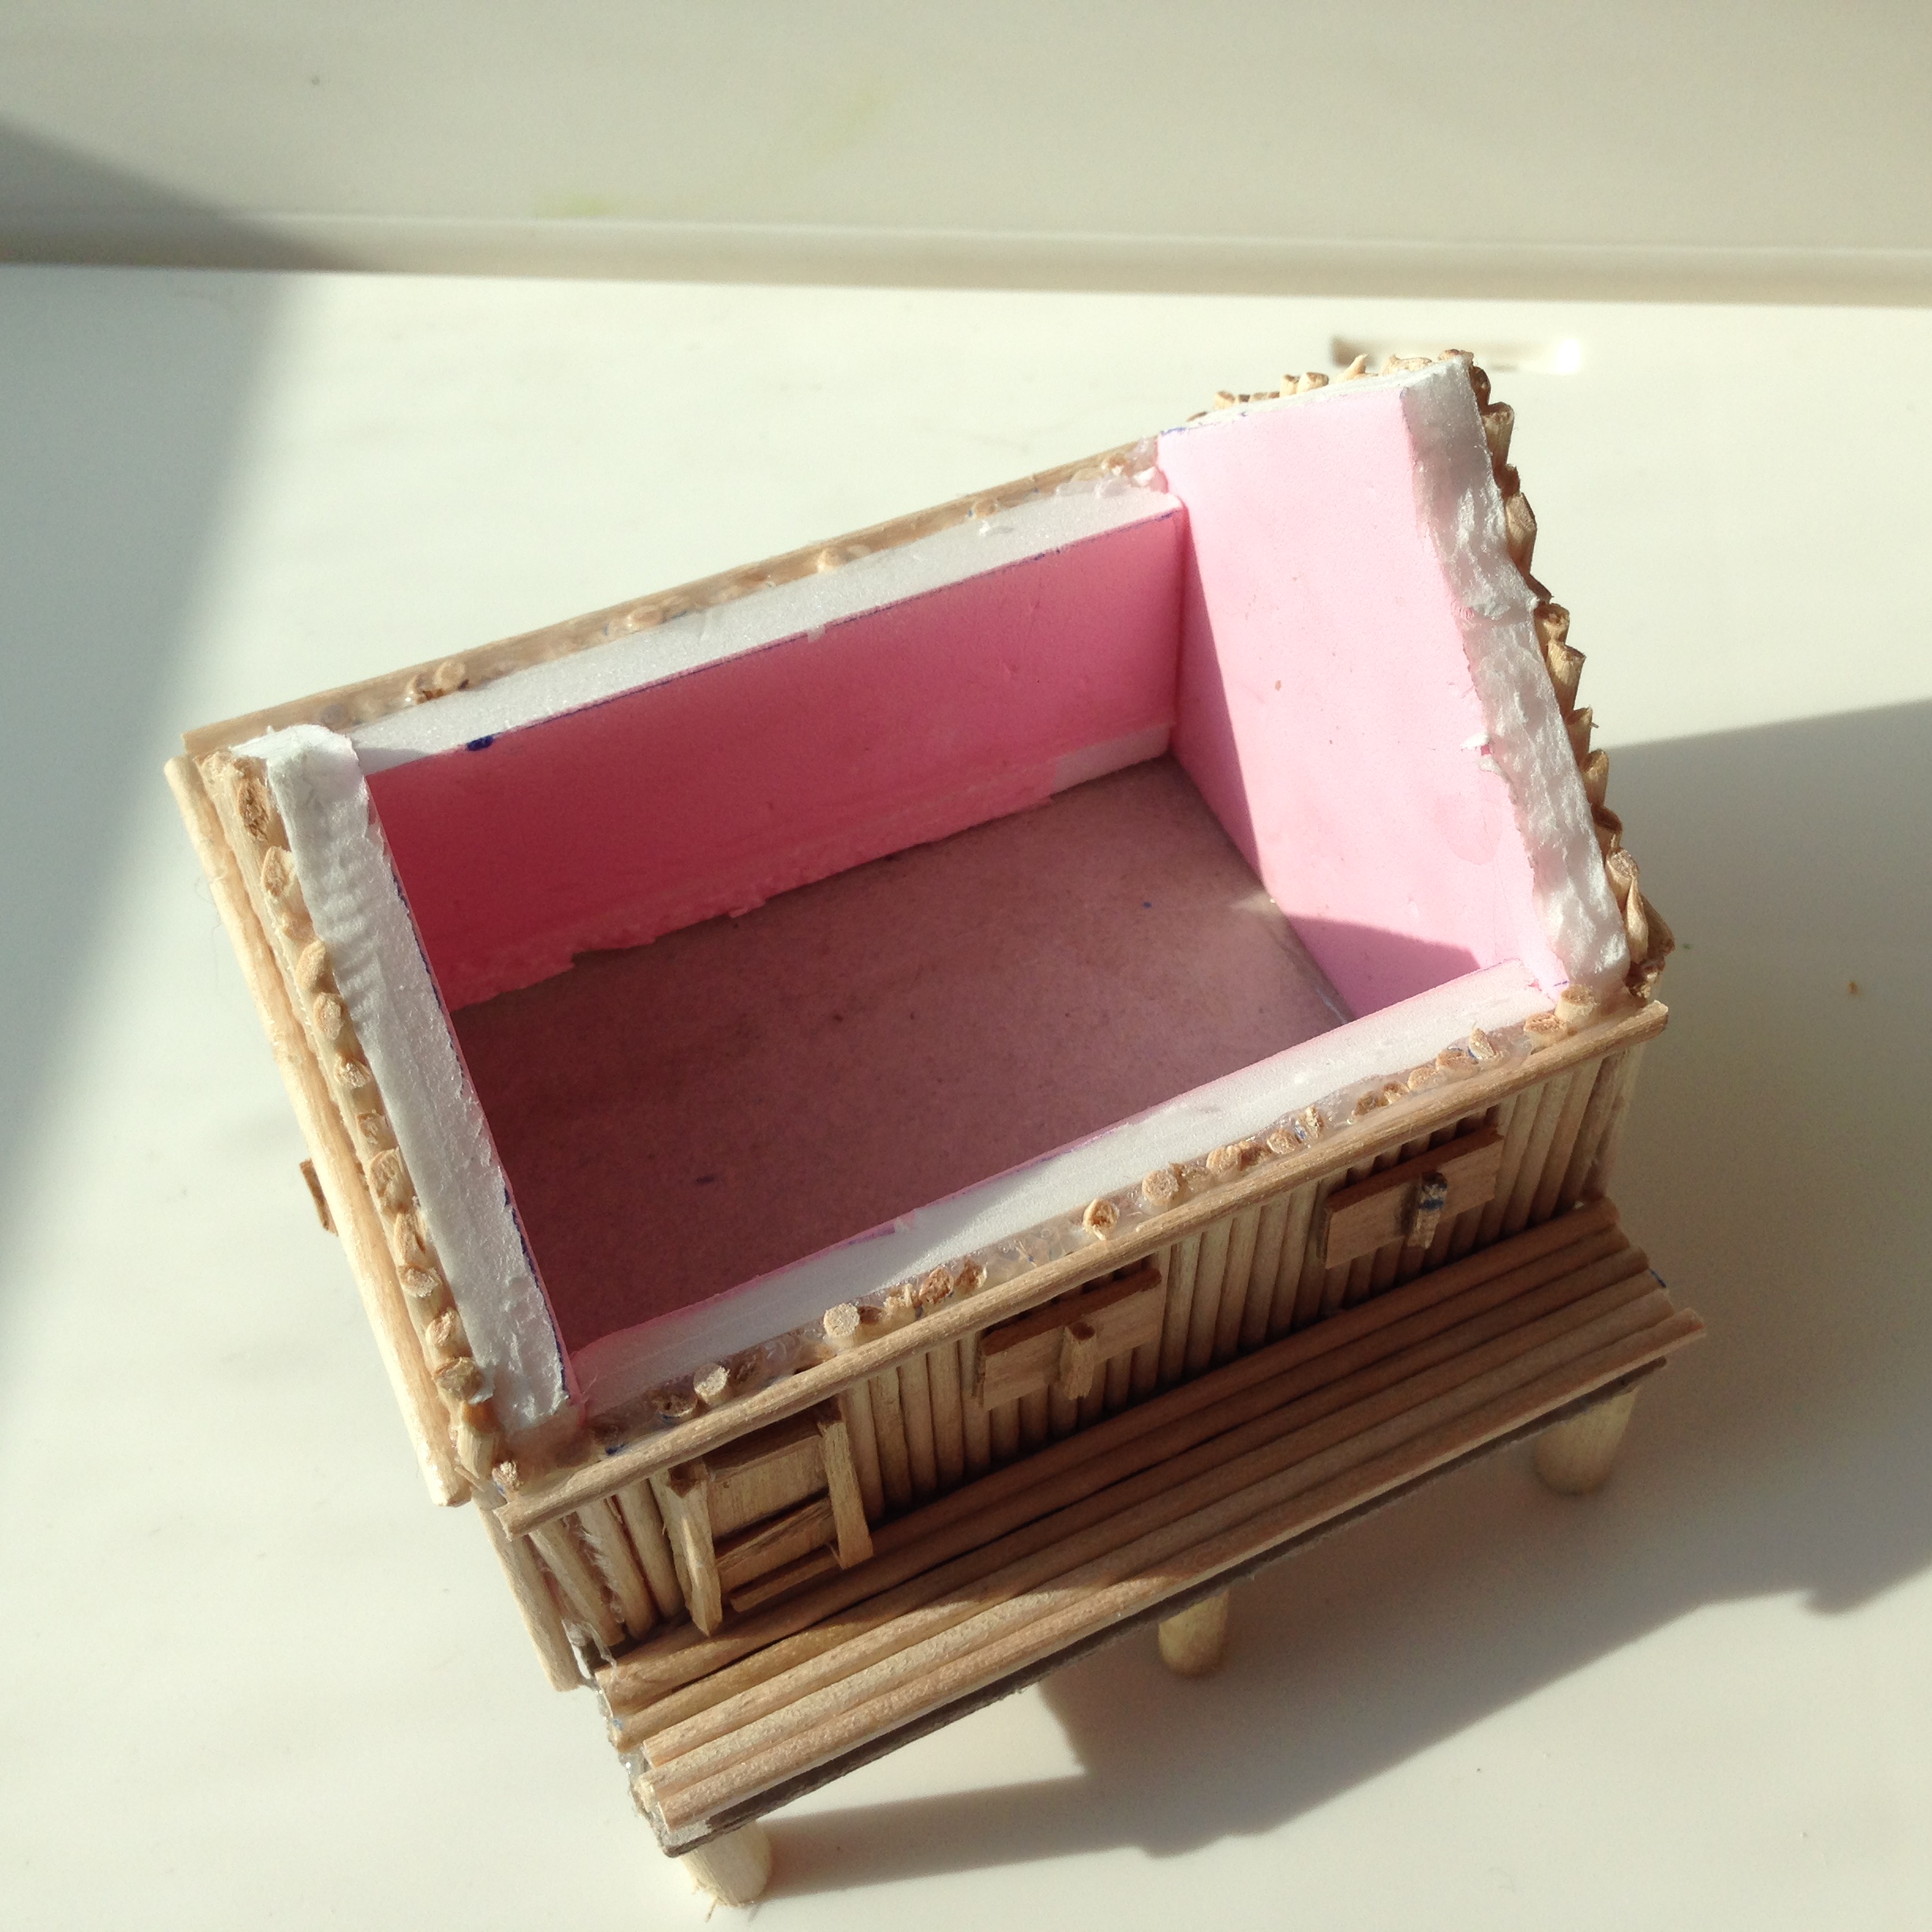
The trick of course was gluing them to the foam board. I could do this gluing them individually using PVA glue, but I figured that would be tedious. Instead I lined them up side by side using a ruler to create an even edge at the base. Slathering hot glue onto the foamboard, I could then lay the base of the hut down even with the lower portion of the wooden skewers, and carefully press the entire wall section flat onto the wood pieces. They would then be firmly affixed to the foam core walls.
I did this for all four sections of the hut. To hide some of the uneven pieces, I framed the top of the walls with a single piece and was also done on the sides of the hut. This way, I could frame the entire hut with sections of wood with relatively the same length.
For the wall sections that were peaked however, I had to glue those one by one after cutting each section individually with a slight angle. This was a little time consuming but at least I only had two small sections to work on rather than the entire walls of the hut.
After completing the outer walls, I placed the hut onto a thick cardboard base. This base would be used to create the platform for the raised hut. One section was longer to simulate bamboo flooring for the front of the structure. Cutting out larger sections and gluing them individually, I was able to make the entry flooring easily. I then used PVA to adhere the wooden supports to the hut floor.

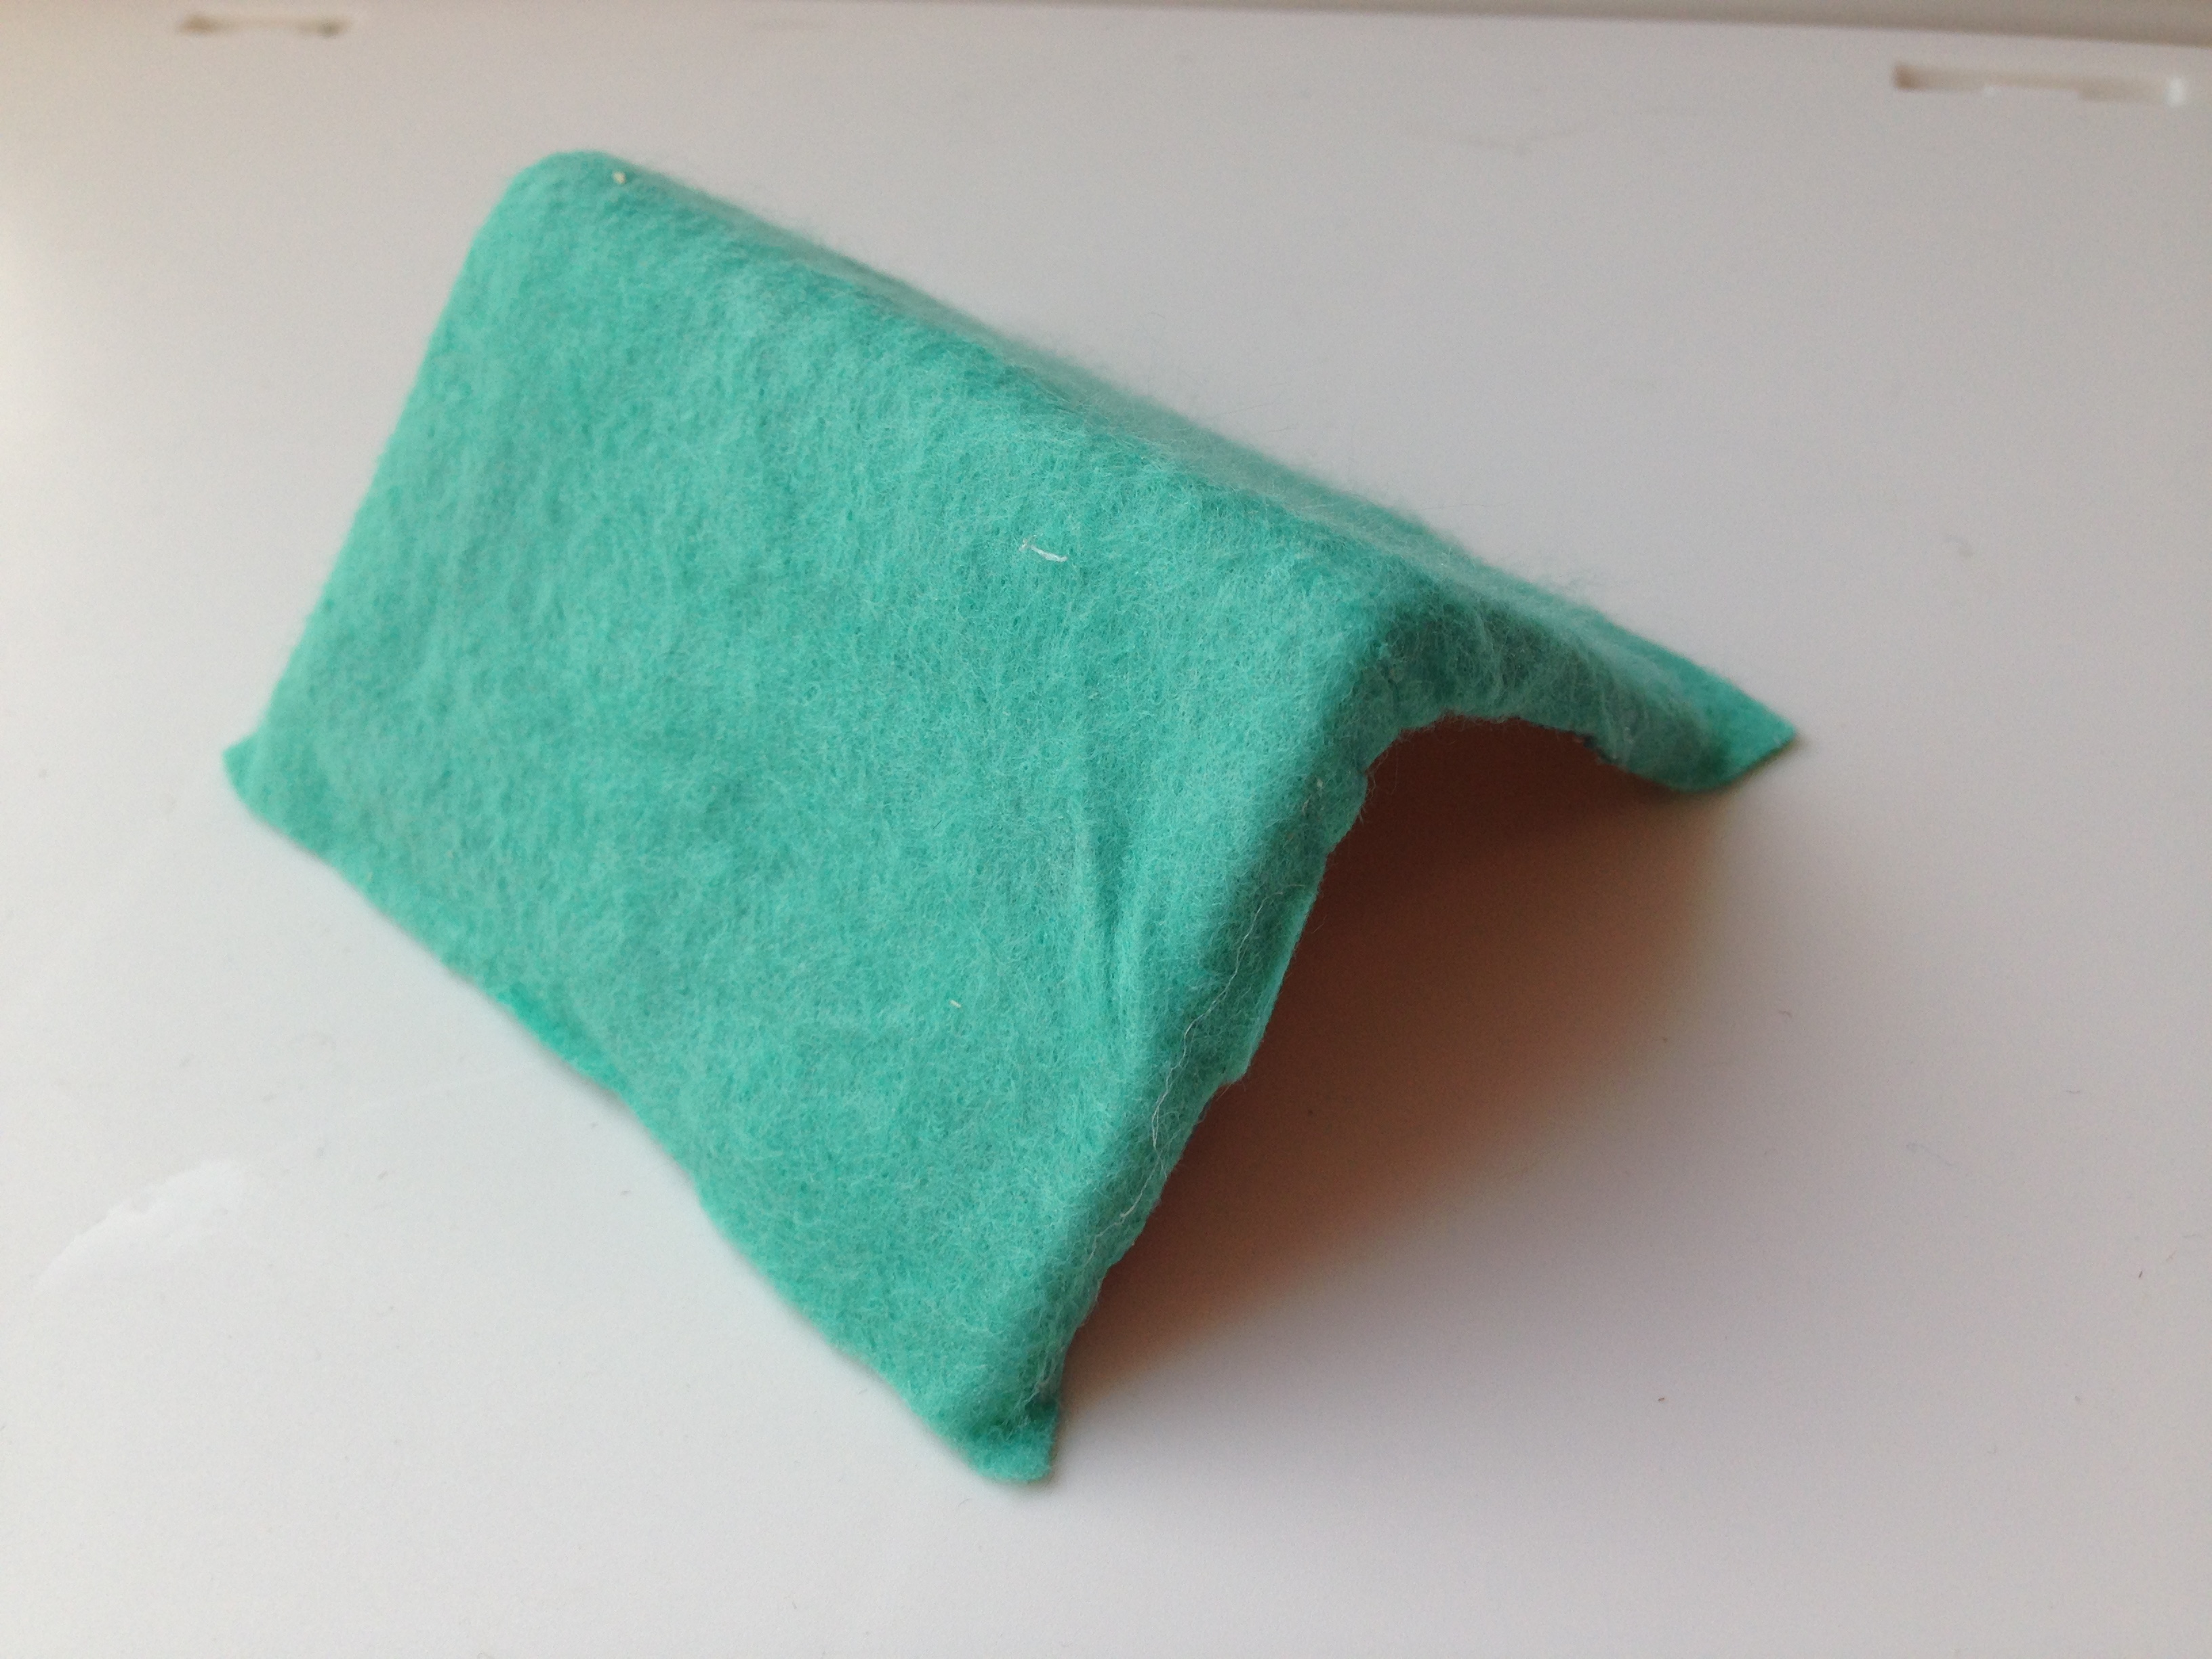
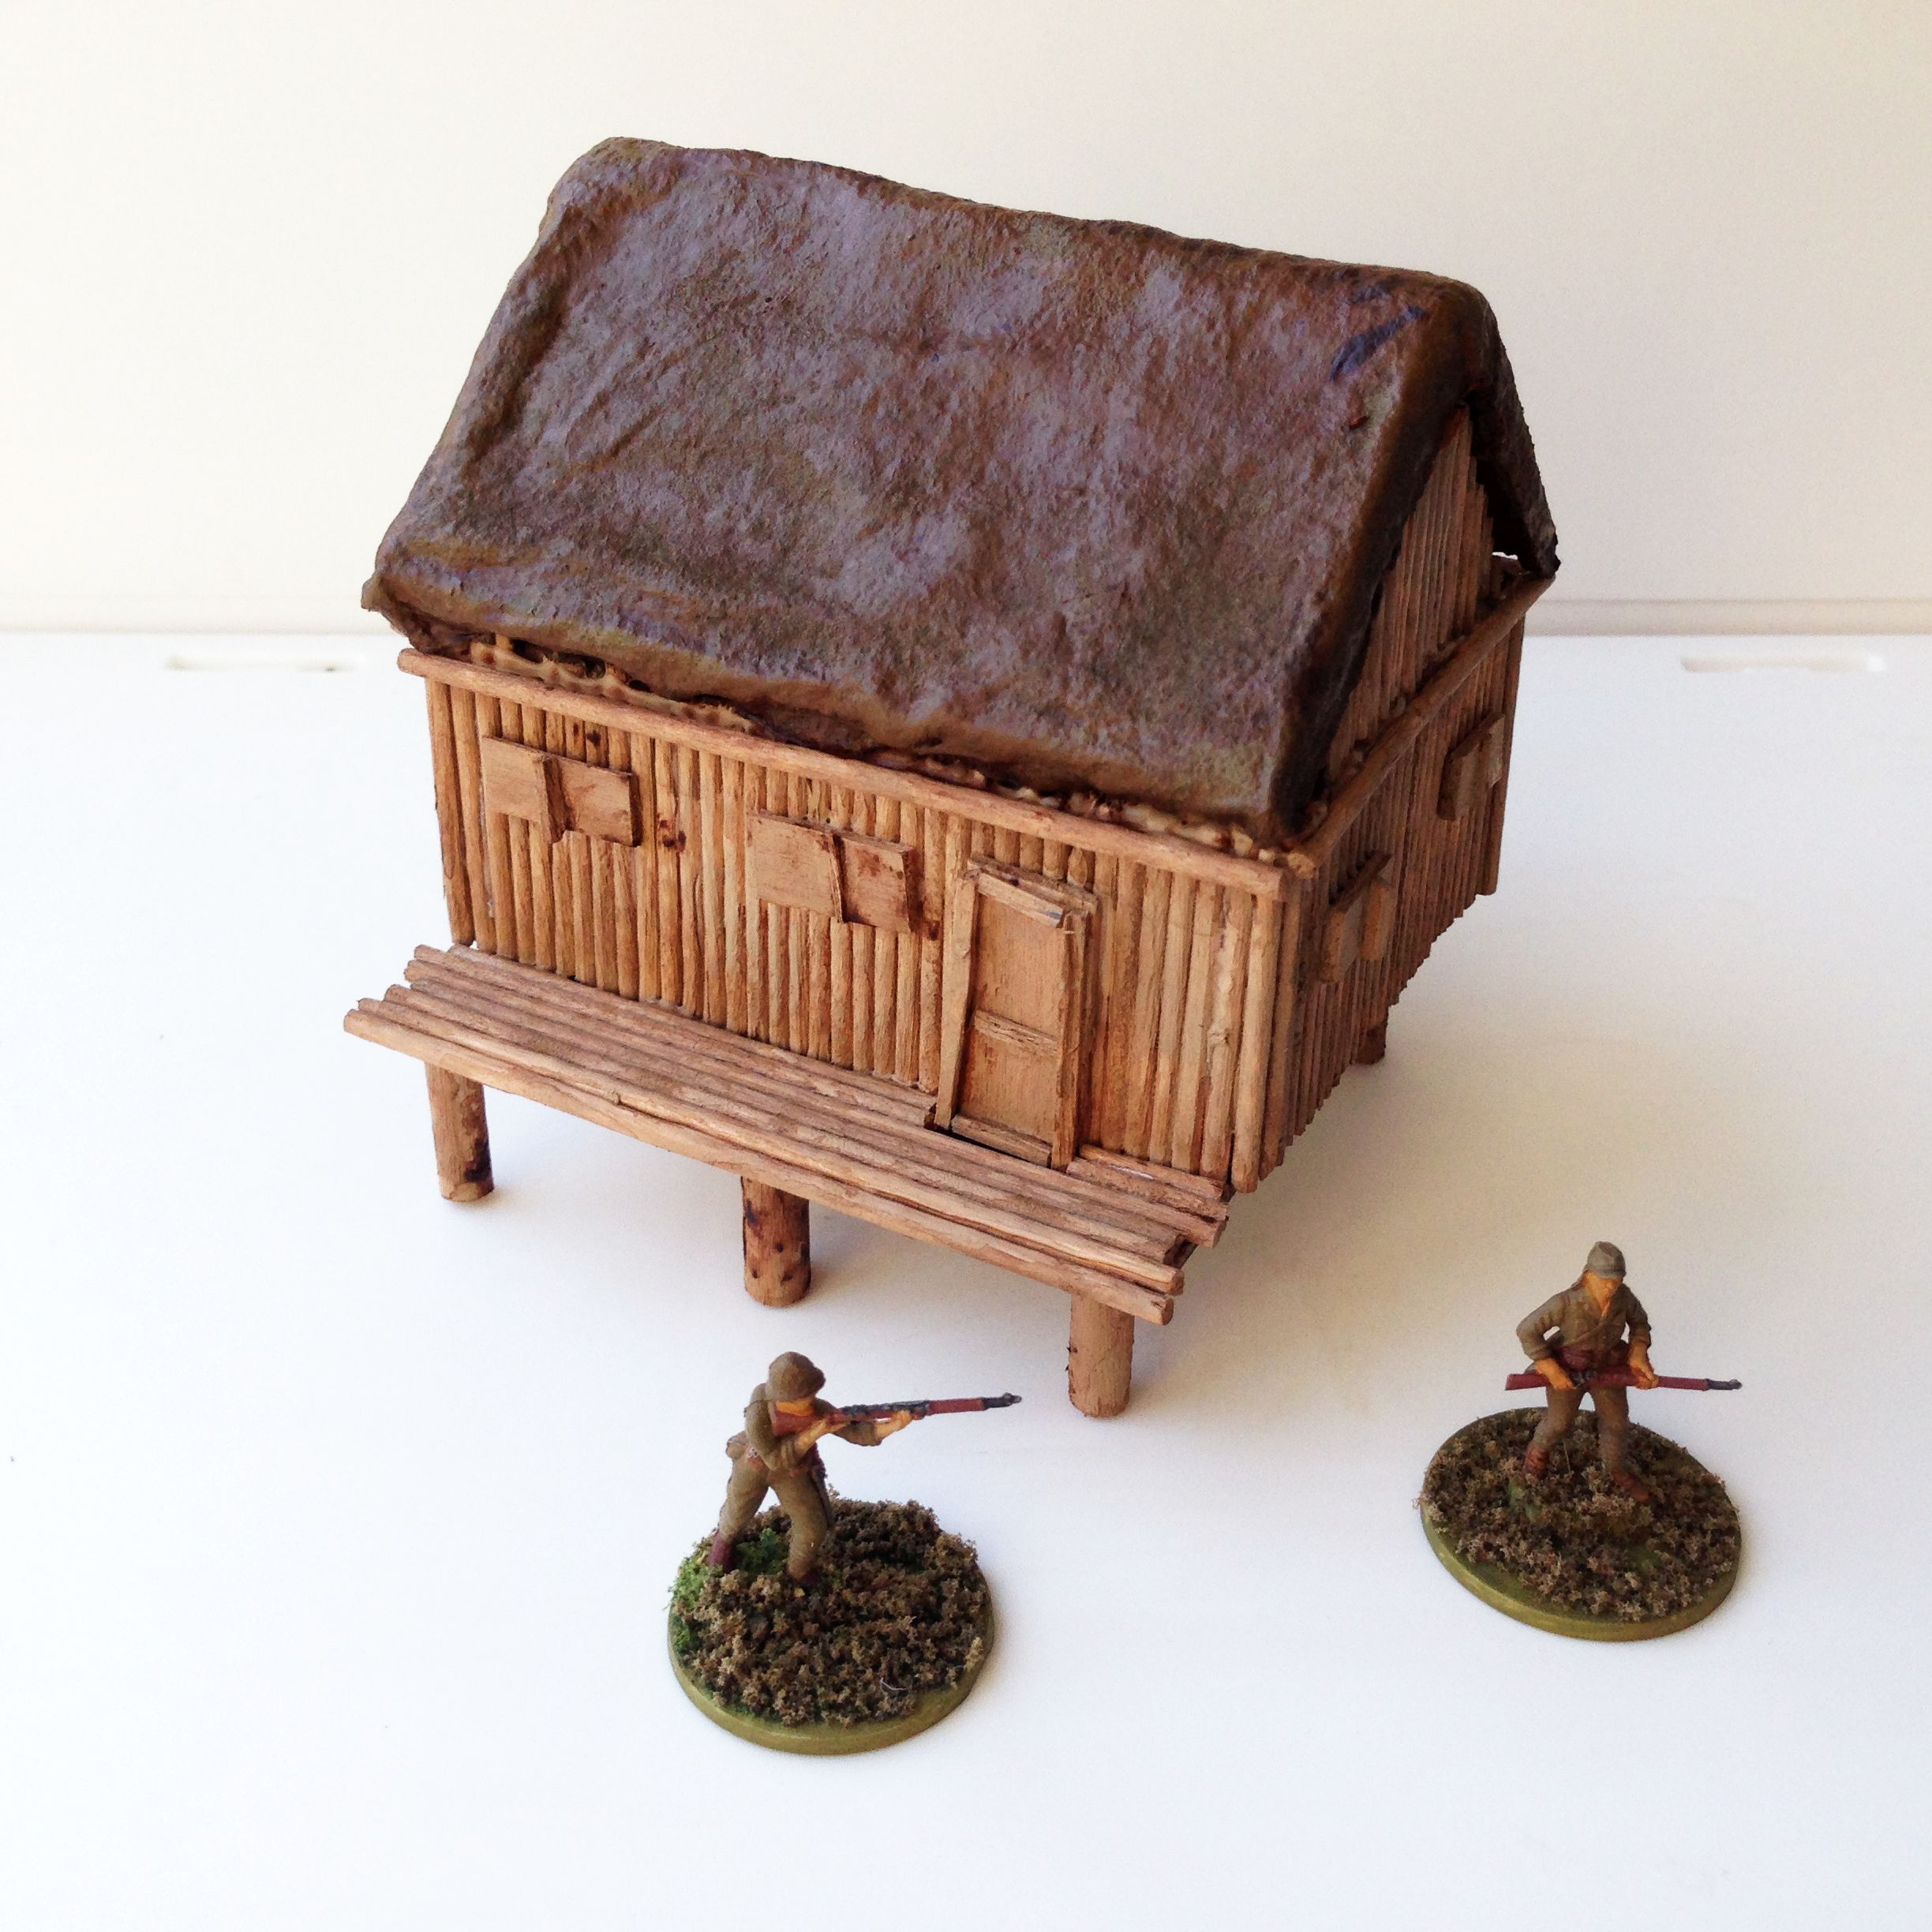
The roofs would need a little work. I decided to go for a grass look and glued a section of cleaning cloth onto the roof piece. Being cloth however, I would need to do something to seal up the surface, otherwise it would absorb all the paint. I gave the entire surface of the roof section a coat of watered down PVA glue. After drying, this created a coating all over the roof providing a simple barrier to prevent paint from being just soaked up.
I now needed to create some windows and entryways. If I had the gumption, I would have cut our sections in the foamboard. However this would also require me to cut and glue individual wooden pieces. Instead I cut sections of popsicle sticks with very thin sections to be used for the door frame and shutter supports. Gluing them onto the sides of the hut walls, they could provide openings for troops inside to shoot out of or mark the location of the building entrance.

 Some coats of paint and a basic wash, the hut was done. I opted to keep things simple with painting and gave the interior of the bamboo hut a simple black coat. I’m pretty happy with the results. The roofs fit okay and come off allowing me to place troops inside. The structure itself is pretty sturdy, however I think the real weak parts are the platform supports. Throwing the bamboo huts around in a plastic tub for storage and transportation seems like a great means to snap them off. I’ll have to be sure to keep them wrapped in some bubble wrap.
 I’ll also admit the windows and doors a little lacking. It would likely be far better looking if I had cut them out. Instead I opted to go the less fiddly route but the huts turned out okay. While I would love to give a lot of attention to the buildings, I am happy just getting something together that would look decent on the table. I’d much rather spend extra time modelling and painting miniatures than dedicating a lot of time towards terrain. So while my bamboo huts won’t win any awards, they do offer fair looking structures that are flexible enough to allow troops to be put inside, and also handle your typical gaming wear and tear.
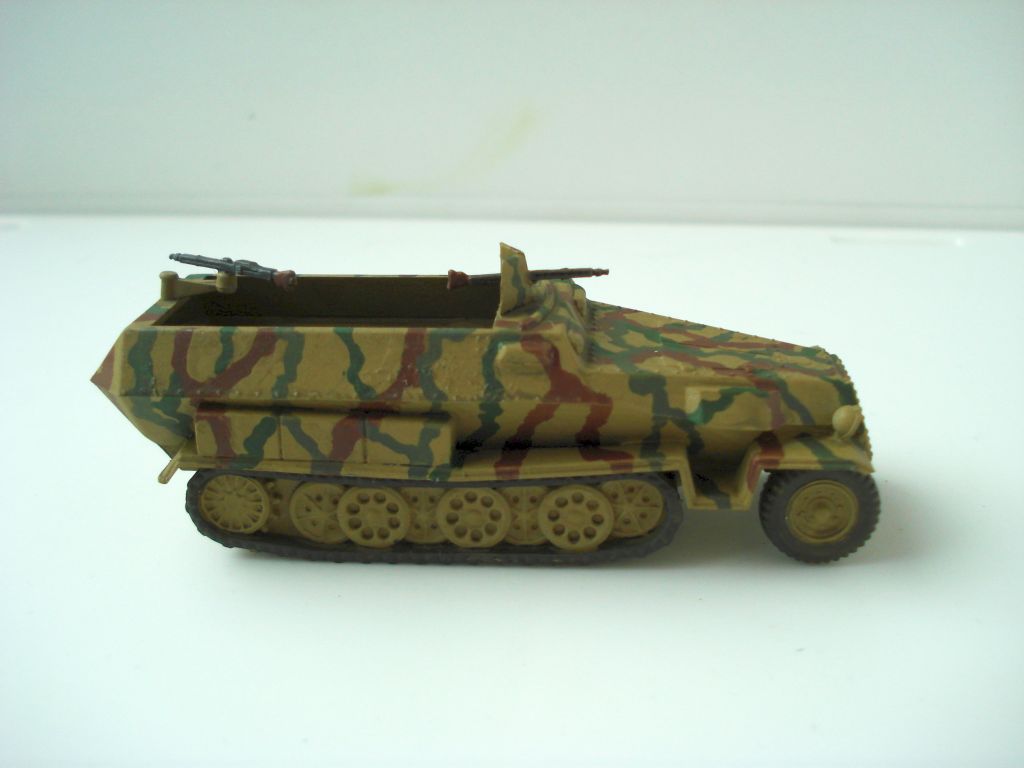
Armourfast Hanomag
So I’ve been slowly accumulating different units for my German platoon. I’ve been wanting to dabble a bit in transports. With the new Tank War book out in the wild, I also wanted to think about fielding an armored platoon with mechanized infantry units. So having a few German halftracks would be ideal.
For a while now I’ve been a fan of Armourfast. As with many of the other models I picked up from them, they offer a wargamer-grade replica. This is not a super accurate kit, but a model that has decent detail that looks good enough on the table.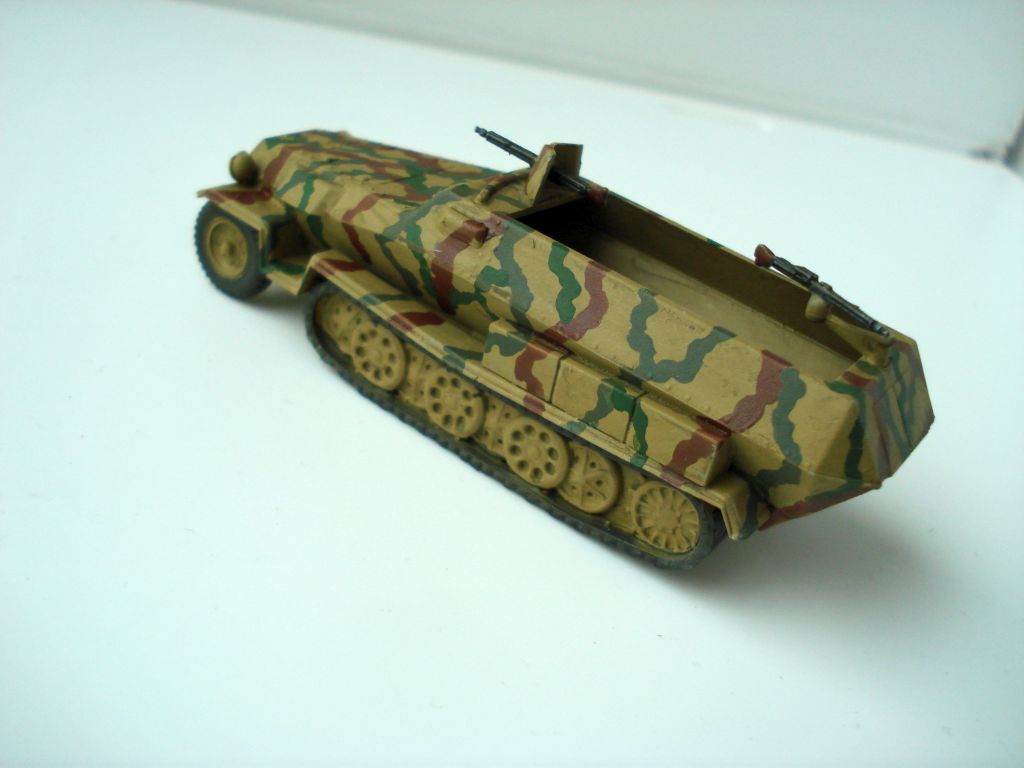
The kit does not offer any crew, with a simple troop compartment. The half tracks include a rear pintle mounted MG42 in addition to a forward mounted MMG. The treads like other Armourfast models are fitted as one piece. The outer side looks good, but the inside tracks are open with struts to support the tread section. When assembled it’s really hard to see the inside tread but if you look really closely at a low angle you can see it. As typical models from the company, they are great for tabletop gaming, but nothing you want to put in a diorama.
The half tracks are a snap to put together and don’t have any gaps. If anything, the port visor guards are a little tricky to mount. There are mounting bumps on the hull of the model, but they really aren’t pronounced so it’s easy to have the ports slip a little when cementing them into place.
I gush a lot over Armourfast. However, for 20mm models you really can’t beat them. They are nice kits for very reasonable prices and given they are transport options for a Bolt Action force, perfect at two half tracks per box.
Bolt Action house rules
 Some time back I lamented about LMGs in Bolt Action. They aren’t the only rough spot with the rules for me. While I understand the philosophy of some game elements being the way they are, it does at times seem to run roughshod with historical accuracy. Another big stickler with me was transports not being able to fire mounted weapons without passengers. I get why it was done this way (to prevent a bunch of mobile LMG platforms running around), but this sort of flies in the face of some nation’s tactics using armored troop carriers.
Other folks have taken up the mantle for using standard house rules. I think it’s a good idea. For house rules, I always liked having a document prepared to pass around before the game. It’s nice to be able to trumpet loud and clear rule changes you are playing with. So here are my limited list of house rules that can be found in the downloads section.
LMG point cost – I’ve talked about it before. LMGs are broken with their point costs. They cost far more than what they are worth on the tabletop. I’ve opted to drop the requirement of having a loader. It’s likely still overpriced, but at least they are no longer throwing out less attack dice than an equivalent point squad armed with rifles only.
Open-topped armored transports and pinning – I was waiting for the Tank War book to address issues with open-topped vehicles. It never did. Open-topped vehicles are simply too fragile to work as troop transports. By adopting the Tank War pinning rules, it’s a gamble for the attacker to throw a pin on transports now. It encourages folks to pick up veteran troop transports and start utilizing APCs more.
Transports firing weapons without passengers – Another stickler with me was requiring passengers to fire transport weapons. My solution likely adds to the ‘problem’ of roaming LMG teams. However I like the idea that transports can throw their firepower into the mix without needing passengers, but it’s limited to fire orders only.
Fixed weapons rotating – I find it interesting that Beyond the Gates of Antares, a sci-fi sister to Bolt Action, has this rule in place. Not being able to rotate fixed weapons at all seriously hindered MMG and AT guns. Being able to do so now allows them some more flexible use on the table.
Priority air strikes – It’s always a crap shoot with air support. Not only can it bounce and hit your units, but you might flub your support roll getting a strafing attack instead if targeting a tank. It’s a little too random. While there are optional air rules out there, I thought about instead allowing the air observer a greater chance of calling in heavy air support. It still is risky, but can be mitigated with taking a veteran observer (again offering an advantage if doing so).
MMG/HMG teams and pins – MMG teams to me seem fragile and despite the volume of fire they can throw onto a unit, they can only inflict one pin. Being able to rotate helps however I decided to add a new weapon tag, suppression. MMGs when targeting infantry units now have a 1 in 3 chance of dropping 2 pins on a target unit instead of 1. It’s just a little boost to indicate these weapons are effective at forcing infantry to keep their head down.
Deviating smoke rounds – I am not keen with the indirect smoke round rules. It’s too much in the hands of your opponent. I’m more favorable with random deviation on the round lands instead. The distance is also random, and can also drop closer to the target area which might actually make it work too well. But I dig the idea of using smoke more and the rules in the book discourage it.
So these are my changes. I haven’t dabbled much in vehicle flamethrowers. I understand they certainly could use tweaking based on the grumbling on various forums. That might be something else to add to the list at a later date. Hope folks get some use out of these rules (or at least inspire you all to whip up some of your own).
Plastic Soldier Co. Churchill
For my Bolt Action British platoon I had originally picked up a Cromwell. I figured it could be a recon element for my reinforced platoon. But for a more standard force, fielding a tank commonly used to support infantry was something I wanted. So I picked up a Plastic Soldier Co. Churchill tank kit.
The 1/72 scale models are well done. They really are a snap to assemble and fit together nicely. The treads and wheel sections fit as a single piece. The rear side of the tread section lacks detail, but it’s really difficult to notice once assembled.
The hull is well detailed. There are some nice extra bits like jerry cans for the rear tread fenders and spare tread sections. The hatch can be modeled with the doors being either open or closed, and include a tank commander figure.
There are a variety of barrels provided for Mk III, Mk IV, and Mk V tanks, as well as an AVRE variant. There is a lot of flexibility with the kit. The set comes with 2 tanks and as you have another turret available, you can really get some mileage out of the models.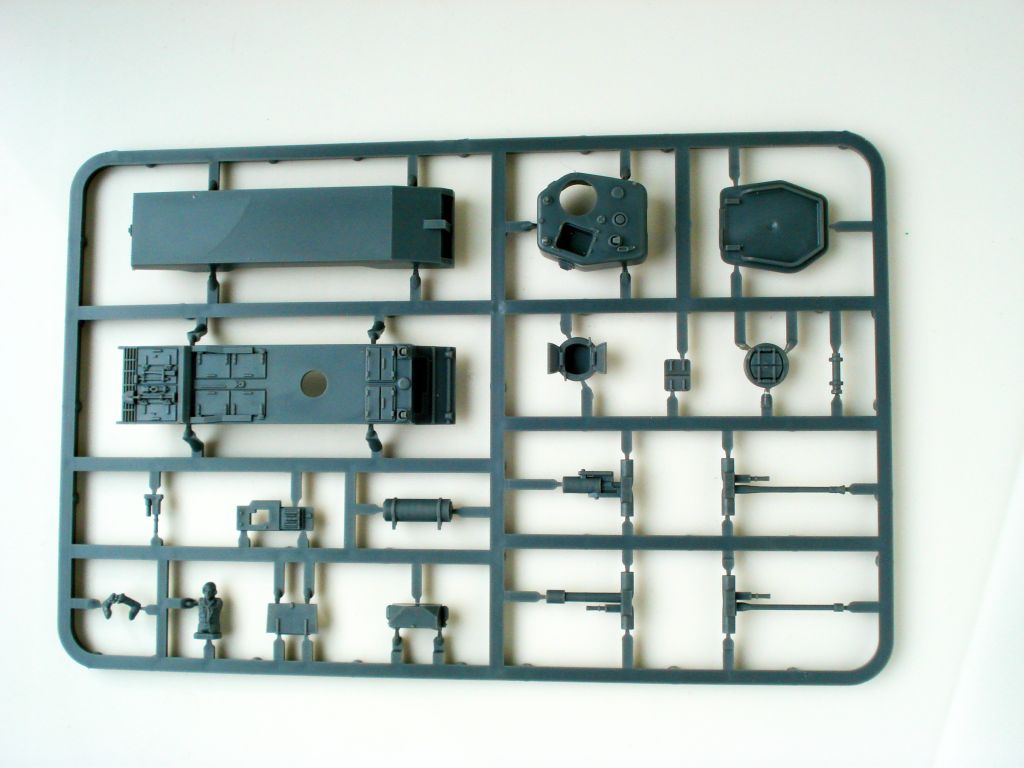
I liked the bren carriers I picked up and feel Plastic Soldier Co. has another winner with their Churchill tank. It is a good buy for a 20mm platoon. Not only do they look nice assembled, but they have a lot of options for barrel types meaning you can really stretch the use of the kits out for different tank types. Quite worth the buy for 1/72 wargaming.

Italeri (and a smidgen of Revell) WW2 Japanese troops
Sadly when it comes to WW2 gaming the Pacific is usually under represented in many war games, especially miniature games. For squad based stuff, Battleground WW2 touched on it a bit with one of their supplements. However it’s always taken a back seat to the European theater. In fact, I daresay that the African theater gets more love over the Pacific.
It all comes down to manufacturers for minis, and clearly they want to produce lines that will sell. Just seems a shame the Pacific and Asian WW2 theater never seems to garner much attention. This was something I certainly wanted to rectify with my Bolt Action armies. So when the Imperial Japanese Army book hit, I certainly wanted to take a stab at collecting a force.
Fortunately, I am delving deep into 1/72 scale stuff, so getting troops is super cheap compared to 28mm. The downside is I really can’t get a lot of specific teams. However there is quite a variety of decent model ranges at that scale.
I settled on buying Italeri ranges for Japanese troops, along with the 70 mm field gun kits. The field gun kits were an especially great find as they had a lot of odd teams. In that set were AT rifle and suicide AT teams, along with some models that would be great for arty observers and could serve as mortar spotters in a pinch. Not to mention a couple of 70 mm field guns.

I like the range of Italeri models. There were a lot of options for different mortar types, including knee mortars and rifle grenade launchers. Both of which I could use to cobble together a mortar squad if I wanted. The downside was I could not field any models carrying smgs, so I had to settle with my sergeants just armed with rifles.
Being a Japanese list, I wanted lots of bodies in beefy infantry squads and planned on fielding at least 3 rifle squads and likely a full mortar squad too. Despite the high model count in the Italeri kits, I opted to pick up a Revel miniature set also. I only took a handful from that set but it was enough to fill out my infantry squads.
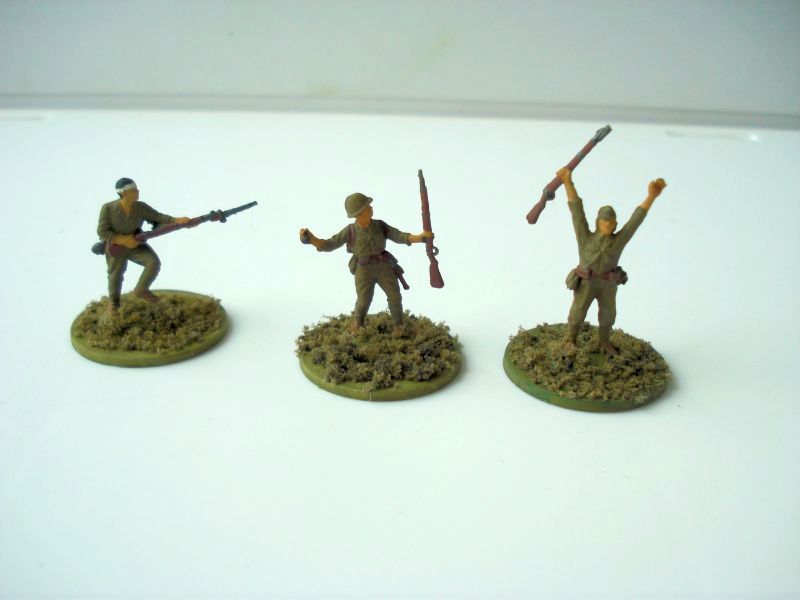

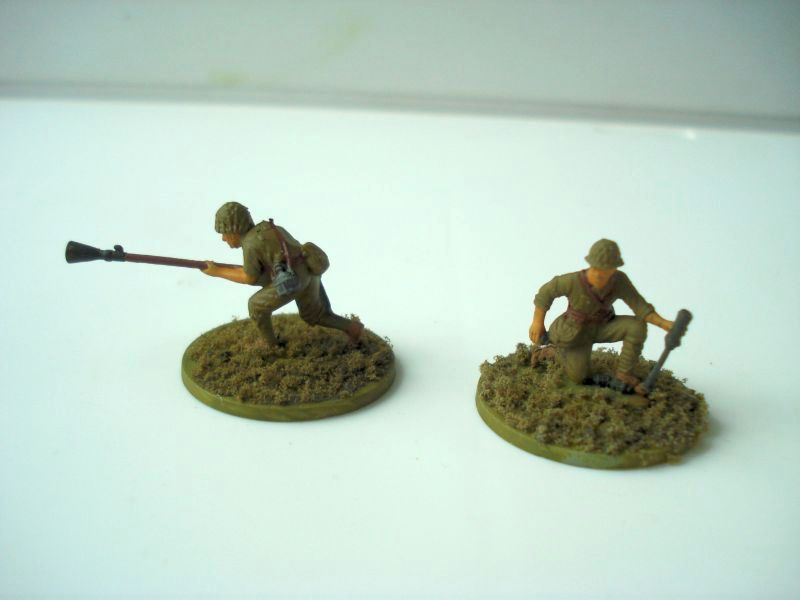
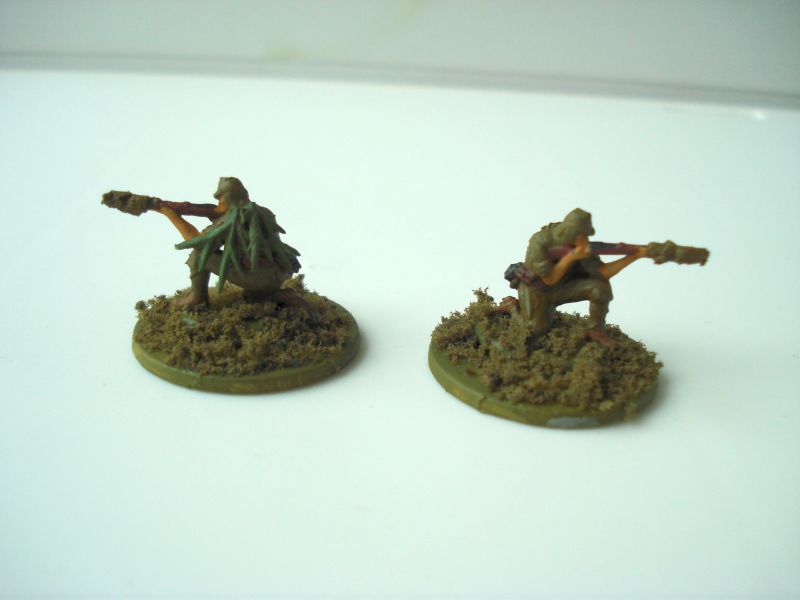
I also was struggling a bit finding appropriate minis for snipers. I opted to use a couple of kneeling figures and glued some plastic plant leaves on their backs to differentiate them some and still slightly capture that look of a sniper. A little wrapping of the barrels in trimmed athletic tape along with a healthy slather of water-downed PVA glue helped too.
I’m pretty happy how they turned out. A sizable force for Bolt Action with enough options to keep it interesting. Not to mention enough minis for another squad or two if I wanted to field another cheap inexperienced unit. Certainly looking forward to playing them and trying a different assault-heavy force. Now I gotta work on more jungle terrain!
 |
| Type 92 MMG |
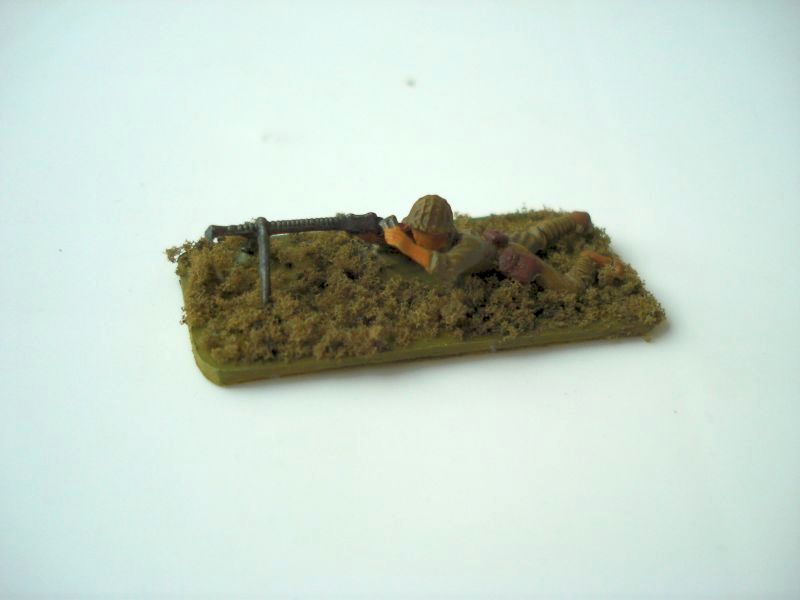 |
| Type 96 LMG mid-reload |
 |
| Type 97 AT-rifle |
Wargaming in Seoul – Orc Town
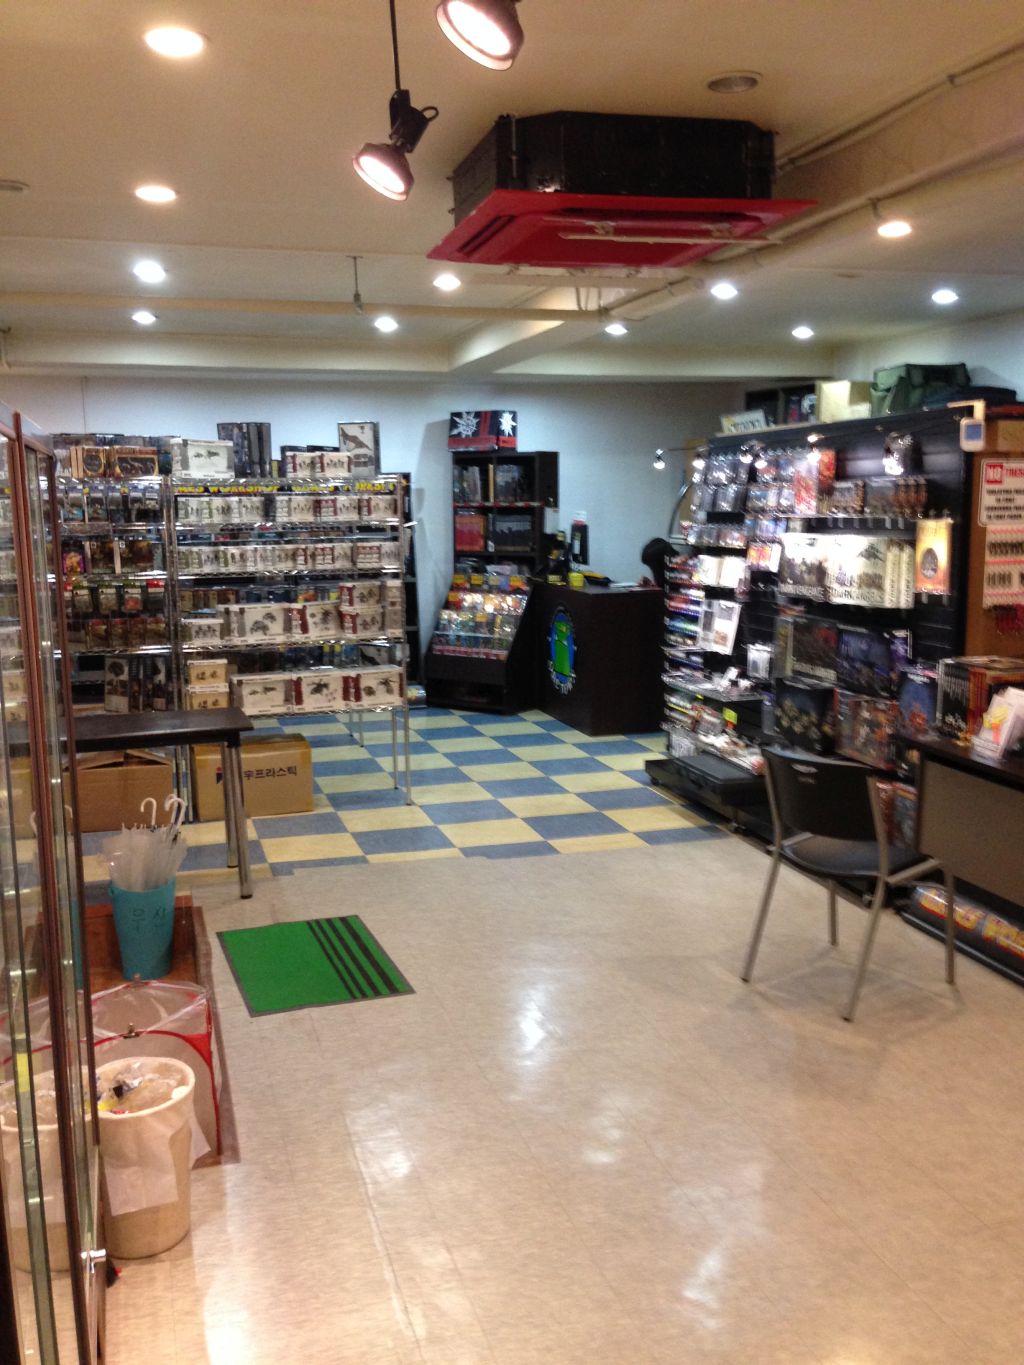
A while back I talked some about places where you can pick up different wargame supplies in Seoul. One place in particular was Orc Town. They recently packed up and moved to another location, so I thought I’d give them a visit and check out the new store.
Orc Town is now in the southeastern part of Seoul in Dongok I-dong. If you take subway line 3 and get off at the Maebong station, Exit 4, head south a few blocks alongside an apartment complex. Go past a main T intersection and one block west, you’ll eventually hit the store. It is now in the basement of a small business complex.

Be sure to look for the small sign on the side of the building over the basement stairway.

It’s certainly much bigger than the old shop. There is a small storage section where folks can leave their models in personal lockers for a fee. This is pretty nice for regulars as they don’t have to lug their models around to the store.
The new place has more space to play, with a side room just for gaming holding several tables. From what I remember, the gaming section here has almost double the number of tables from the old place. They also have a few shelves with store terrain to allow players to dabble in some different scenery layouts.


They seem to still carry similar products, including Infinity, Bolt Action, Firestorm Armada, a few Napoleonics and a smattering of other historical kits. There are also some Flames of War miniatures and some alternate 15mm WW2 sets. However Orc Town is still very much a Games Workshop store. They carry lots of 40K stuff and a good number of Warhammer Fantasy minis. The store also has a full line of Citadel paints, spray primer, and other GW hobby modeling supplies.
Sadly, I still think prices above retail particularly for non-GW products. No real clue how the prices for GW products fare but I noticed some of the Warlord games stuff being well over MSRP. I have no idea why. Maybe they can’t get distributors to send stuff over and have to go the route of resale (which likely includes having to pay extra custom fees on merchandise).
They have an online store and I’m guessing with pre-orders, you could get more of a discount to bring it in line with other international distributors. For a handful of items, given that you’d have to pay international shipping charges, it seems ordering directly through Orc Town works out maybe a little cheaper. However I do wonder if making a large order, getting a big a discount from an online retailer, and just paying extra shipping might be more economical.
Nonetheless, if you want to pick up a few models and paints Orc Town seems to fit the bill. If you are a GW fan, it’s the only place to shop. I’d also give it points for allowing space in their store for gaming. Certainly a great way to get some feelers out to meet up with other fellow wargamers.
Armourfast house
While my Bolt Action platoons have been slowly shaping up, I really needed to get some terrain together. I went the super cheap route getting some paper buildings made which came out okay. However getting troops inside a building can be a key part of the game. My paper models have the roofs firmly affixed to help keep them a sturdy construction. While I can lift them up and plop them over figures to represent troops inside the house, having models with detachable roofs would have been better (seriously have to consider working on making some with foam board).
Looking around for some options, I ended up buying a tile roofed, 1/72 farm house from Armourfast. The kit is very nice if a little pricey at $14.50 USD. The model comes with varying colors so that you could literally assemble and play without the fuss of painting. I somewhat embraced this and opted to give the model a very basic one-over with some washes and drybrushing.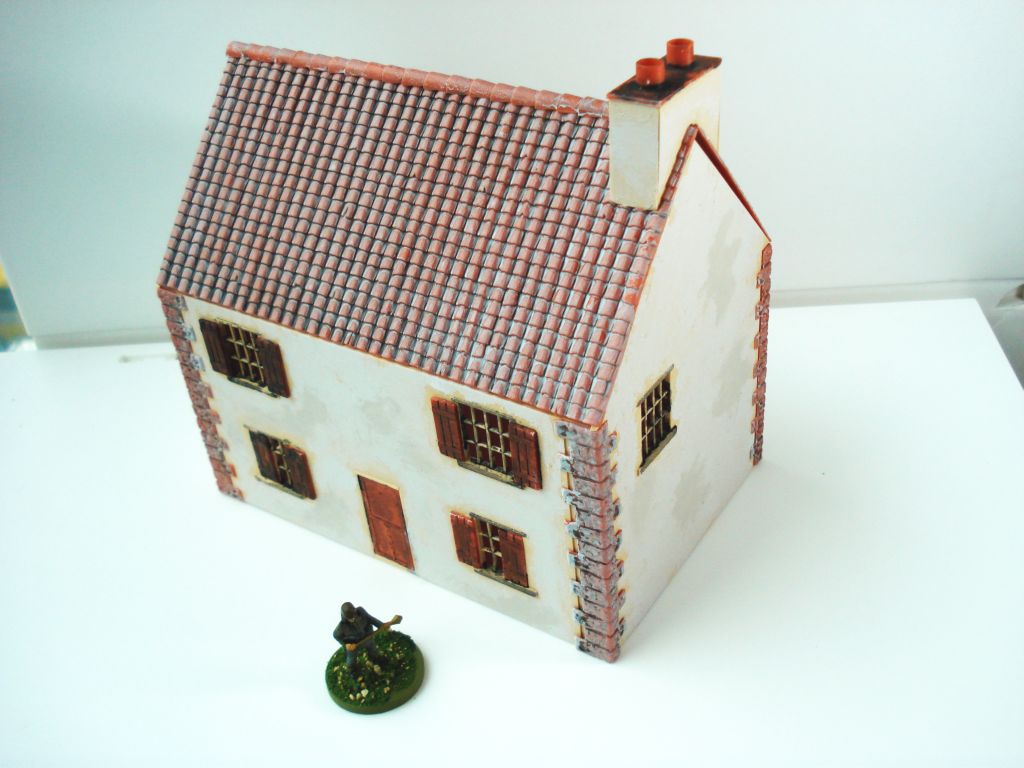
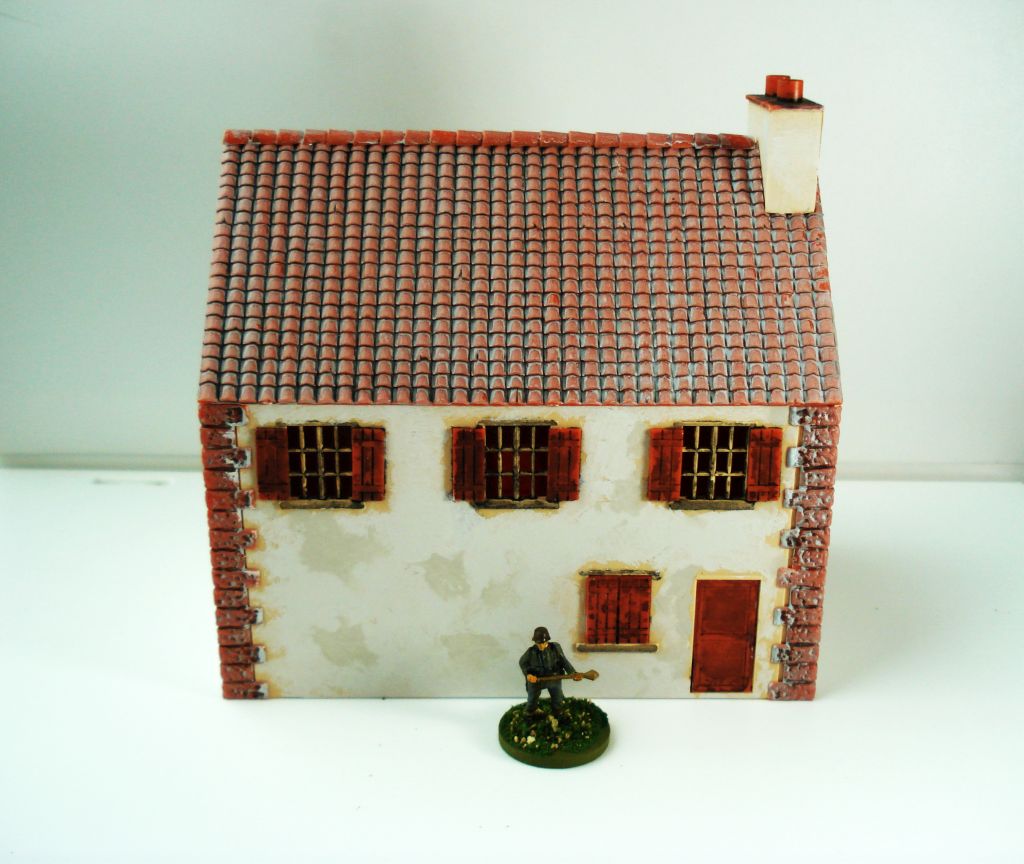
The house is simple to assemble and offers some decent options regarding the windows. There are a slew of window shutters you can use to represent open or closed windows. The roof and chimney can be put together without breaking a sweat. I will say however the instructions are a bit sparse and I did have to think through the construction a bit, as there are certain ways the walls for the house and chimney fit together. Nothing brain burning, but be sure to take a bit of time looking at how the pieces fit together.
Still, working with the plastic was a breeze and a welcome change compared to thick blocky houses of resin. The pieces fit together very well, with the roof section sitting fairly snug on the house walls and easily removable. Additionally, the inside walls have small tabs on them, allowing you to put in a second floor if needed. I cut a section of board to do just that and it fits nice and secure, allowing me to get a little more coolness out of the model.

The scale of the model is for 20 mm figures. I have one of my Plastic Soldier Co. mini in the some of the pics here to give it some scale. Honestly, the house would work just as fine with 28 mm figs. The doors would be a tad small but the space on the table is pretty beefy. Overall the model measures 14 cm by 9 cm, with the peak of the rooftop at 11 cm. I find true scale 28 mm buildings end up occupying too much tabletop real estate. Something a little smaller looks passable and doesn’t seem like a brick of plastic on the table. If you need a quick bit of terrain for your table and looking for something flexible, consider giving this house from Armourfast a look.
The problem with LMGs in Bolt Action
 I really enjoy Bolt Action. While it’s not a WW2 simulation it certainly is a fun skirmish game. As it’s been out a while, sure enough errata has slowly crept into it. However the lead designer, Alessio Cavatore, has a philosophy of trying to minimize errata. He really believes in saving it for rules that are unclear, as opposed to trying to fix problems in the game.
One thing that has stood out for a long time is the LMG. Being a tournament game, based on building forces with points, inevitably you are going to get people trying to get the most competitive army possible. As such, LMGs consistently never seemed to make the cut. As a team weapon at +20 points, it appears people just couldn’t justify the points for getting them.
There are some slight advantages with LMGs. Most notably is the range. At 30″ they can really reach out and touch someone. You can get pins put on a unit well before they can return fire. Even with penalties for firing on the move, long range, and having a target in light cover, with 6s you are rolling enough dice to get roughly a 50/50 chance to throw on a pin.
I’m convinced LMGs were viewed in the light of max squads. They are the only way to add some firepower to a full unit. Given LMGs are team weapons, having 2 extra dice would be roughly equivalent to having 2 more rifles in a squad. From that perspective, paying +20 points for a LMG works out. The 2 extra dice being similar to spending another 20 points to add two more men.
This falls apart though when you aren’t looking at max squads. A regular 5 man squad with a LMG compared to spending an equivalent 70 points for 7 riflemen, you actually throw out less dice. Due to the team weapon rule, you only get 6 fire dice. Ignoring that 7 man squads can take more casualties and pitch more dice into an assault, you still come out on top with fire dice compared to buying a LMG with the same points.
The cost for LMGs are broken. Sadly, it’s not something that will be addressed either (or at least until Bolt Action 2). But for a competitive tournament scene, it’s odd that LMGs are not encouraged more to be included in a force list. This also smacks right in the face of historical composition of infantry squads. LMGs were pretty much standard armament to compliment infantry. So a couple of ideas to consider…
Drop the team weapon – I did this for my BA sci-fi conversion. With no loader needed, you are at least matching the number of dice that a 7 man rifle squad is rolling. So that 5 man squad with a LMG generates the same amount of fire dice for the same amount of points.
Lower the cost of LMGs – The other answer is lowering the points. One suggestion is paying only 5 points. At first this seems too cheap. However if you take into consideration the team weapon rule, you are only generating 1 more die for shooting when comparing a LMG to 2 riflemen. Looking at this, +5 points for LMGs match very well against troops armed with BARs or assault rifles which generate a similar number of extra fire dice.
Of the two I am leaning towards dropping the team weapon rule. Maybe only have a penalty if it’s the last person in a squad. The only reason I am leaning this way is I like keeping points for models roughly similar. That way if in the incredibly unusual situation I actually hit up a tournament sometime, I am not scrambling to adjust my points. This is the only reason however. Looking over the numbers, keeping it a team weapon and lowering the cost to +5 points is actually a better solution.
I’ll put money on the point cost of LMGs being addressed in an updated rulebook. Till then I guess I’ll have to tinker with them to make them more cost efficient.
Cigar Box battle mats review
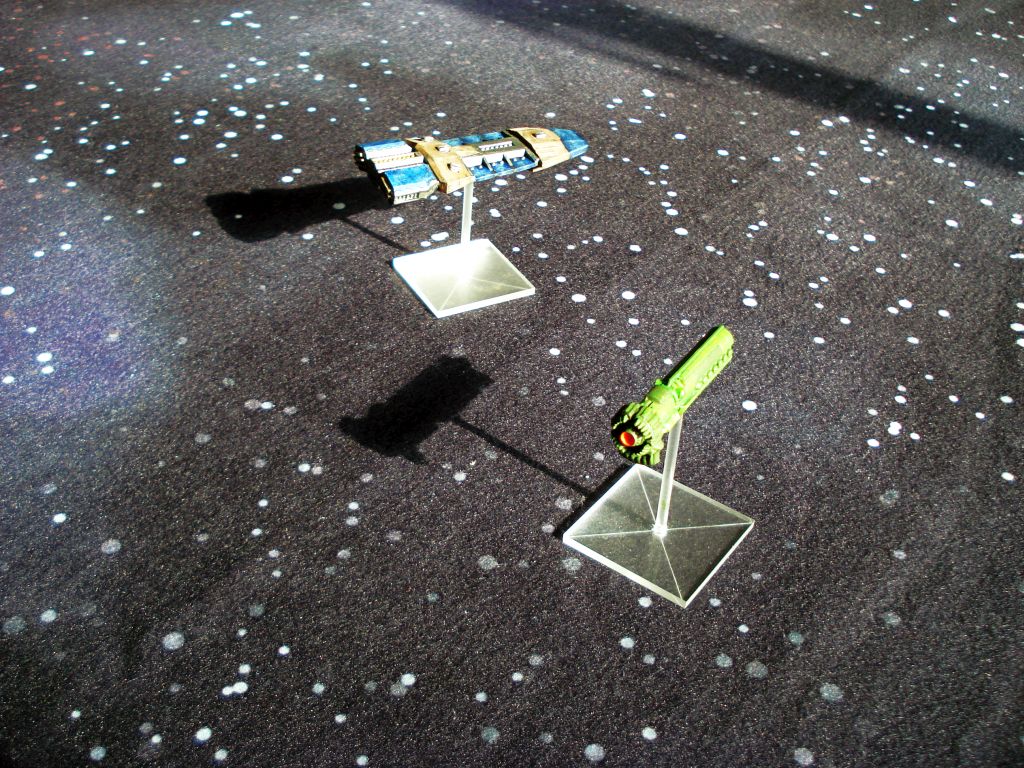
Ever on the quest to find some cool gaming mats I stumbled across Cigar Box Battle Mats and had to pick a few up. A while back I had gotten some Hotz mats for my Bolt Action and Firestorm Armada games. The star field mat was okay while the green mat was a little lackluster. Further, they were treated felt. The surface looked like it could handle pilling but it was stiff and kept wrinkles if folded up.
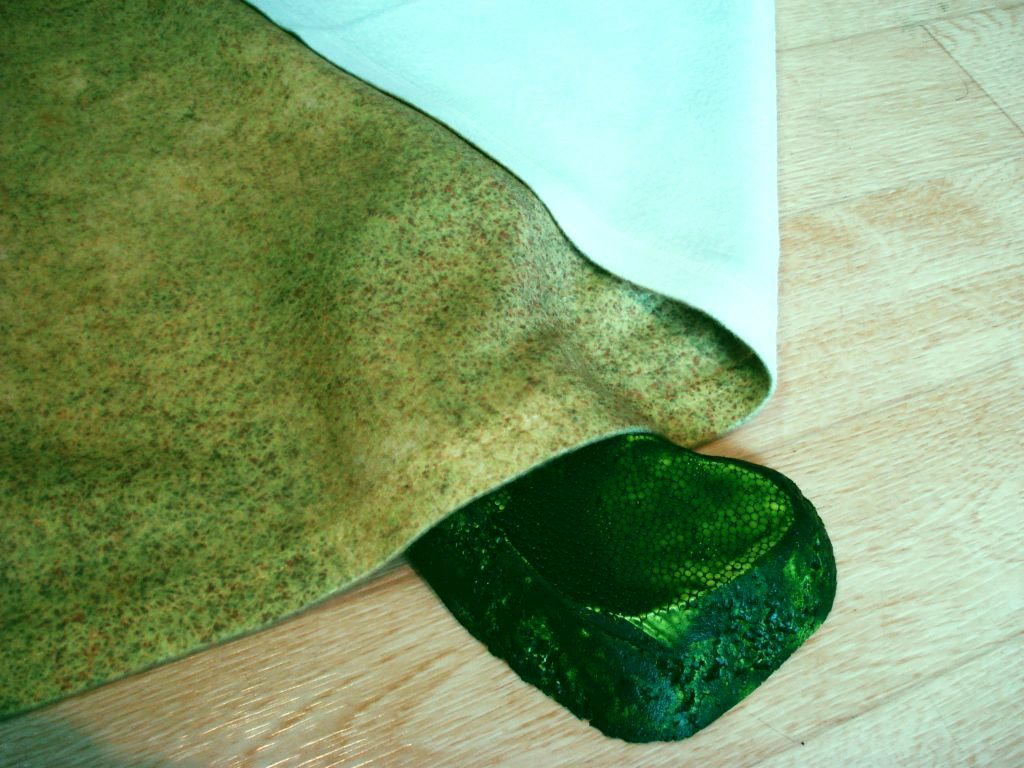
The battle mats from Cigar Box are made out of a thin fleece material. It’s very supple and has a sheen surface that will not snag on miniature bases. Most come in 4′ x 6′ with a few mats measuring 36″ x 36″. You can machine wash the mats and the surface appears to be screen printed making it look pretty resistant to your normal wear and tear.
The star field mat is very muted, but has a nice generic look. All of which allows you to plop down whatever terrain you have and not look too out of place clashing with something printed on the mat itself.


The generic grass field has a nice textured look to it. As the material is so yielding, you can put hills under the mat. This is something I found an issue with the Hotz mats as the treated felt was rather stiff. For a basic open field, the Cigar Box mat looks good with just a little contrast to break up the entire surface.


Digging through the store, there are also more elaborate patterns which can highlight roads, fields, and forests. A few even are set up to portray classic civil war battles, but could work for different historical engagements too. There is a pretty impressive variety and fortunately some generic mats are also available.
I think one ding to the mats would be that you’d have to double up if needing a 4′ X 8′ mat as the size options are limited. The mats are also ideal for free miniature movement as there are no hex or grid options.
The service was quick and I got my order via international air mail about a week after it was shipped. They were also very quick to respond to any queries via email. I highly recommend these mats. They are durable, provide a good gaming surface, and look great. Well worth picking them up for your games.