Category: Miniatures
Plastic Soldier Co. – British Universal Carriers
Slowly wrapping up my British platoon for Bolt Action I picked up a set of British Universal Carriers from Plastic Soldier Company. This is a nice model kit with 3 sprues for Mk 1 and Mk 2 carriers. Each includes 2 crew members, Bren LMGs, and a pair of passenger models. The kit for the most part assembles pretty easily. The one downside was the crew members.
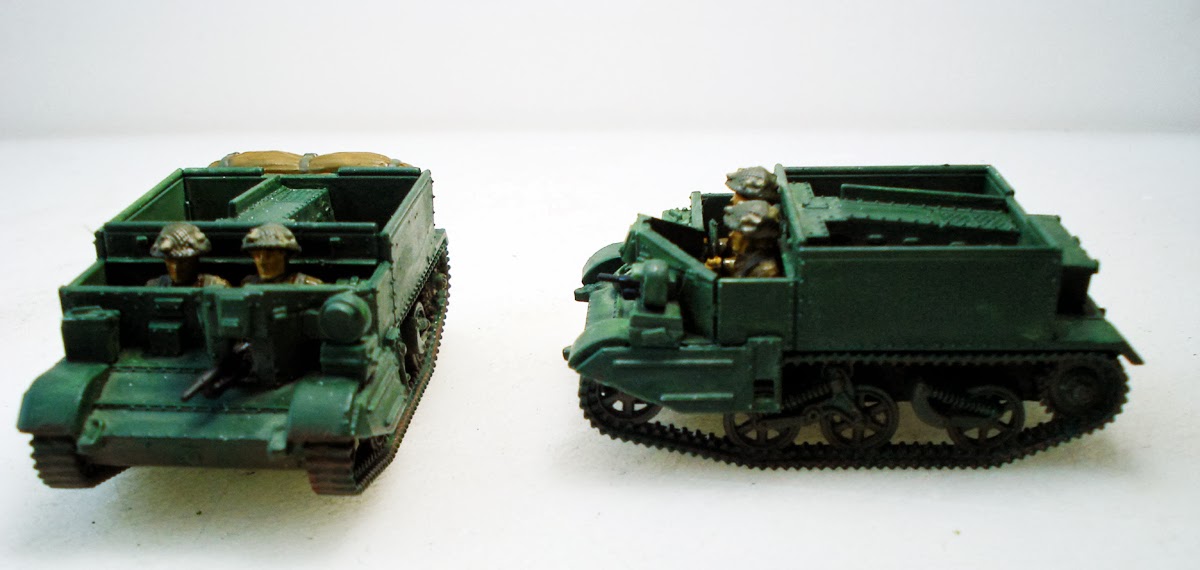
Sort of temporarily fitting them together, I tried out slipping the driver in and thought it’d be no issue to paint it up separately. I found once assembled I couldn’t quite get it in without a bit of force. Fortunately the gunner slipped in a bit easier. However, I then found out the Bren gun simply did not fit within the port slot. I had to work on trimming it down and couldn’t quite get the angle right with the crew member inside. The front armor panel can be attached as a separate single piece. Working on this model again, I would get the Bren gun mounted to that first, paint and seat the crew, then add the front armor plate.
It is nice having a plastic kit though as assembly and doing some alteration is a snap. For myself, I’ve got two for transports and likely will convert the third for a Vickers MMG mount. A bit on the fence for that though.
There are a few small accessories such as a spare tread wheel and a folded canvas tarp for the back.

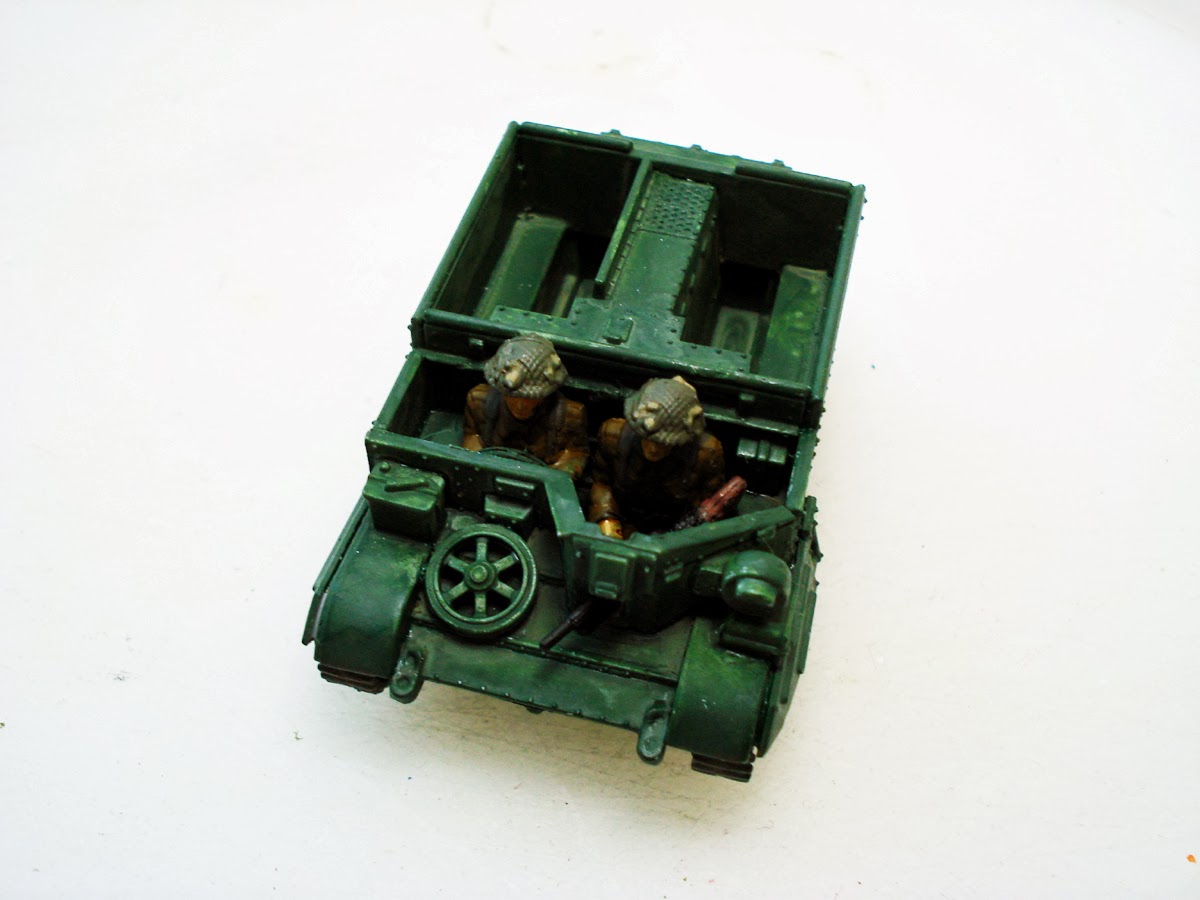
I modeled mine with passenger troops that could be removed. Just a simple way to model the unit as a full or empty transport, with a visual reminder using a figure.
Despite the hiccup with the Bren gun and the crew, it really is a great kit. The models are well detailed and you can’t beat the price for a bunch of transports. Likely with a 5 man capacity, you’ll want a few of them in your force. So getting 3 a pop is a nice buy. The models here are for 1/72 scale. Hopefully PSC will be pushing to expand their 28mm line. I’m certain these would be a great seller.

Scratch built scouring pad trees

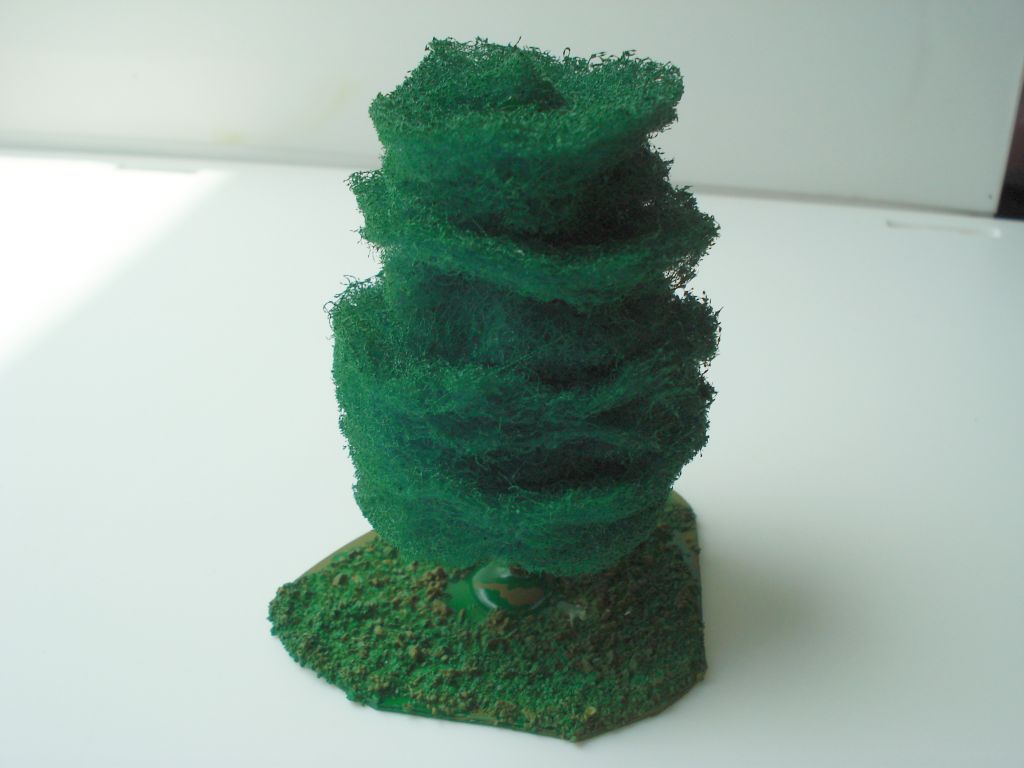
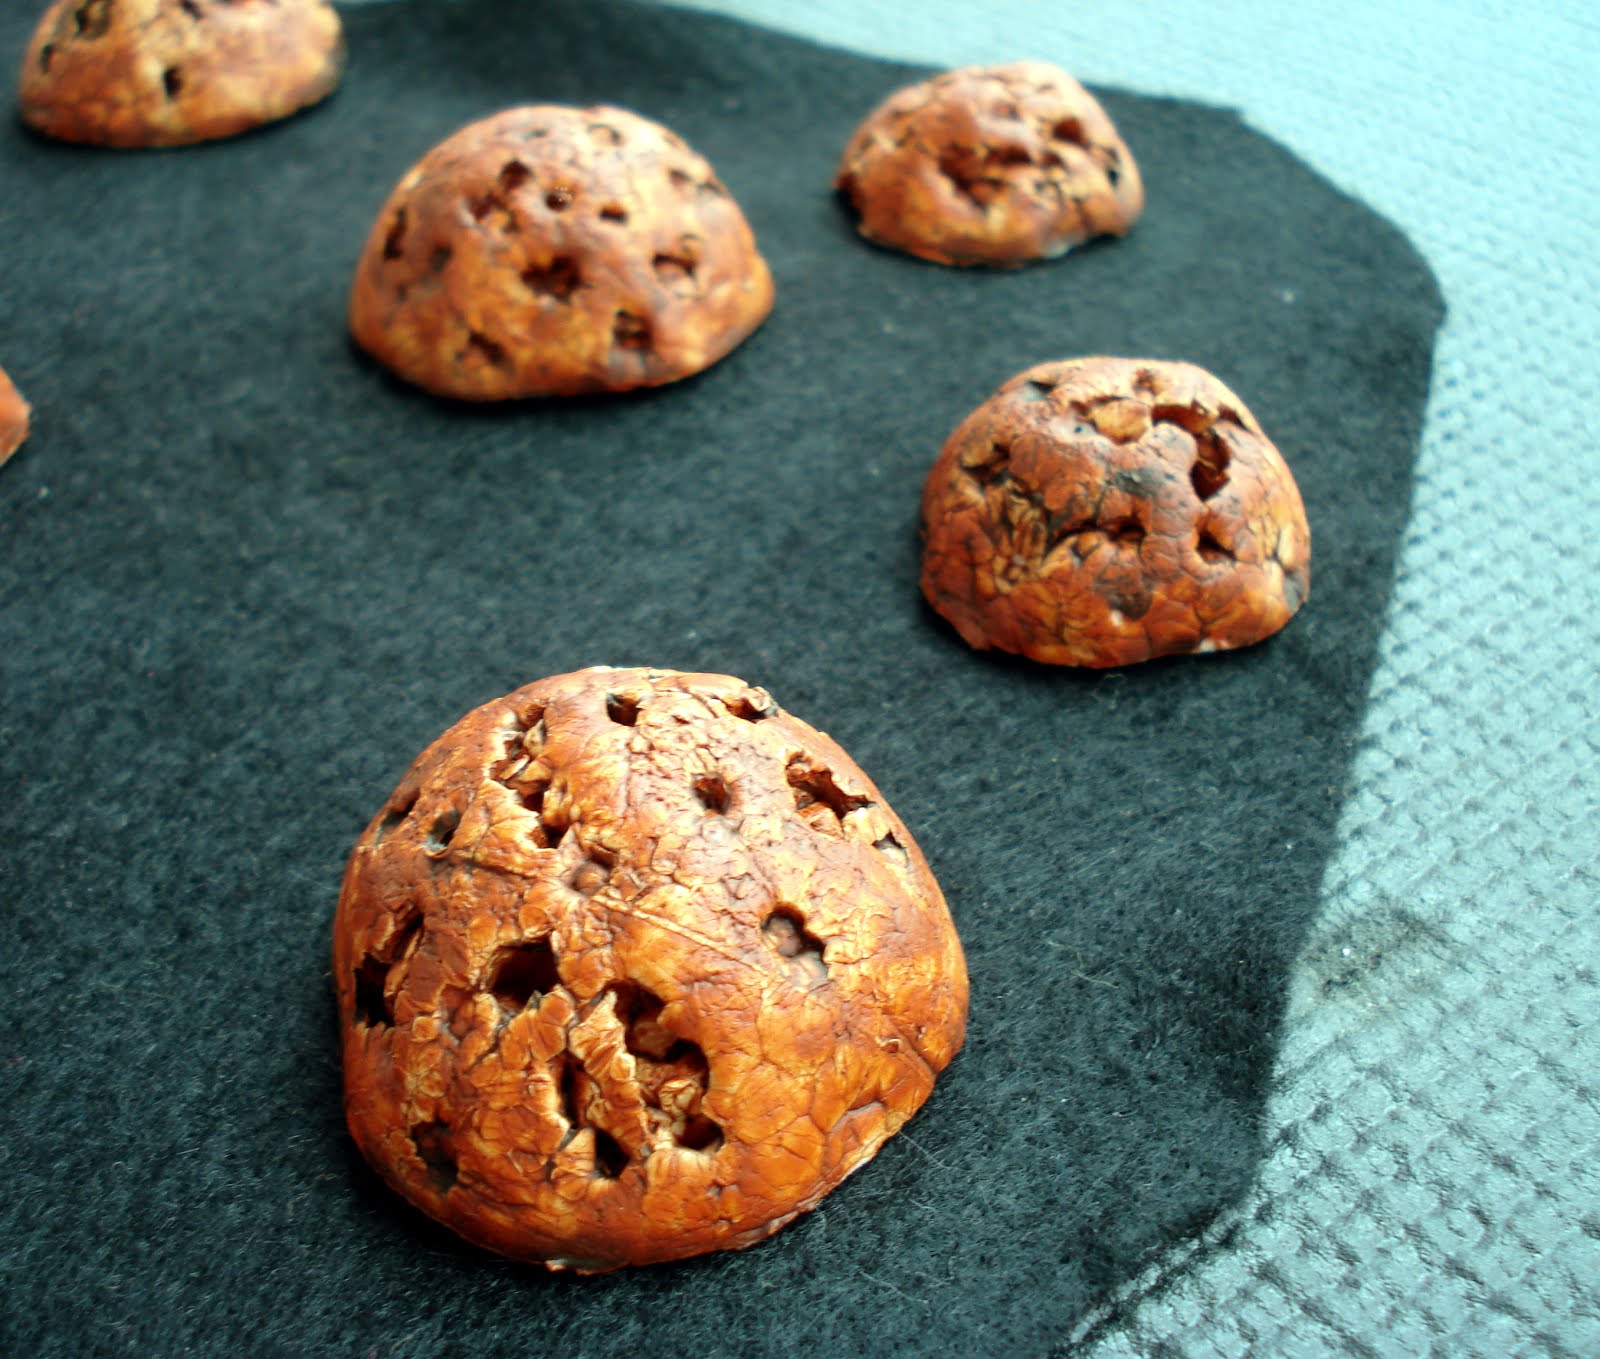
My Bolt Action platoons are shaping up and I’ve been on a bit of a kick to get some terrain whipped up. One thing I sorely wanted were trees. However I’m just not able to bite the bullet and pony up cash for them. Looking around for pre-made scenery, trees are a bit expensive. A long time back I had gotten a bulk pack from woodland scenics where you could construct your own trees. It was a mess to put together and while great for a diorama, it just couldn’t handle the wear and tear for my wargaming table.
One tutorial I dug up described using cleaning pads for pine trees. Just right for my budget, so I jumped right in and looked into making some up. I picked up some scouring pads for less than a dollar and kept some skewers from some street food after a late night of drinking. I liked these skewers as they were thick ¼” diameter wood pieces.
I cut the pads into rows and then in approximately 1 ½” to 2” squares. I then trimmed the square pads into rough circles. I made sure to save a lot of the small corner bits of pad after cutting the major sections into circles. Some of the pads I cut into smaller circles of about 1 inch to serve as the top section of the tree, and followed this up by cutting the tree ‘trunks’ into 3-5” lengths. I found while larger trees are more realistically scaled, they are almost too big for wargaming.
As the I had to get the center wooden piece through the pad sections, I made a small cut in the center of the pads. Then came the more tedious bit. To give the pads some bulk, I teased apart the pad material for each section. This would almost double their thickness by simple pulling the material apart some.
With a hot glue gun, I added a dab to the center dowel and skewered a single pad section, moving it down to little over ½ the length of the wood. I repeated this, adding more glue higher up the wood shaft, adding more sections. I ensured the last section was a smaller diameter circle piece. All in all, I found 4-5 pad sections was enough for the trees to give them some bulk.

For the tops of the trees, I used the leftover parts of the pads from making the circle sections. Really teasing them apart, I could add 2-3 sections to the center wooden piece after placing some hot glue. This gave a nice small tapered top to them.
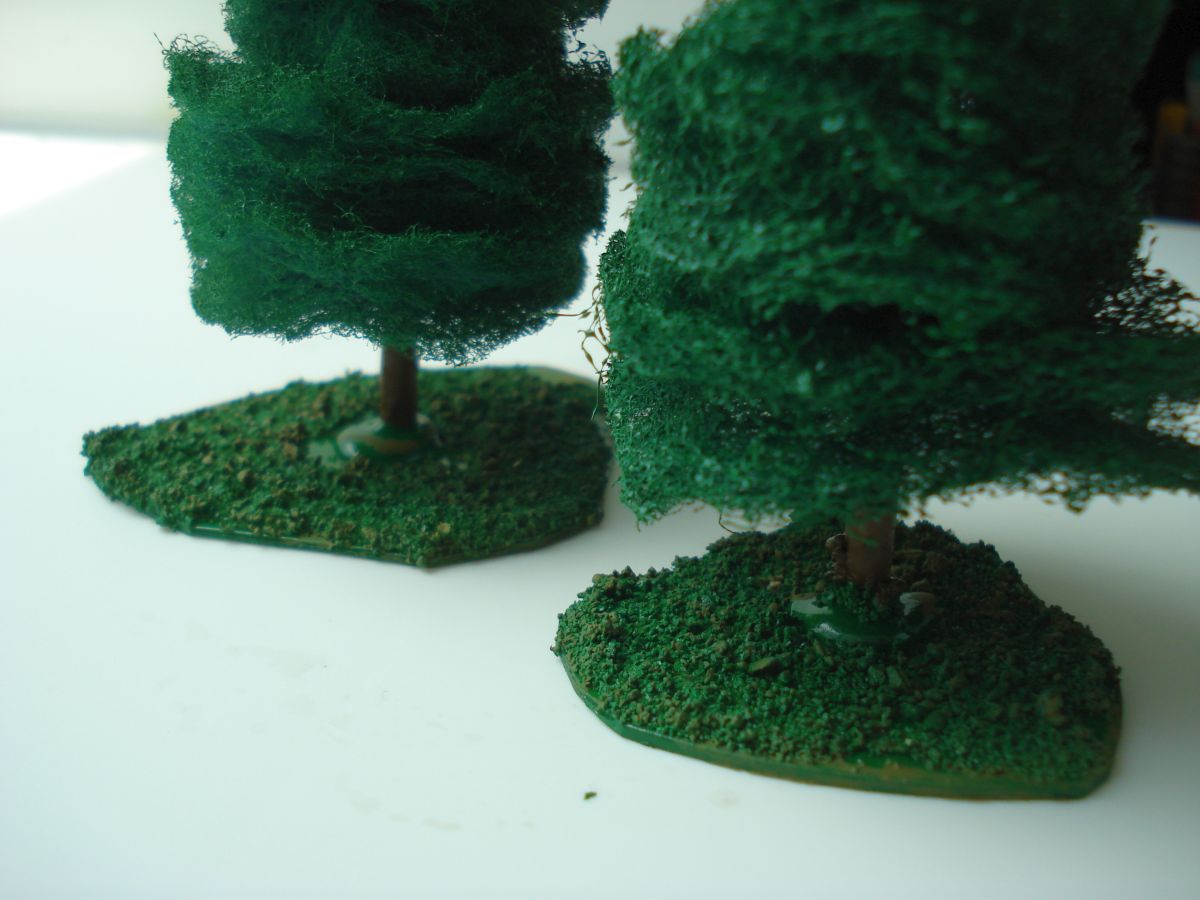
To mount my trees, I cut up some old software CDs, carefully rounding the edges. I placed a thick drop of hot glue in the center and then set the tree on the base. I decided rather than using watered down PVA and flock for the bases, I’d use a drybrush over a layer of modelling ballast. I wanted to do this partially to keep from getting flock all stuck up in the trees and also to ensure the trees could take a little punishment with storage and transporting.

I put down a layer of watered-down PVA glue and after letting the model ballast dry, set to painting it. I gave each tree a good coat of green spray paint. A nice part of this is that the paint will also act as a sort of cement for the ballast, and stiffen up the pad sections of the tree too.
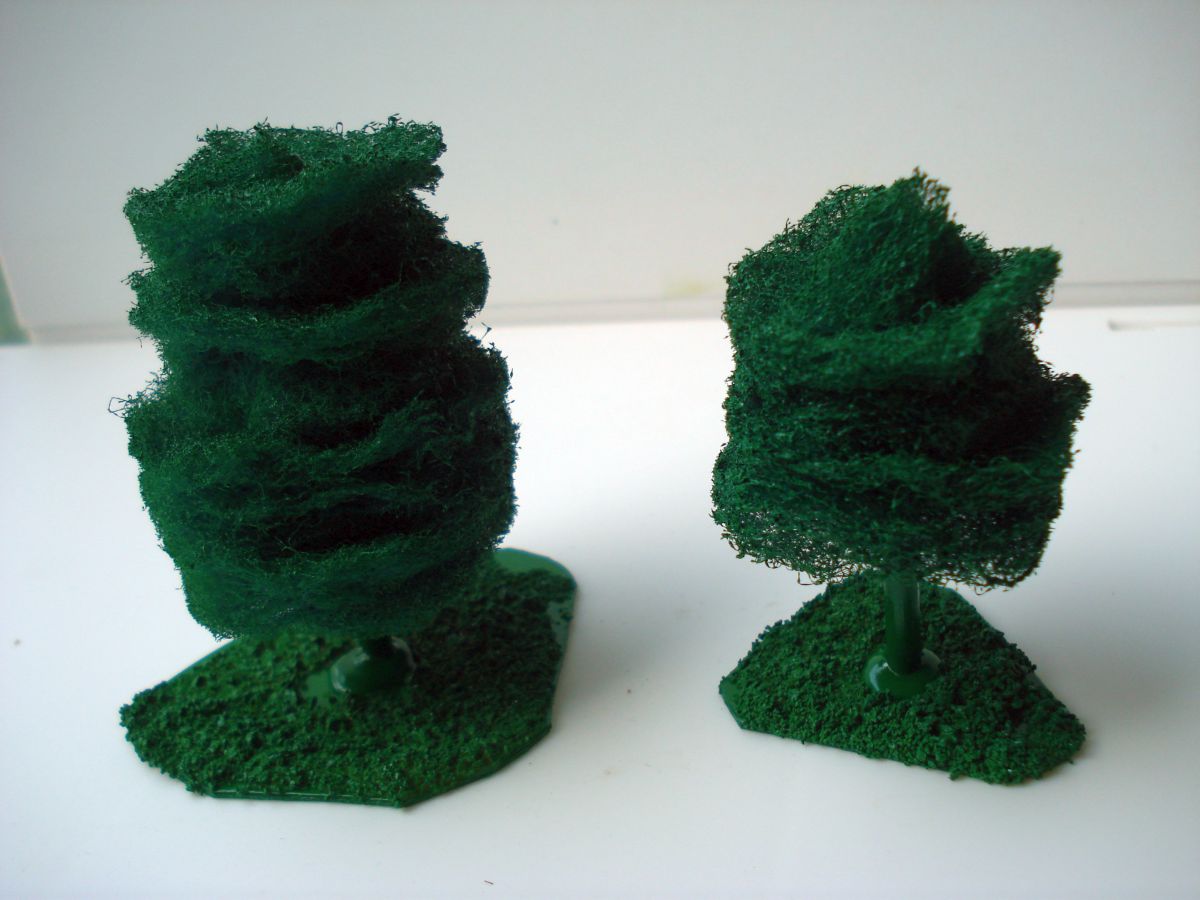
After letting them dry, I painted the trunks a nice brown coat, and followed it up by drybrushing the bases with a lighter green to simulate grass and low brush. More chunks of flock could be added if needed, but overall I liked the effect it gave.
Note I did not highlight the trees any. I feel one solid color, with potentially a wash was enough. Drybrushing the tree leaf sections would likely only highlight the overall pattern of stacked pads even more. With one solid, uniform color of green, the detail of the tree leaf sections are muddled some. Afterwards I went ahead and gave the trees a matte varnish spray.
I think they look pretty decent and you simply cannot beat the price. I may very well likely pick up a few model trees and expect if I mix them in with the lot I made, they will look even better on the tabletop. This was a pretty fun project and an evening’s worth of work (minus the time needed for letting the trees dry due to spray painting). Now to just get some more games in!
Plastic Soldier Co. – German platoon painted
Quietly over the past months I’ve been steadily working through my German platoon. There is a local con coming up in September and I think I might try to demo a few games. With my Brits done I wanted to also get a group of Germans finished to face off against them.
The detail for the German figures are pretty good. Some of the MG42 weapons are a little bulky and odd looking, but for the most part the figures are accurately modeled and equipped. I’ve assembled models both from the late war and the heavy weapons kits available from Plastic Soldier Co.


Some of the figures are from Zvezda pioneers and pak-36 sets.
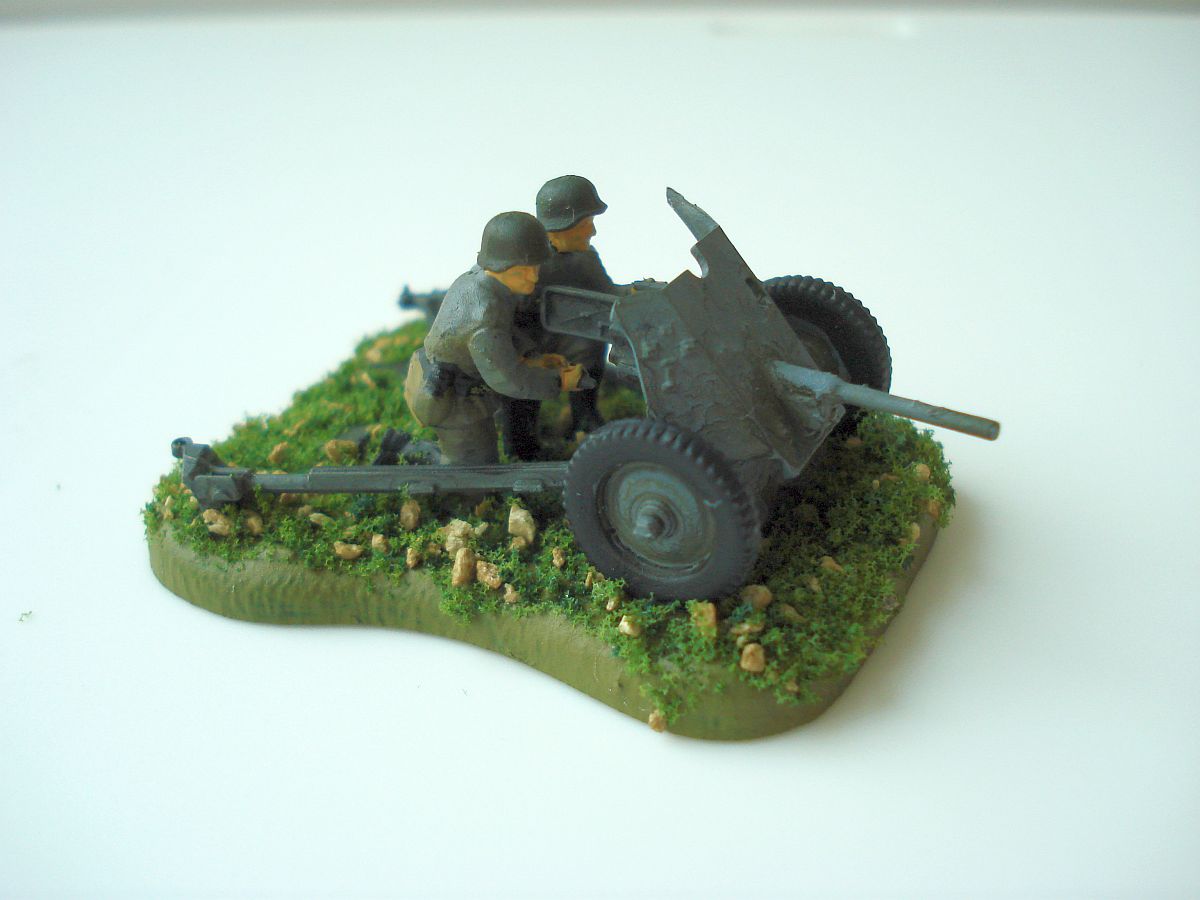
Another handful are Airfix pak-40 crew members (which I couldn’t pass up as the AT gun also came with an Opel Blitz truck). The one below is also with a Zvezda pioneer armed with a flamethrower.

However you can see the bulk are from PSC. They certainly paint up pretty well and happy with how they turned out.

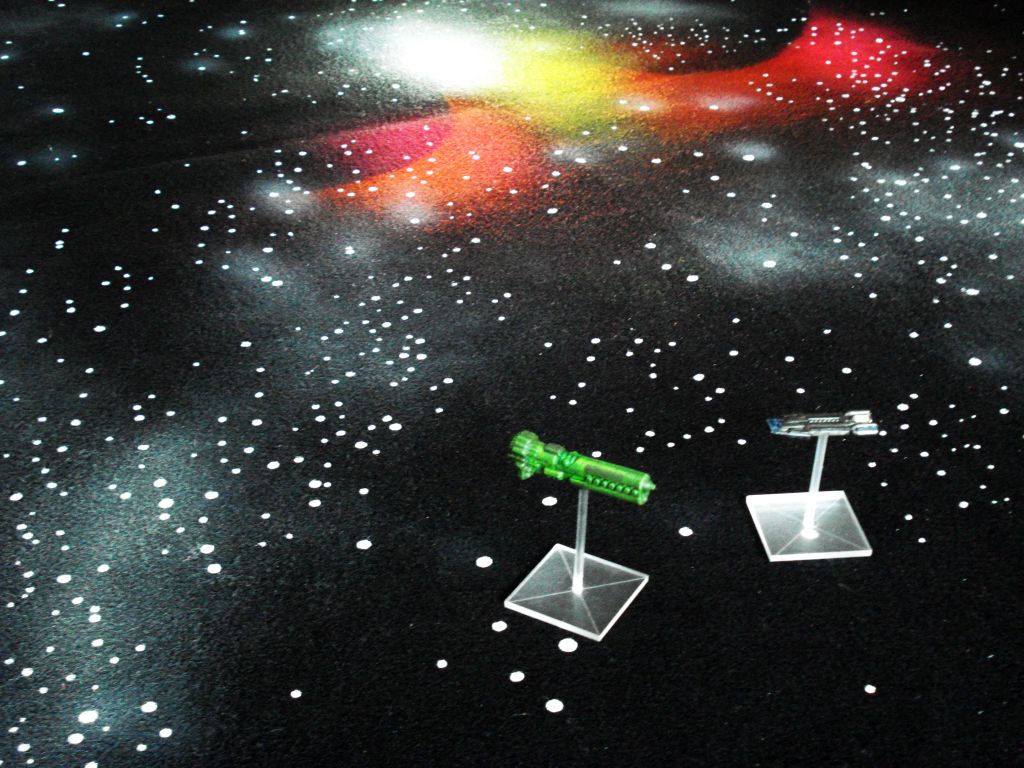
Hotz Mats gaming mats
Since I was sorta on a terrain kick making asteroids for Firestorm Armada, I wanted to get a better gaming surface than a black cloth. For a while I heard about Hotz Mats which make a variety of felt gaming mats that can serve for some really nice space tables. They are screen printed and have a variety of options with printed hexes or grids, or even mats that are double-sided with an option for one side being gridless. The mats come in a variety of dimensions with 4’ x 8’ being the largest.
So I went ahead and ordered two mats at 45” x 72’ with one being an earth green mat for my WWII and SAGA stuff, and another deep space mat for my Firestorm Armada games. The mats are felt. However they are supposed to be treated with a fabric binder that reduces the wear and tear of the surface, lessening the pilling you typically see with felt.
The mats are a decent thickness (if just a tad thin) and can get a bit creased. However really deep folds can be carefully ironed out. The surface of the painted side is somewhat stiff which I assume is the fabric binding material that is sprayed over the surface. This does keep models from snagging up as much compared to regular soft felt. I could push my ship model stands around without having them get caught up on the material.

The deep space mat is pretty nice for a generic background. A little color is thrown in aside from the star background which is nice. I think if I were to get another I might splurge for the enhanced deep space mat.
I am a little disappointed with the earth green mat. I was hoping maybe a little extra paint to add some texture to it. However it’s really just a bolt of green felt yet still has the fabric binder coated on it. This gives it a decent surface and likely a hex printed version would serve great. Overall the one I picked up is a plain, muted surface for wargaming.

Now to go a bit on the customer service of Hotz Mats. Bluntly, I found it lacking. I do know they pretty much make the mats custom order. And I would put money on a lot of the mats being done in one go, and maybe needing some time to dry out in the open. Coming from Canada, this might mean delays due to poor weather (humidity) mucking up the production.
It took my order an extra two months to arrive. Email responses from the company were also sporadic and I didn’t get any indication my order was shipped. So I will give a huge caveat for buying their mats directly. It’s going to be delayed. Don’t expect a prompt (or any) response to emails. I can understand production delays, but I’m a little less understanding with the lack of communication. Consider the 3-5 weeks deliver to only be valid if you live within the province.
Now I understand they are moving to a new studio. This might alleviate some production delays. If you order from them, I think you need to take a zen-like approach and just accept that after several months you’ll get what you ordered in the mail.
The game mats are decent, seem like they can take a little punishment, and can easily be stored away. However simply put Hotz mats aren’t worth getting as there are better gaming mats out there that are comparably priced. What really pushed it over into the no buy column for me is the abysmal customer service. Seems you’ll get your mats… eventually… when they decide to get them into production… and bother to ship it. There are other options available for gaming mats which provide much better customer service. I can’t recommend buying Hotz gaming mats.
Asteroid terrain for Firestorm Armada
Living in a Korean city I have an exceedingly hard time getting DIY materials. There just aren’t huge outlet stores like you see in the west (Lowes, Home Depot, etc.). So getting my hands on construction material is a bit of a chore. Also, living in a city means that landscaping material is pretty much impossible to get too. Folks live in apartments so there is literally no customer base here for that type of stuff, hence it’s difficult to pick up gardening supplies.
I think it would be exceedingly easy to pick up pumice rocks or wooden chips as landscaping material, give it a base coat, drybrush highlight, and get a set of great looking asteroid terrain pieces for Firestorm Armada. However I’m sort of stuck with not being able to get material like that easily (or cheaply). So I started looking for alternatives.
Fortunately, I was able to find an art supply store that had nice supply of styrofoam balls of various sizes. With a bit of compressing and a paint brush handle, I was able to add a bit of texture to the balls once I cut them in half. After quick base coat and wash, I have a nice supply of asteroids to put down on the table.

I also picked up some larger balls that I’ll use for some planetoids. They are a somewhat smaller than the typical planet terrain listed in the FA rule book. You can see one of the larger styrofoam balls in the background for this image. I’ll likely give them a very simple paint job, and despite the smaller size I think they give a neat 3d look compared to a cutout template.
One thing you’ll notice is that I have my asteroids on black felt. As with many of my war games, I am a huge fan of felt. I really like using them to mark roads, woods, fields, rough terrain, etc. I like having very clear boundaries and with FA it’s the same. I can easily layer the felt to create as big a field as needed and have a few smaller sections to make more odd shapes. What really works for this is that I can freely move the asteroid terrain bits around on a set base, allowing models to maneuver where they want, without worrying about altering the perimeter of the field.
Still thinking of possibly adding a few dabs of paint to the felt to give it that star field look. I’m planning on picking up some other colors like a nice purple for nebulas. Now I’ve got some terrain completed, it’s been calling me to get some fleet battles going.
Hill terrain from insulation foam

After making some progress with my 15mm sci-fi troops, I needed to get some terrain together. As always, I’m really on a budget. I’m also hesitant as a likely move is looming in the near future. Keeping the amount of stuff I need to ship low (and light) is weighing on my mind as of late. So really putting a lot of model time into terrain feels sort of a waste, especially if I’ll be throwing out half the stuff I whip up.
I managed to pick up some packing material made of dense foam insulation material about 3″ thick. As thick cylinders with nice flat sides, taking a knife to the center meant I could get two hills. Roughing up the surface even more with a craft knife left a lot of nice texture with the edges. And a few I cut with an even sharper angle to give one direction a more impassible facing cliff.
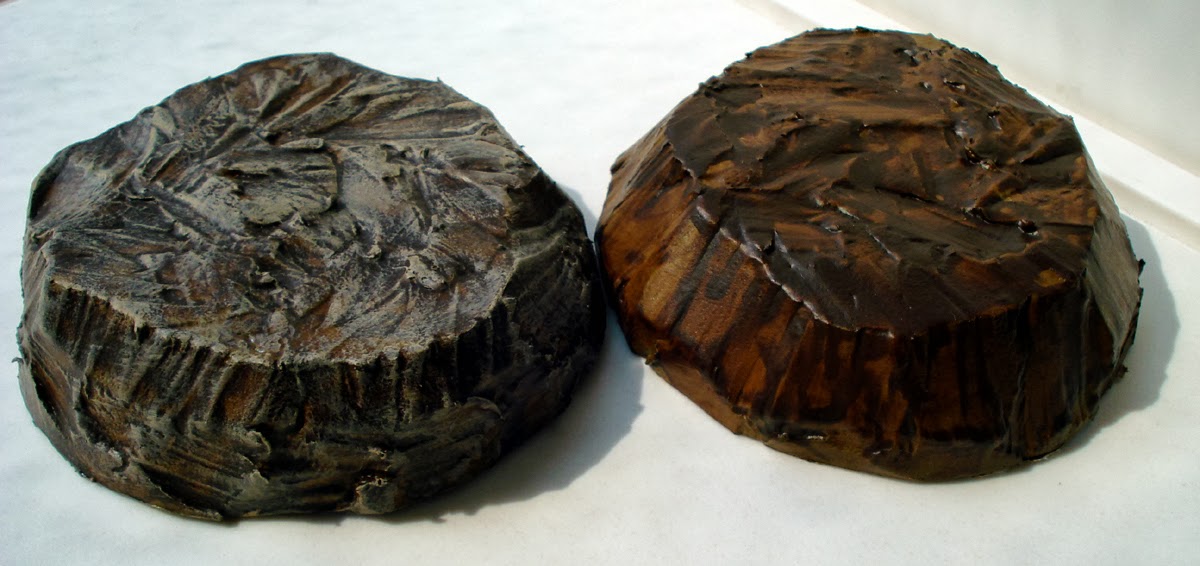
The material was soft however. Using some acrylic paints for canvas and a few coats, I was able to layer on a decent base coat that was more flexible to prevent excessive cracking. A simple wash also brought out more of the crevices and cracks within the cut foam.
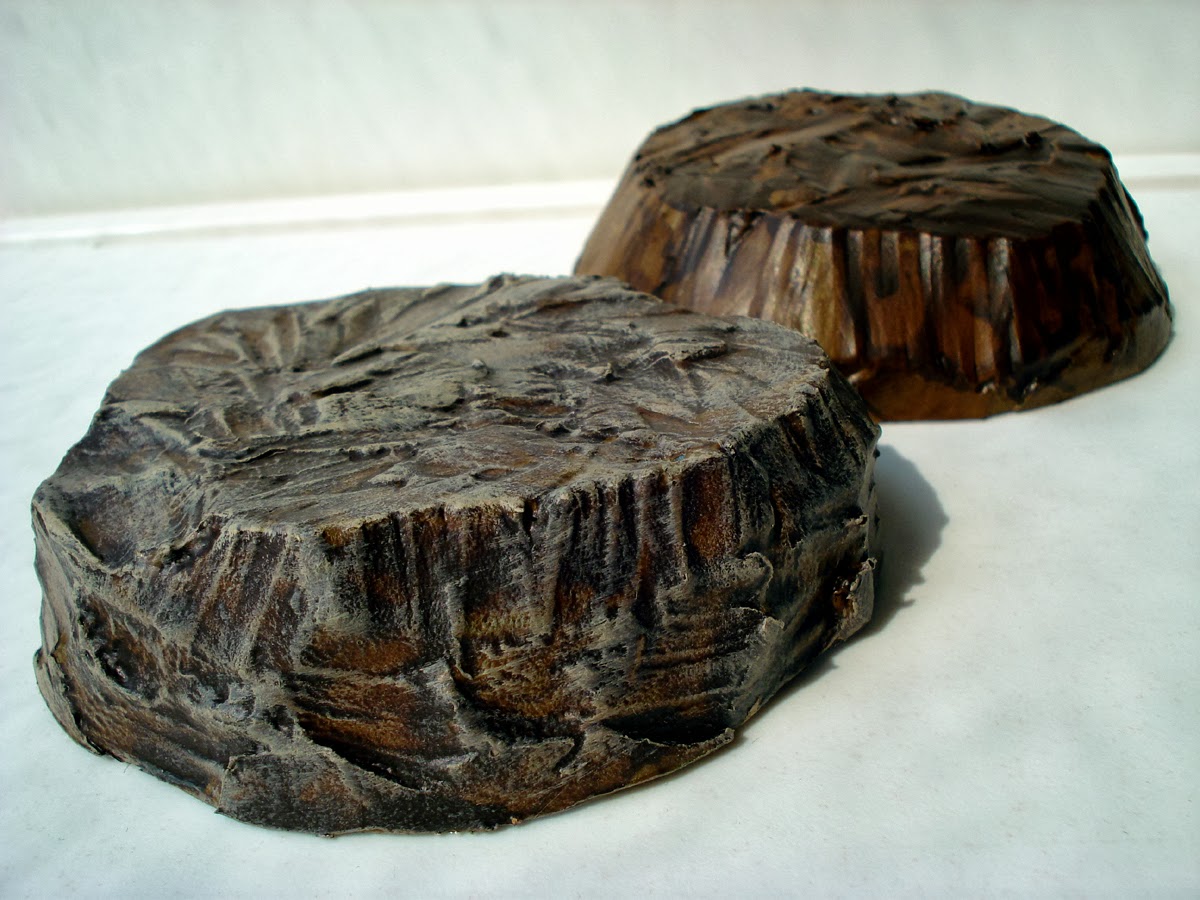
A final drybrush really highlighted the texture of the hills. In the image you can see a comparison side by side between a base coat with a wash and one that has been drybrushed. It’s a basic project that turned out pretty well. All it took was a few base coats, a quick wash, and drybrushing. Three basic techniques that can provide you good results in record time.
15mm Sahadeen troops
So I’ve been dabbling in 15 mm sci-fi models a little. I’ve been really lucky being able to get models shipped overseas through Rebel Mini’s directly. As I posted earlier, I worked on a platoon of Earth Defense troops that painted up pretty well.
This time I got some other troops from the Sahadeen line. I like them as they make pretty good rebel forces or some type of irregular troops. I might try dabbling with different tech troops and having some models on the lower end of that spectrum would be nice. One thing I’ll admit, I’m still stuck in the mindset of base coats with washes and highlights. I really should try just sticking with emphasizing highlights through drybrushing with bright contrasting colors. The colors on these guys are a little muted with a single wash.
What I like about these sculptures is that they’re based on the Earth Defense models, showing some armor, but have a type of cloak over them. This gives the models a little more flexibility in the type of troops they represent. I can make them a high tech mercenary group, or make them poorly armed insurgents, all depending on the wargame ruleset.

The troops have pretty good detail on them. I’m a tad lazy though as I liked using a single wash for the mini and then going back to dry brush a few details. I decided on a simple ballast flock for the bases. I think with the color scheme of the figs this type of flocking material goes well. However, I had to give another coat of matte finish to help with keeping the material sticking on the base.
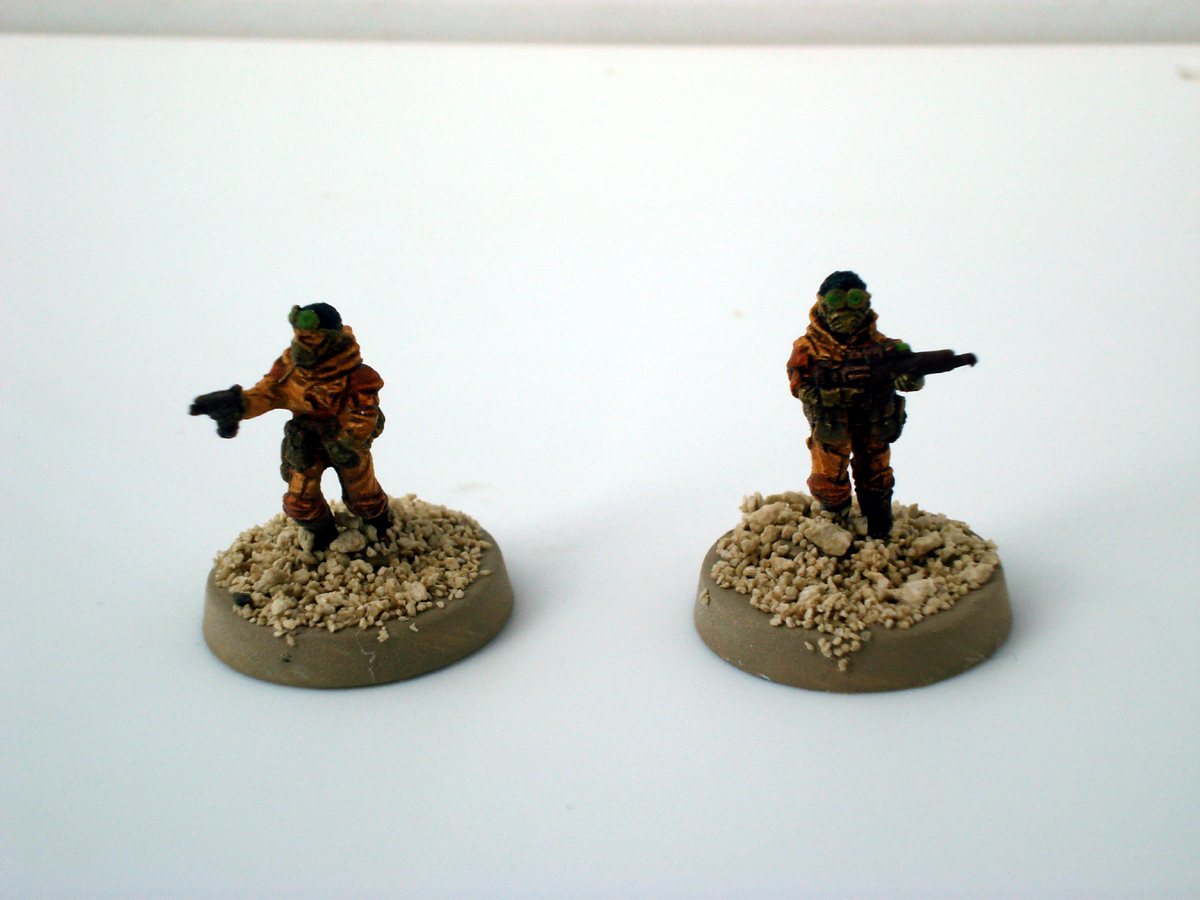
You’ve got a decent variety of poses. With most of the command troops being armed with pistols. I’ve opted assuming they are machine pistols, treating them as a type of SMG.

The squad assault weapon troops are pretty nice with big meaty guns. I like the goggles they have also.

I also picked up some heavy weapons models. This sniper team below I ended up putting on a larger 25mm base.

Below is another NCO-type of leader along with a rocket launcher trooper.
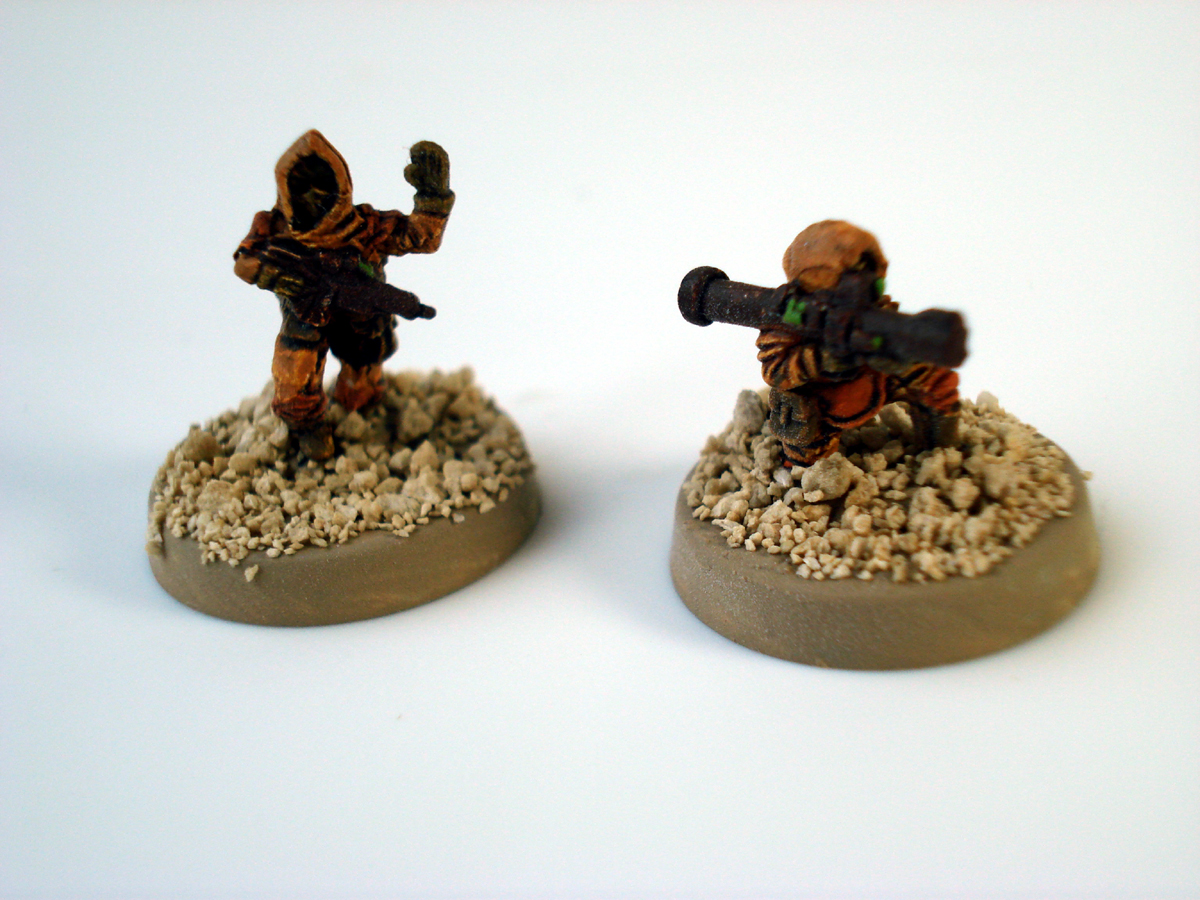
For this platoon I put them on a 20mm plastic base. It’s a tad large but I like them as there’s plenty to grip moving them around. I might go back to a few and add more detail to some of the bases. Having it just a bit larger allows me to throw in some details without making the base too crowded.
Modelmates weathering wash
Usually for my tanks and such I’ll give a drybrush of brown paint to simulate mud and gunk that will pick up on the wheel guards and treads. It’s a simple technique that gets a decent effect. I never really dabbled in weathering pigments much. Then I heard about this nifty line of products for washes from Modelmates.
Modelmates translucent washes come in a variety of pigments that are really nice. A big plus for me is that they can be diluted and cleaned up in water. So I decided to pick up a bottle and try it out. I got the mud brown color wash. They come in plastic containers with a small bead inside to facilitate mixing. The top has a sloped funnel lid to allow excess paint inside the lid lip to drip down back into the pot. The manufacturer recommends trying out the wash on a section first for testing if painting on plastic, as the wash themselves have a little solvent in them. Apparently for some plastics this can be an issue. I think for the typical plastic used in model kits this isn’t a problem, as I didn’t get any peeling of paint or pitting of the model surface.
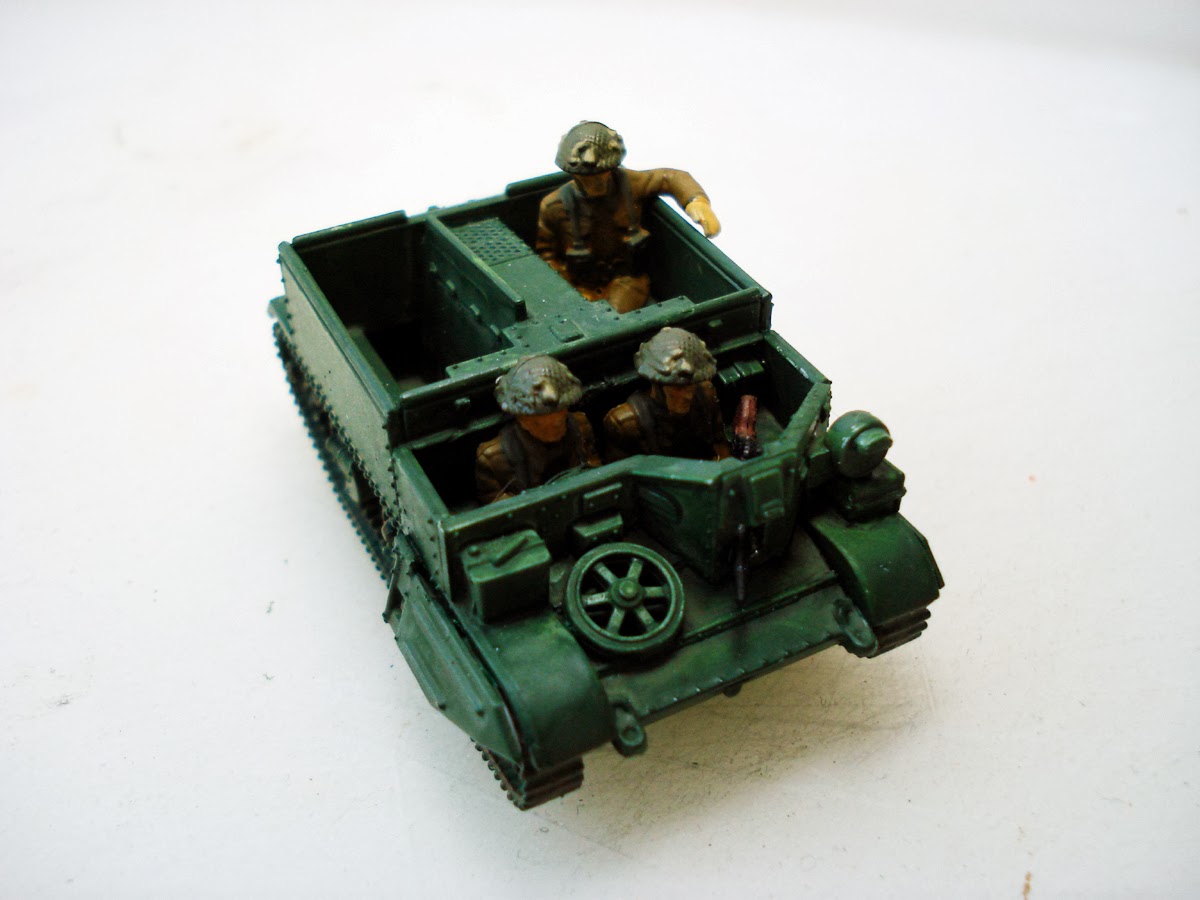
I dabbed a bit over the wheels and let it set in, followed up with a matte spray coat. I’m really impressed with how the weathering wash looks and it’s a breeze to apply. Here is a bren carrier I’ve been working on. The carrier on the bottom had just a drybrush of brown for mud, with the carrier on top also having a coat of Modelmates weathering.

I would certainly have a lot of water on hand and use a crappy brush. I’ve heard that while it’s water soluble, it can gunk up your brushes and will dry pretty quickly as the solvent evaporates. So having water nearby to rinse out your brush every tank tread or so would likely help in keeping the brush intact. With weathering, it really added a lot more depth to the basic treads modeled on the side of the carrier.
I’m really happy picking up this weathering wash. Likely I will check into picking up other shades, especially if working on an African-theater platoon, as the dust colors look really nice. They are a super easy way to dress up a basic paint job. Best of all they seem easy to work with and cover well over acrylic water-based paints.
15mm Earth Defense marines
A way back, I was pretty deep into 40K but several moves and a lack of desire to play meant I dumped my minis and rules long ago. Occasionally I get a pang to jump back into it again but that passes within 5 minutes and I gleefully go on to collecting and painting other stuff. I’ve got a fair collection of Flames of War armies and been really enjoying painting up Firestorm Armada models and terrain (not to mention Bolt Action). Lately however I’ve gotten this serious itch to get back into sci-fi skirmish gaming.

I’ve picked up a few rule systems over the past year and will likely get a few more reviews (or thoughts) up on the different rulebooks. A bit slower has been the accumulation of minis for actual forces. Rebel Minis has some nice stuff that is very reasonable and also have platoon sets which is great for filling up a decent size force pretty quickly.
I’ve got about three different groups I’ve picked up. One group are Earth Defense Marines, a pretty standard soldier type group with a decent range of heavy weapons and command figures available. above is a pic of the figures primed (next time I’ll throw a basic wash on the figures to give a bit more detail).
I decided to embrace the idea of a single wash and went with a nice shade of green ink. Base coats of varying colors, including a light gray for the weapons, seemed to work well with the single wash. A final drybrush on the armor and a dab of lighter color for the helmet visor was given as a final touch.

I snagged some 20mm round plastic bases that fit the figures pretty well. It’s a bit more area on the base than I’d want, but when flocked it tidied up nice. Another big plus is that the bases are a tad less finicky when handling and shuffling around the tabletop. I’m pretty happy how they turned out. Sadly I just didn’t really get into the detail much on the figures. These EDM minis really have a decent amount of detail for 15mm. Certainly has me itching to get some more squad skirmish stuff going.
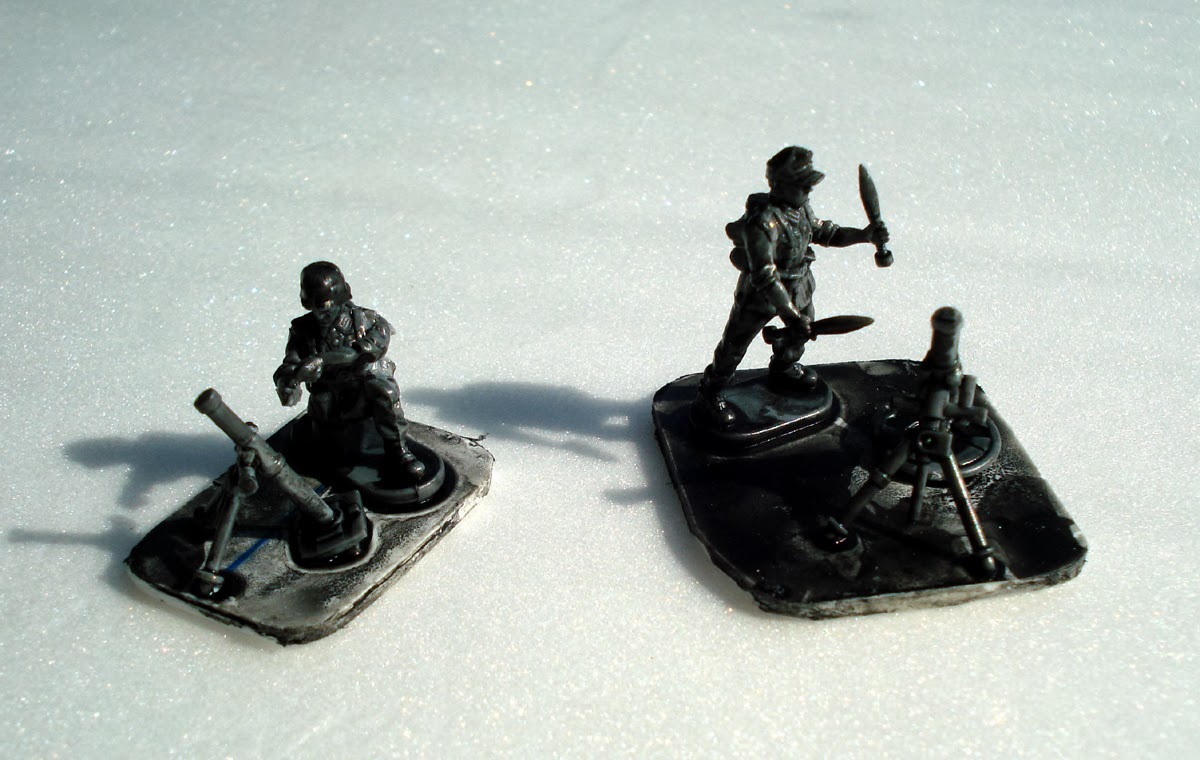
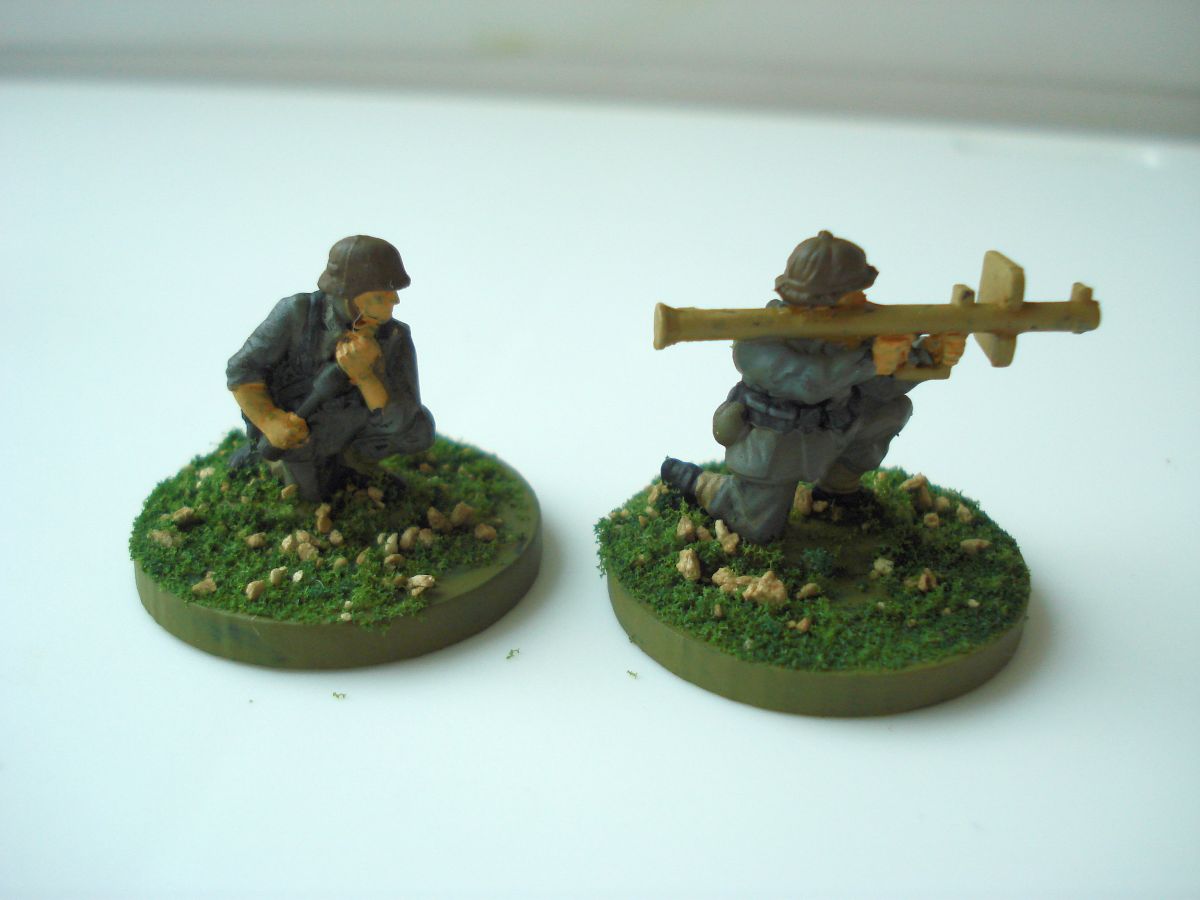
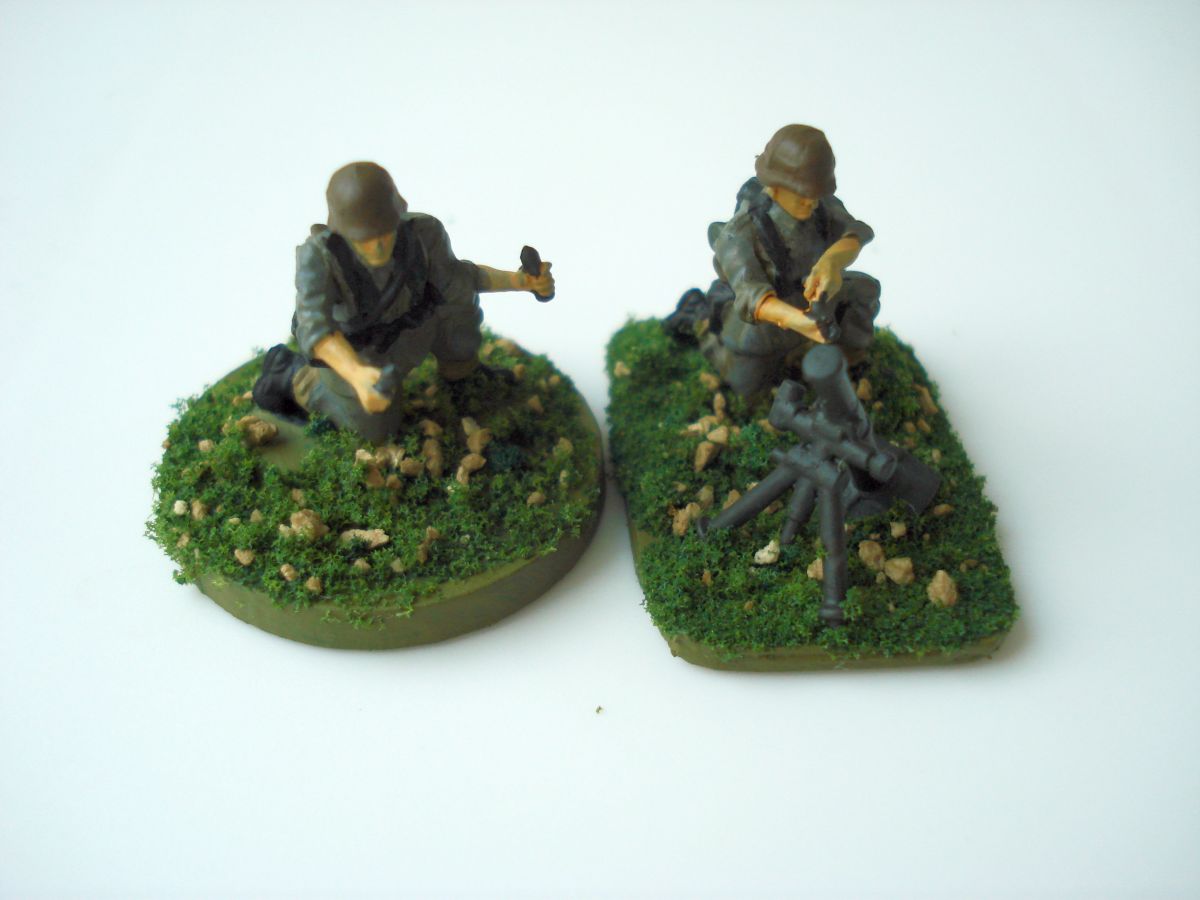
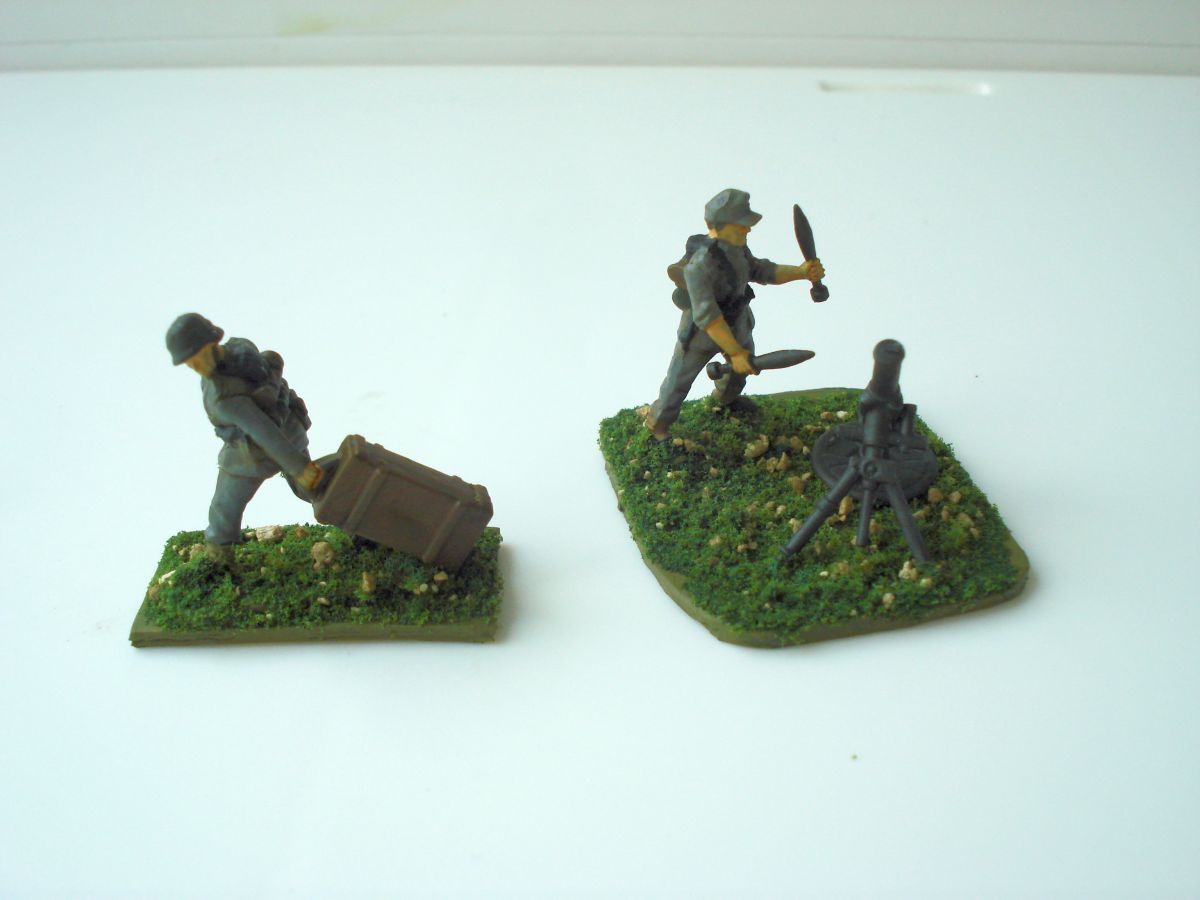
Plastic Soldier Co. – German heavy weapons

Some time ago I posted on some German infantry I’d gotten from Plastic Soldier Co. As I was wanting some other specialty units, I opted to also get some German heavy weapons teams for my force.
The 1/72 scale figures in this kit are well done and have a nice amount of detail, just like the German infantry minis. There are 6 troops armed with panzerfausts for some extra AT options. Aside from Panzerschrecks there are multiple models for 8cm and 12cm mortars. There are also MG42 teams with tripods in the set. While I think some of the multiple teams are redundant for your typical Bolt Action force, there are some theater selector lists that allow for more heavy weapon units. I also suspect that upcoming scenario books for Bolt Action will have some expansion on the limits for particular team weapons.
I am hoping this company considers going into 28mm more. While I think some of their model kits are a tad lackluster at larger scales, the German kits are great and would likely be a very competitive buy over other manufacturer’s models.