Category: Miniatures
Game Nite – Board games in Saint Louis
I’ve gotten some more opportunities to check out the options of board game stores in Saint Louis. Another popular haunt, especially for wargamers, is Game Nite. They carry quite a large selection of board games and miniatures. GW is pretty popular as well as Infinity. But other games like those from Privateer Press are carried also, in addition to paints and modelling supplies.

They have an expansive collection of board games and card games. Interestingly they also offer shelf space for used games. I imagine it’s more of a consignment system, but they allow for folks to unload older games. It seems worth giving them a gander too, as most of the offerings are near mint or lightly played. A great way to pick up on stuff that wanes in light of the ever-changing BGG hotness of the month.
There are also a fair number of tables for in store gaming. Not only are tables set up for miniature wargaming, but there are several tables for card and board games too. Both the weekends and weeknights look to be popular times to visit. I do believe that priority is given to people wanting to run organized events, so plan ahead accordingly if wanting to run a game for just your friends.
They also have a decent sized game library. Combined with ample table space, you’ve got plenty of opportunities to try new games out. Or potentially consider trying a game out before buying it. Pretty nice aspect of the store.
Game Nite is a good place to visit for board and card games (even for the miniature wargamer too), and certainly worth checking out their calendar of events to see if anything tickles your fancy.
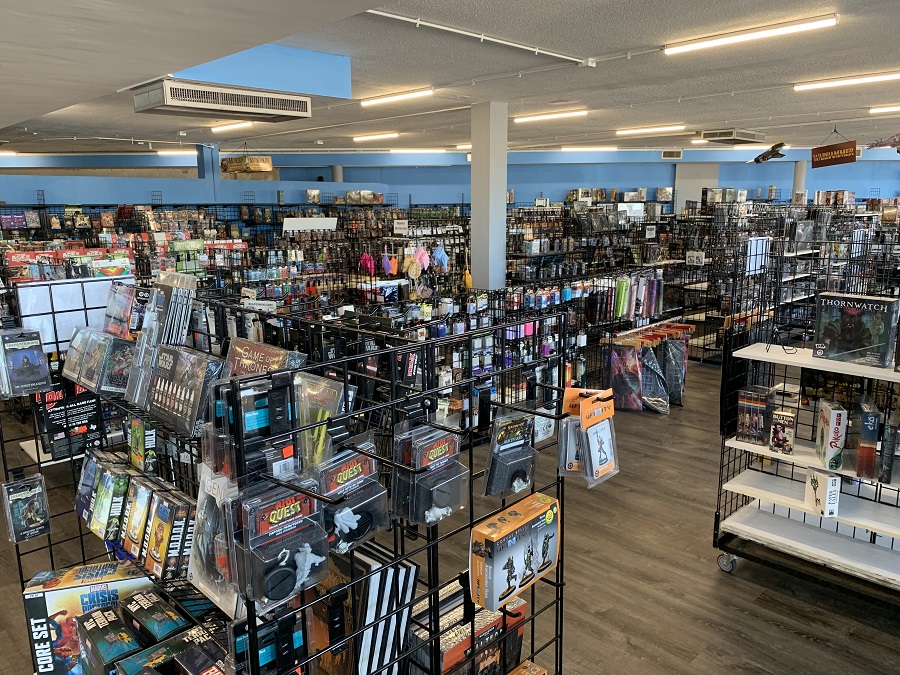
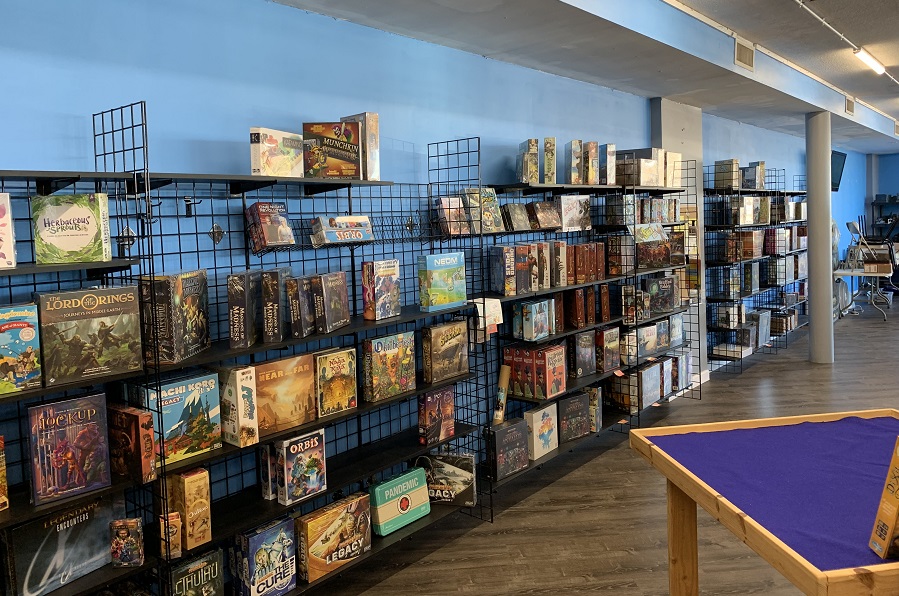
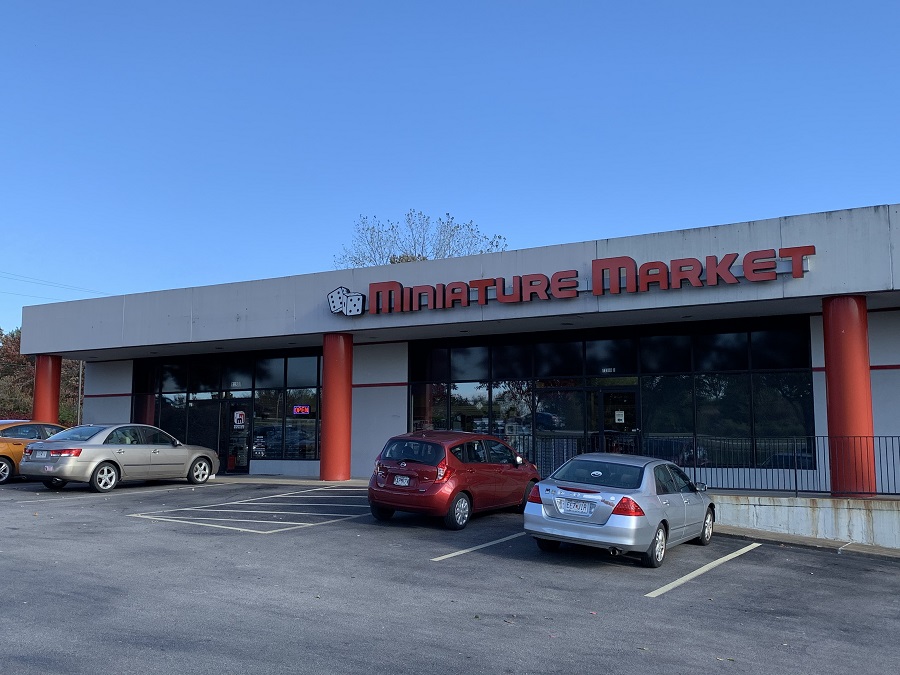
Miniature Market – Board games in Saint Louis
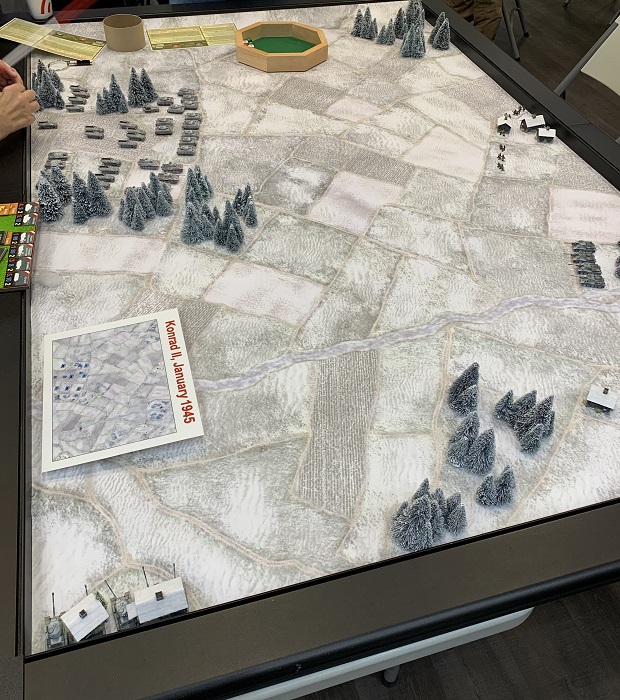
It’s a new year and big changes for me as I’ve transplanted myself from Korea back to the US. Gaming has been on the back burner for a few months but now that I’ve gotten settled some I’ve been peeking a bit on local gaming haunts. Miniature Market was high up on my list as it’s got a pretty big footprint as an online store. I was able to swing by the shop finally and have to admit I’m pretty impressed.
They have a large selection of board games and also cater to the miniature wargamer too. Aside from a lot of GW, Malifaux, Infinity, a smattering of Bolt Action, a wide selection of Reaper Miniatures among other stuff can be found on the shelves. In addition to paints and supplies, they also carry quite a bit of terrain. Well worth checking out if gaming with miniatures is your bag.

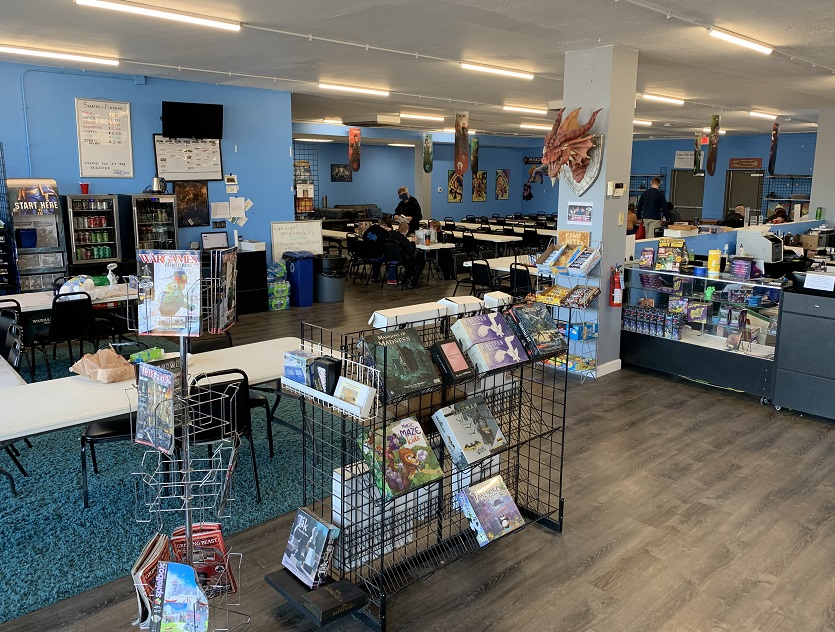
They carry a wide selection of board games and card games. Not to mention a well stocked bookcase of RPGs. I’d say most of the physical store delves more in the new hotness on BBG. But you can find some older gems, and I understand it’s always worth asking the staff about a particular game as it might be in the warehouse (or check their online store). The staff always seems helpful and engaging. I quite liked them being proactive asking if I needed assistance instead of being holed away behind the register as I wandered around the store.

The store also has quite a large dedicated space for gaming with several open tables that is well lit. They also seem to have a pretty active schedule running events every weekend and weeknights. I’m impressed with the amount of space available for in store gaming. Keep in mind they try to cater to folks running organized events. You could likely get some space to meet with mates and play a game for the afternoon, but understand that priority will be given to people registering on their calendar of events.
It’s a well stocked store, with lots of opportunity to get a chance to meet people and play. If running through the Saint Louis area, Miniature Market is certainly a place to visit.

Mantic Games Ghouls
Now that I had gotten a few warbands together for Frostgrave, I wanted to round out my collection some with extra creatures. Looking for appropriate models for ghouls was a challenge, especially those that would work on a budget. I was able to track down a few loose sprues of Mantic Games figures for their Kings of War line.
The minis are pretty nice and offer an overall feel of the model scrambling forward in a full out run. It’s not some figure making a static pose. These look like they are hauling ass towards someone. While they don’t have a lot of variation, I like the lively action the figures portray.
I gave them a quick coat with a wash and a bit of drybrushing. You’ll notice I steer away from your typical ice and snow covered scheme. I use an alternate world for my Frostgrave games. Mostly to stretch out the figures I already had for other systems.
They assembled well and you could easily swap out heads and torsos from the legs. The minis appear to be impaled with knives and other hand weapons which are jutting out from their arms and legs. The figures also have a fair amount of ripped clothing and cloth which break up the skin. Easily you could put more detail on the clothing to make them stand out more over the model’s flesh. I just went with a simple color scheme though.
Decent detail, easy to assemble, and a good price. Worth picking up for Frostgrave critters.


1/72 Armourfast StuG III
Deciding to field a German infantry platoon for my games I liked the idea of having more typical armor that would support them. Hence for my late war platoon I went with a Panzer IV. However I was keen to have some other options so I felt and assault gun would be ideal.

Armourfast offers some nice armor for 20mm and their Sturmgeschütz III (StuG III) certainly keeps in line with many of their other kits. It is an easy to assemble model with a fair amount of detail that is a great value for wargaming. The model sports a 75mm StuK 40 L/48 gun so it’s more of apt for mid-late war games. The assault gun also comes with separate schürzen side skirts that can be left off if desired.

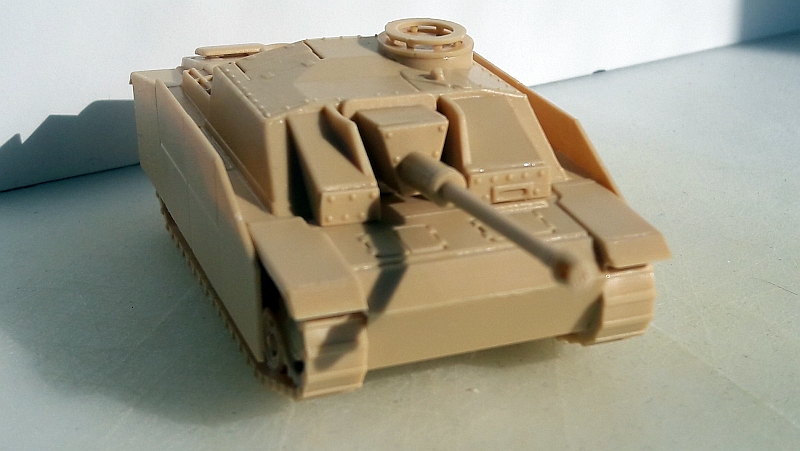
However if leaving off the skirts you should be forewarned that the hull has pretty large gaps even with the tracks mounted. You likely will have to fill them with some squadron putty as they are fairly noticeable. There isn’t much stowage bits but there are a few spare tread wheels.


Aside from the hull track sides, the parts of the kit fit well without excessive gaps, and is a snap to put together. All in all it’s a fairly good model. As most Armourfast kits you are not going to get a super detailed model fit for dioramas. Yes there is a decent amount of detail, yet certainly nothing stellar. But you get 2(!) tanks per kit and having the option to field a StuG with and without skirts is pretty nice (or on both if you wanted). They are an exceptional value and great for 20mm gaming that will look good on the table.

Desert bases using talus
Slowly been painting through my Perry WW2 British. I decided to work them up as the 8th Infantry Division from the British Indian Army. Partly as the 8th Division had action in the Middle East, North Africa, and a good chunk throughout the Italy campaign. And partly because for WW2 North Africa, it’d be cool to work on something different as UK commonwealth force instead of your typical British 8th Army.
I was in a pickle somewhat with how to model up my bases though. Typically I use a simple flock technique but wanted a different texture that would fit in with a desert theme. I decided to use some railroad modelling talus which I’ve used on my 15mm Sahadeen.
The problem is even though they look nice, the material is a bit fragile. Even with a good amount of PVA glue you can rub it off. For 28mm figures I’ll have more material on the larger bases and regular handling during gaming means more of the talus flaking off.
To work around this I decided to add some superglue to the talus. For my Algoryn this worked great as the modelling material easily adsorbed excess glue. For my Indian troops, I used a PVA mix to initially get them based, then gave the models a coat of primer and a base coat. I finally followed up with adding instant curing glue to the textured bases.
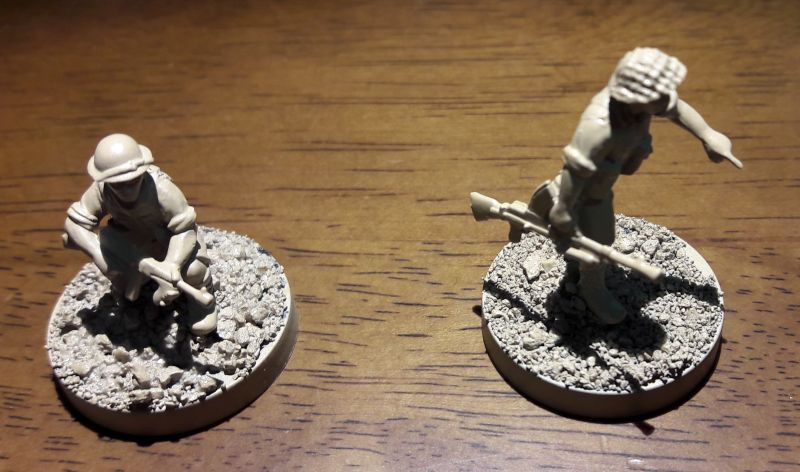
For the most part it looks okay. Above the figure on the right has the talus adhered to the base only using PVA glue (after a spray base coat of paint), while the one on the left has been coated with superglue. Comparing the figures above, you can see the base material for the left mini has some glossiness compared to the right. There’s also a subtle lack of texture compared to the right figure that just has PVA glue. It’s not too noticeable after a good drybrush and will be even more so after a layer of matte sealant. However if I were to do it again, I’d coat the talus with superglue first before priming.
Regardless they look pretty good. I’ll be sure to give a more step by step paint job post once I get through the platoon.

Painting Miniatures: Games Workshop Contrast paints
I am not a fan of Games Workshop paints. They are good quality paints but are overpriced. Additionally (and can say this after using a new set of paints recently at a convention) the design of the pots are poor. While the lids allow for applying paint to the brush, paint also pools up on the lip tab and it gets difficult to get a proper seal closing the pots. Seems after time you are either going to have to scrape out a bunch of paint from the lid seal or you’ll have problems with your paints drying out (who knows, maybe the pot design is intentional in that regard).
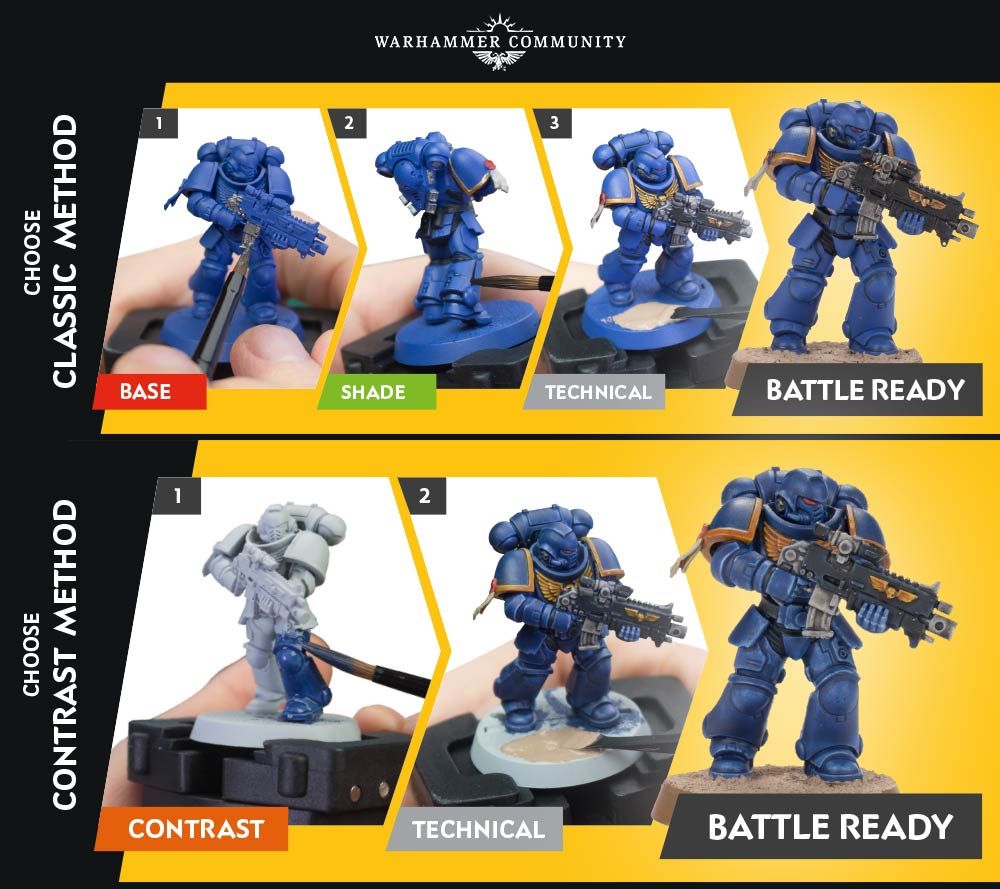
Nonetheless, GW has introduced a new paint line which has piqued my interest. For folks new to the hobby it might be worth checking out. It appears the paints have a glaze medium already mixed in. In effect you get a thinned coat of paint along with a wash all in one go.
I love this. New miniature painters should certainly be looking at these paints. There is a learning curve using them, one of which is using a specific type of primer. While I balked originally at this, I discovered not only are spray versions available but also primer that can be brushed on (providing a lot more functionality of the paint line).
There is some technique to working with them, applying darker colors, then prime and paint sections you want to have a lighter color. A good coat of varnish is needed. Lastly it looks like applying thicker, heavier coats for the contrast paints are the way to go.
You end up essentially applying both a base coat and a wash in one go. Throw in a light highlight or conventional drybrush, you’ve got a tabletop standard paint job. For a slew of rank and file models this looks like a great product. I’ve suddenly got a positive feeling about finally tackling all my Zombicide minis.
Honestly the results using these paints look promising. While it won’t give you a super fantastic paint job, with careful application you can get decent results and save a bit of time essentially cutting out steps to apply washes. I’m excited to see this out there and hope it opens up more people to taking a stab at painting minis.
Painting Miniatures: Varnish
This is the last post of my miniature painting series. Last time we touched some on varnish, especially if using flock on your bases. A critical final step for your miniature is sealing the model in a coat of varnish. Even with a good coat of primer, typical handing of your mini during gaming can cause the paint on your figures to rub off.
With a varnish coat, you can protect your models and have them keep their amazing paint job for years. There are two routes people go with varnish. Some use a gloss spray, and then give it a quick layer of dull coat. I go the lazy route and simply use a single coat of matte varnish spray.
I’ve used more expensive stuff for models like Tamiya and Testor’s, but found Krylon a good choice. Like spraying on primer, you want to mix the can well and do it in weather that is not too cold. Go for an even coat, spraying not too close to the figure, and making sure to cover all the angles of the model.
A matte spray varnish will dull shiny paint jobs. Something that can happen if using ink washes. The varnish will also act as a sealant and adhesive for flock on the bases of your mini. There is one critical point with giving models a coat of varnish though, beware of humidity.
A decent amount of humidity can result in a horrible white misting or ‘frosting’ on your mini. There are some ways to restore your paint job if this happens. However it’s best to avoid it in the first place. If worried about humidity, you can paint a popsicle stick black and give it a test coat of varnish to ensure humidity won’t be a problem.
If you live in an area that has months on end of high humidity, you can try using a brush on or airbrush varnish. Vallejo matte varnish is formulated for airbrushing. However I’ve thinned it out and used is as a brush on varnish too. It will give your figures a slightly glossy look if applying by brush but provides a good protective coat.
That concludes my painting tutorial series. It’s an enjoyable hobby. While it might be daunting when starting out, if you stick with some key techniques you can produce some nicely painted figures. Just an even application of base coats, a wash, and highlights, you can get several miniatures done that can certainly rise up to tabletop standard. So don’t let painting anxiety keep you shackled to pushing around unpainted plastic. Get cracking and spend some time at the paint bench!

Painting Miniatures: Bases
So we’re pretty much getting into the home stretch of this series. Last week I talked some more on highlights. This week I want provide some tips on the final part of your miniature paint job, the base. Flat out you need to give your miniature bases some attention. It can be quite jarring to do a fantastic paint job on a mini only to have it sitting on a flat piece of plastic covered in green paint.
Your main tool with sprucing up your base will be PVA glue (aka white craft glue or Elmer’s glue). Adding a good amount of water you want to thin out the glue to a consistency of milk. You can add some sand to this to give it more texture. Then carefully paint the glue-sand mixture onto your base.
Once dried, give the model base a simple coat of paint and then drybrush with a lighter color. The small bits of sand will have enough of a rough surface to gather up the lighter highlights. This can work well if you want to mimic asphalt or concrete. If your base has a lip, I suggest only focusing on the top surface. You can add texture to the sides but wear and tear from handling miniature will commonly result in material getting rubbed off some.
If you want rougher texture, the base can get a coat of watered down glue and then dip the model into a small jar of sand. Gently tap the bottom of the figure to remove any excess and set it aside to dry. The sand texture can be painted over and then drybrushed. This works well if you want to mimic grass and rough ground.
Personally I bypass the dipping in sand and go the route of using flock. Flock is a railroad modeling material which mimics vegetation and comes in a variety of colors and textures. I paint the base with a solid color. Then I give the surface a coat of watered down PVA glue. Finally I carefully set the figure in a container of flock. Tap off the excess, let the glued on flock dry, and you are good to go.

Eventually you will be giving your model some varnish which seals the flock even more, but in general once the glue dries it’ll be pretty set. Note that the flock will rub off if you run your fingers over the surface. But the glue will give a good adhesive base to the flock. With normal gaming wear and tear, I’ve done this with figures and had flock stay on my mini bases for decades.
If you want an even more textured surface, you can use railroad modelling talus. This is a clay material with rough edges. It can work great representing rough ground and rocks. I usually add some to my flock to represent the odd stone or two. Like with flock you can set it using watered down PVA glue. Be mindful though that it’s a little more prone to rubbing off.

If you want a more solid bond, you can add drops of superglue to the talus. As the material is clay and porous, it will draw up much of the glue. You may get some pooling and a little bit of a sheen to the base. However the stuff once dried will be rock solid. You can even paint over the material and drybrush to represent grass or other rough ground.
Painting Miniatures: Drybrush and Highlights
The previous post I talked some on washes and shading. I’d like to move on discussing a tad more about drybrushing and highlights. Drybrushing is a subtle technique. To use it best, you want to be patient and work on multiple layers of lighter and lighter colors. It can be a time consuming process but eventually you’ll get wonderful results adding a tremendous depth to your miniature.
I suggest when adding highlights to work with a strong lamp or paint in copious amounts of natural daylight. You want to use the light and how it catches details on the figure to select areas to highlight. Those parts that capture the natural shadows and deep recesses you want to skip, and instead identify the edges of the mini that hold the light. When you touch those areas with a lighter shade of color over your basecoat, they will dramatically emphasize these raised parts, adding more contrast and give the miniature a more life-like look.
Even if using a drybrush as a base coat of sorts, you can use different shades to add more highlights. For chain armor, a fair technique would be to drybrush a metallic shade over base coat of black. But by using a brighter silver color on areas like the shoulders of a miniature, or edges of a sword, it’s possible to squeeze out more detail.
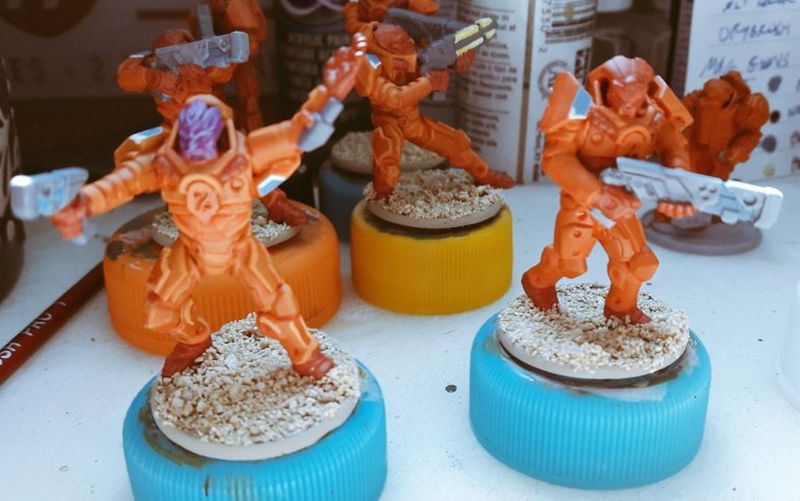
A slightly different take on drybrushing is something I call high contrast highlights. Here instead of dusting edges with paint, you add small lines of lighter color on edges of the figure. You are going for stark contrasts instead of a gradual layering. Unlike drybrushing, you want to do this before applying a wash. Shading after helps blend the colors some. It is a great tool for speed painting instead of traditional drybrushing and blending, but has some limits. In the pic below you can see the figure on the left has high contrast highlights, while the figure on the right doesn’t. Looking at parts like the legs you can see the armor standing out more compared to the figure on the right, where the color of the armor is more muted.
Another type of highlight which can add a fun look to your mini is Object Source Lighting (OSL). This is adding highlights of stark contrast colors to mimic light emitting from a source on the mini. Blending is pretty much a must here. Pick a part on the figure that you picture emitting light, then add the lightest color to that area. Raised edges and other areas on the figure that you think would catch that light source will have darker shades of that same color. Avoiding deep recesses, you want to pick out the edges that would collect the imagined light and use a darker tint compared to the one used for your ‘source’ of light. In the undertaker figure below, you can see how this high contrast highlight is used to create an OSL-like effect from the lantern.

OSL is something you want to use sparingly, but for some details like glow effects on weapons or ship engines. It’s a fantastic little effect that can add so much to a mini. Next post I’ll cover the final step to your paint job, miniature bases!
Painting Miniatures: Washes and Shading
I’m going to spend the next few posts adding a bit more to the 3 basic techniques I covered last time. I’d like to focus some more on washes and shading. If you want to quickly add something to a basic paint job to make your miniatures stand out, adding a wash will offer more than drybrushing. So if you wanted to add a little bling to your board game bits and didn’t want to throw in a ton of effort, a simple wash or quick shading will do wonders.
A basic means of making a wash is to add water to a paint thinning it down. You are going for a consistency of paint that is very fluid like water. This will add just a tinge of color to upper edges but allow more pigment to pool in the recesses and deeper details. This is a pretty simple means to make your own wash, bypassing the need of purchasing dedicated washes.
I first have to offer an excellent overview of shades, inks, and washes by Dr. Faust’s Painting Clinic. He covers one issue that can creep up sometimes when doing washes, especially if just using thinned down paints. Occasionally you can get an uneven layering of color due to pigment depositing higher up on miniature details as the wash dries. This usually crops up in smoother transitions of detail like tunic smocks and cloaks. It also is more common when covering lighter base colors with dark shades of brown and black.
One way to get around this is creating your own special wash mixture of Wet Water. Use about a drop of soap per 1-4 ounces of water in an empty bottle. This results in a solution with reduced surface tension, allowing for more uniform mixes of wash. Be sure to add soap sparingly. Too much and you’ll get foaming. A tiny amount will provide just the right amount of surfactant needed. Using this to mix on a palette in place of regular water, you end up with a wash that has a more uniform flow of pigment.
If you are using a particular color repeatedly, you may want to consider making your own wash solution diluting with wet water. That way you can simply get your wash directly from the bottle. If you have a lot of figures to go through and want the most consistency, this is a good option. However you may want to consider looking into purchasing washes if you have a pile of figures you want to paint in a similar scheme.
Inks are similar to washes, except the pigment is more intense. They are excellent if wanting to impart more color to your shading, particularly for brighter colors. Like with paint washes, you want to dilute out inks quite a bit as even diluted they can provide a lot of color. Glazes can be used for shading but work more for blending colors. Glazes are a great means to add subtle transitions of color like folds of cloth on a miniature. One thing about inks, you might end up getting a gloss shine to a figure. Don’t panic. If you are following through all the steps of miniature painting, using a matte varnish to seal the figure will cut down any glossiness from ink washes.
A good technique for working with washes is to use different colors for sections of your figure. Using different color washes can bring out a great amount of detail to add some intensity to parts of a model. However single washes with neutral tones can provide a fairly easy means to add shading to a mini.
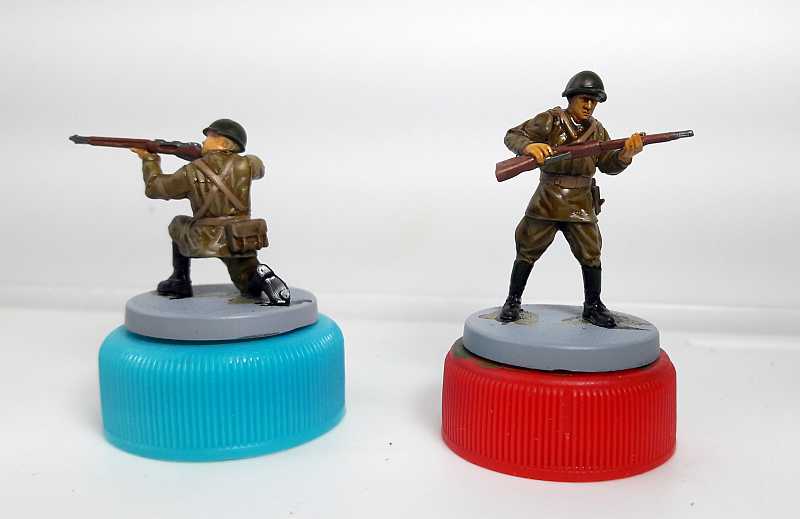
I highly recommend getting some Sepia Ink for miniature painting. This is a fairly neutral shade that you can use as an entire wash for a miniature. For flesh tones this can add a good amount of color to faces and still work well for clothing. You can see with some 28mm Russians below, just a single wash of sepia ink can bring out details on faces and add some shadow to tunics and clothing. Instead of working with various brown and green washes for these figures, a single wash of this neutral brown works well enough.
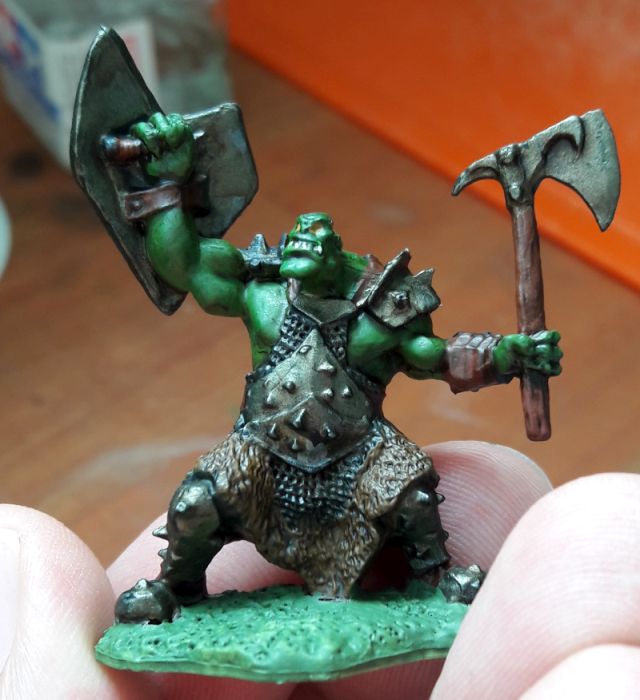
Be mindful though this can sometimes mute your colors too much. You can see with the orc below that a sepia ink wash certainly imparts a dingy look to the figure. However it also lessens the transitions of color like from the skin to layers of the figure’s clothing. Sometimes this is an effect you want to go for. But if looking to emphasize portions of a miniature, you have to put extra effort into blending and highlighting those parts when working with a single wash.
[EDIT: So Games Workshop has introduced Contrast Paints which look like an interesting product. They might replace the need for washes entirely. For new painters or people looking to get a slew of minis painted to tabletop standard, these paints might be worth a look.]
