Continuing my efforts in completing a pile of unpainted plastic, I took a stab at Daredevil. This time I completely embraced using Xpress contrast paints by pretty much using them for most of the uniform. I love the dark hue of Vallejo Xpress Velvet Red and think it pretty much gave a great look to his costume just using a single coat.
To make Daredevil’s chest symbol and baton webbing stand out more, I put down a coat of Vallejo Red. For his skin, I used a coat of Vallejo Dark Flesh.
The baton cable I put down a coat of Xpress Templar White, and painted some of the underside sections with Vallejo Basalt Grey.
For some final touches, I gave the skin on his face an Army Painter Strong Tone wash. I also mixed a 1:1 of Xpress Velvet Red and Vallejo Red to paint the underside of the baton he was holding, along with some parts of this thigh webbing. As a last touch, I dabbled in using GW contrasts, using Ratling Grime to give the tombstone and sections of the base some detail. I also went over underside sections of the baton cable with that dark contrast, to add just a little more to it.
The final result isn’t going to win any painting awards. It’s a pretty slapdash job. But oddly I think it just works for Daredevil. Despite the name, he never felt a flashy character and the muted, basic look to me fits with him being a street level hero, keeping Hell’s Kitchen safe. Good enough for the tabletop I think.
Continuing my painting exploits, I’m just about done with the core set and moving on to some other models. Yet, I’ve still got a few Avengers on the bench and Black Widow was next in the queue. As with much of my other models, I’ve really come to embrace Vallejo Xpress contrasts and started off giving her 2 coats of Black Lotus Xpress for a really dark jumpsuit look as one coat just didn’t seem to get as dark as I wanted (pic is with one coat).
For her webbing, bracers and belt, I put down a base coat of Desert Yellow. As a final touch for her belt and bracers, I mixed metallic Gold with sepia ink and used it as a wash for these sections of the model.
Her skin was a coat of Basic Skin Tone, and for Black Widow’s hair and eyebrows, I used Plasma Red Xpress.
I gave highlights in her hair a single pass of Amaranth Red. Then have both her skin and hair a wash of sepia ink. For the webbing I used a coat of transparent Yellow, and a final highlight of Deep Yellow. I went back and forth considering adding lipstick. Typically I’d add it to the lower lip only, but it was difficult to get it down just right, so I ended up just sticking with a natural skin tone.
I used Dark Blue Grey for the pistol grip and highlights for her jumpsuit. I first used a perspective of looking directly over the model and liberally coating portions of her jumpsuit that I could see. Then I edged it out some for these areas to break up the transition. This forced perspective allowed me to really key in parts of the figure that would naturally be lighter.
I used a generic red craft paint for the bricks on the base. Then a final coat of GW Ratling Grime contrast to pick out the details of the brick mortar and metal grill. Just a basic wash to give the base a little love and Black Widow was ready for the tabletop.
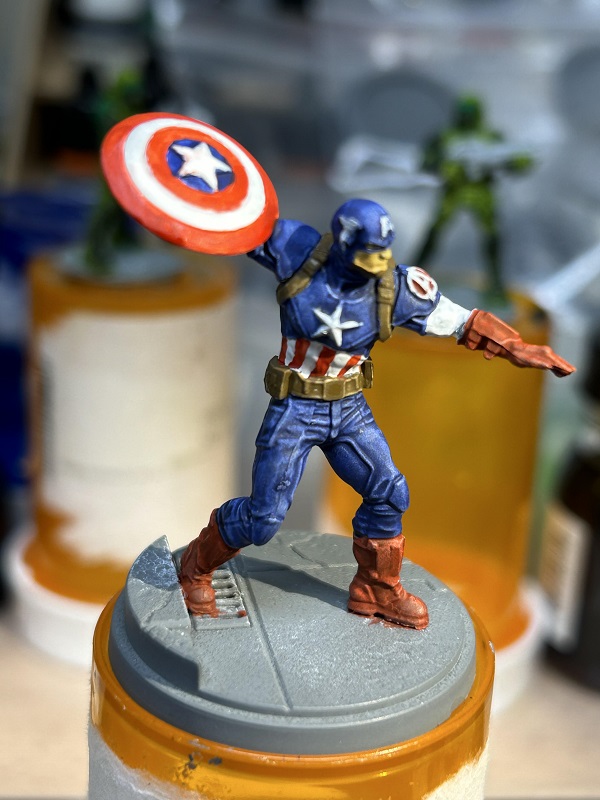
Last time I detailed my paint scheme for Captain Marvel. This time I’m going to go over the other Captain in the Marvel Crisis Protocol core set, Captain America. Like the other models I painted I primarily used Vallejo Xpress contrast paints (with Vallejo acrylics on other portions). A slightly different approach over your typical slop chop method, I painted a base coat of white over parts of the model. Cap’s waist, biceps, and outward section of the shield were all given a coat of white.
For the red used on the mini, I used Xpress Plasma Red. His gloves and boots were over a gray base coat with a liberal drybrush of white. The piping of his waist and the shield simply had stripes of red painted on. With a different undercoat, the red for these sections really stood out more compared to Cap’s hands and feet. I did have to go over sections of the shield a few times to clean up the stripes. I imagine a more careful hand could have done this easily, but it took me a few tries.
For the center part of the shield and the rest of Captain America’s uniform, I used Xpress Storm Blue. Painting it unthinned, I think it really gave a wonderful look to the figure.
For his face I put down a base color of Dark Flesh. The chin strap, belt and webbing got a base coat of German Camo Medium, with the buckles having a base coat of Gunmetal Gray. The underside of the shield I used Neutral Gray for a base coat.
A final wash of Sepia Ink over the belt, underside of the shield, skin, and webbing was added for a little more depth. I also gave his uniform highlights of blue with Ultra Marine. And for his gloves and boots, an initial highlight of Carmine Red and White at 1:1, with a final coat of Plasma Red Xpress.
A little attention to the base and a final gloss varnish was applied to the shield to give it a slight reflective shine. Good enough for the tabletop. Might move onto Ms. Marvel next.
Last time I covered my approach to Iron Man, next up on my bench was Captain Marvel. This time I used a more typical approach to contrasts using a modified slop chop method. I found that the Vallejo Xpress contrasts are really vibrant paints. GW contrasts needs that black wash to bring out the shadowed depth of color. With the Vallejo Xpress paints I could just use a simple white drybrush over gray primed minis. For other colors I used Vallejo acrylic paints.
For much of her suit I used Xpress Mystic Blue which gave her a lovely deep blue base. Note on the hands I was going for a fiery color, so I gave her hands and some of her forearms a white base coat.
For her sash, shoulders, and boots, I used Xpress Velvet Red. I also blended in Carmine Red for her shoulders and boots, and gave a simple highlight coat to portions of her sash belt. Her shoulder piping I used a base coat of Orange Ochre and blended in Deep Yellow. I also did this for her hair.
For Captain Marvel’s skin, I used Vallejo Basic Skin Tone for a base coat, followed up with a wash using Army Painter Soft Tone. Dead simple. Her hands I wanted a blazing look by giving a thin coat of Deep Yellow, followed up with a wash of Fluorescent Orange. I finally highlighted her hands and raised parts of her wrists with a Fluorescent Yellow.
I dabbled a little with an OSL effect using Deep Yellow thinned with Vallejo Glaze Medium. This ended up having some muddled results. For raised smooth sections like her thigh and chest, it turned out pretty good, giving a thin coat. But the medium was so thinned, for sections on her ribs, it seeped into the recesses of her uniform, instead of staying on the raised parts like I wanted. In retrospect, I should have done a quick drybrush first, and then touched up areas with the medium glaze to soften any harsh highlights. Regardless, she turned out pretty good. Next on the bench, Captain America.
I’ve had my Marvel Crisis Protocol core set languishing on the shelf for a while. Love the game and likely will get a review up sometime. But I eagerly assembled and primed the minis, but they sat on the back of the paint bench for months. In that interim I’ve been dabbling a little more with contrast paints and finally was able to pick up the Vallejo Xpress line. I really love these contrast paints and they have vibrant colors. For some minis they might not be a good fit, needing a fair amount of thinning to use. But for my MCP stuff they seemed a perfect fit to match that pop of comic book colors.
For Iron Man I decided to try a different approach that I typically use for contrasts, and gave the entire model a base coat of Vallejo gold. Usually I use the “slop chop” method. Take a gray primed mini, give it a thinned black wash, and then a strong drybrush of white. For the Vallejo contrasts I don’t even bother using a black wash, and instead just rely on white drybrushed over gray primed figures. However for Iron Man I wanted to try and get a slight metallic tint of red so I went with a gold base coat.
Over sections I wanted red, I used Xpress Velvet Red. I used it undiluted with a single coat. In retrospect, likely thinning it out more and doing multiple coats would have given a better candy apple paint job for the armor, but I was still happy with the results.
For the eyes, hand repulsors and arc reactor, I went with white blended some with Xpress Space Grey. Just enough to give a tinge of blue around the edges. I also touched up a few parts on the boots and legs with Vallejo gun metal for those few bits that had a different paint job.
I used a matte varnish to coat the mini and then later painted on a gloss varnish. This gave the figure a subtle shine. A little bit of detail on the base and I was done. A super simple paint job to get Iron Man ready for the tabletop.
I also found a site that does suit replicas. While it’s not likely a 100% accurate depiction of the Mk III suit, I thought it was good enough. And even better it had a lot of different perspectives to give you a good reference while painting.
From Van Ryder Games, Final Girl is a solo board game that plays out your typical slasher horror movie. Pursued by a relentless killer, you try to save others, scramble to find weapons, and prepare for the eventual showdown against your murderous hunter. From my understanding the original game design was released as Hostage Negotiator, where you played a law enforcement agent trying to match wits against an unhinged criminal. The design was tweaked and updated to fit within the slasher flick theme and functions as a deck builder game with task resolution using dice. The overall objective is to win by killing the murderer before they kill you.
Each game revolves around a specific scenario with a small board of several linked locations and numerous tokens representing victims, the murderer, and you as the final girl. The different pieces are all assigned to specific spots based on the scenario setup. You have a semi-circular sectioned player board that marks time for each round, and includes a separate track to indicate the horror level. A set of initial cards for various actions form your starting deck, with other, more powerful cards in a pool you can draft from. Card actions range from allowing to move between board locations, search areas for items to help, a weak attack against the killer, or a means to heal or manage time for your turn.
As a general turn overview, you start in the action phase playing cards to attempt doing something, and continue playing cards until you run out the time track (or decide to stop). You then may purchase cards using any remaining time from the action phase up to a maximum hand size of 10. Then the scenario will potentially have some random event followed up by the killer moving and attacking victims or trying to kill the final girl.
To play a card requires time. The initial cards you start with will always cost zero time (and are essentially free actions). In order to succeed at an action you roll dice dependent on the current horror level ranging from a terrifying situation using only 1 die, to a more prepared and focused situation allowing you to roll 3 dice. A die result can either be a success, a failure, or a success if the player discards 2 cards. So generally you’ve got a 1 in 3 chance of rolling successfully with better odds if discarding cards, and obviously, the more dice you roll, the better your chances. Each action card ranges from obtaining 2 or more successes resulting in doing the action with no penalties, a partial success (one) allowing you to do the action but hindered in some way, or failing outright which will use up time, increase the horror level, take damage, or possibly allow the killer to move and/or attack.
You as the final girl are trying to move from one section of the board to another, biding your time. When moving you can take up to two victim tokens along with you. Get to specific exit areas, you can save them, getting them to escape the crazed killer. Each victim you save gives you a small boost like increasing time, raising the horror level, getting a free action card, etc. Conversely as the killer slays victims their bloodlust increases and they will get more powerful, moving farther with each action, and doing more damage with each attack. So a key strategy is to try and rescue as many people as you can before trying to slay the killer.
Additionally you can hold and carry a certain number of equipment cards. These can replenish health, act as weapons to bolster your attacks, or other effects which can help you manage time/horror during your turn. You’ll need those cards as combat can be brutal. In order to attack you must play specific action cards that will do a variable amount of damage. On the flip side the killer will do a varying number of attacks and damage depending on their state of bloodlust. Each attack will kill a victim, while attacks against the final girl remove counters from your health pool. Lose all your health from your pool, typically you’ll die outright and lose. The final girl is trying to do the same against the killer, but unfortunately their health pools are typically twice the amount of yours.
That’s generally the game. However, the nuances with managing time and the decisions on how to choose cards for the following turn, as well as what cards to play in your hand, is what makes the game. At the heart of it you are trying to manage time and act efficiently during your turn. Cards used during your turn cannot be available to replenish your deck until the following turn (effectively they go into a separate discard pile). So if you plow through all of your cheap zero action cards, as you acquire cards for the following turn those can’t be purchased.
There are actions that will provide stunningly powerful attacks, or really alter the horror/time level to give you a breather but the cost in time to purchase and play them is high. Additionally you can mitigate the randomness of the dice by discarding cards from your hand. Those cards thrown away can allow you to do a critical action, but they won’t be available next turn, creating delicious conundrums on effective choices for what cards to play or discard. All while you are trying to balance out how much time to use doing actions or instead spend buying cards for your next turn.
Further, you can plan out your next turn only so much. Each turn there is a random game event that might allow the killer to do an extra move or alter the time and/or horror tracks. Additionally your victim tokens aren’t in static positions. If they end up in the same space as a killer and a victim is slain, they will scatter randomly to different locations. It can be like herding cats at times for the final girl to get them to safety.
Layered onto this is a surprising amount of scenario variability adding to replay. While the board locations are static, setup can be one of many random options. There are more item cards than locations available. Only a limited number of cards for terror effects from a larger set are used each game, resulting in different events and a varied overall tempo with each play. Lastly the game has several modular elements which can be mixed freely. Most scenarios have particular rules and specific events associated with them. Each killer will have some random powers and event cards that are also thrown into the scenario deck. Further, each final girl has a special ability once they save a particular number of victims. This part of the game design is immensely enjoyable as you can end up with some wild combinations of locations, killers, and final girls to play.
The Good – Final Girl is a challenging solo game. It has some randomness that can lead to unpredictable results but can be mitigated some. Managing time to allocate enough resources to obtain effective cards, while balancing what cards to use in order to be effective turn after turn is also an enjoyable challenge. It does offer an engaging experience. Additionally the product design is wonderful. Some of the game bits like the tokens are rather bare bones, but the overall design of the player boards, icons, and art adds to the game immensely.
The Bad – The game can run into a wall of randomness that can result in wildly different play experiences. Sometimes you get a chain of random events and die rolls that spiral into a quick game loss. And rarely, there will be a few games with a series of fortunate events that allow you to comfortably cruise to victory. The later part of the game can have the tension drift somewhat towards more mechanical play as you just try to whittle down a killer’s health, playing the numbers game to ward off enough attacks to survive their assault. The buy in is rather odd as you need a core set, and then an additional setting expansion to actually play the game, and it seems that not all expansions fit everyone’s tastes with some feeling a little more fleshed out that others.
The Verdict – Final Girl is a wonderful solo game. The balance of managing time, and deciding what cards to play or retain in order to plan out future turns, while being effective for the current turn is a fun challenge. It also does capture that feeling of dread and tension. Each hapless victim results in the killer becoming more and more an unstoppable force. And the pressure of keeping the horror level low enough to be relatively successful at actions adds to this feeling of dread, as there is this steady push to ramp up the horror level. Throw in those occasional highs of a wildly successful action, stumbling across some needed weapon to take the fight to the killer, it all just makes for a great experience that hits the right notes of those slasher films.
Attached to the game play is stellar design and art. The game boxes are cleverly designed to serve as scenario maps and killer boards with the overall product looking like a video cassette box. And this is what takes it over the top for me, every expansion dips heavily into horror movie tropes. Some take place in a remote summer camp with an unstoppable killer. Another is your typical suburban neighborhood, with an elusive hunter that can only be killed in the final girl’s dreams. While a different expansion is at a remote Antarctic outpost, with the final girl having to first determine which victim is secretly a doppelganger monster hiding among them.
Even better is that every scenario, killer, and final girl can be cobbled together with other expansions to make your own customized game. Got a scenario down enough able to figure out the tempo of horror events making overall play predictable? Throw in a different killer and it scrambles that experience for you. It’s an immensely clever design resulting in a lot of replayability.
I would say one slight is Final Girl does lean towards making a few purchases to get the most out of it. You’ll probably get a fair amount of play out of the core set and a single expansion, but having 2 or 3 more on hand will likely allow for more interesting options. Another ding is that not all expansions are created equal. Just about all of them draw from a particular horror movie theme, with some being more successful than others. Camp Happy trails is serviceable, but there are no special rules making it as generic of a slasher film setting as there is. While events, gear, and setups are certainly something you’ve seen in those type of horror movies before, you might find it more enjoyable to delve into other expansions with unique rules.
Regardless, as a solo game Final Girl is great. And certainly a must buy if horror movies are in your wheelhouse.
After several days of rest and small excursions to explore the area, the Torchbearers heard of a foul camp nearby that looked to be the jumping off point for raids from a warring enemy. As they crept towards the camp, it appeared to be an old ruined temple. Dark energies emanated from within and gibbering fiends, crazed with bloodlust, sat nearby. The humans seemed to have been driven mad, more animal than man. The Torchbearers worked their way to the edge of dense woods but a stick cracked under the foot of Zane, warning the raiders of intruders and they scrambled towards the party.
Unnerved by the relentless speed and screeching of the madmen, both Zane and Teller shot wide. Takari and her companions waded in and managed to slay one, while the others rapidly filled their ranks.
Zane managed to severely wound one as Teller failed to land any arrows. Druuna fended off another while more babbling fiends drew closer. Takari, Karl, and Corben made quick work of others, and the slain men weakened the resolve of one, which routed from the field.
The Torchbearers continued their melee killing more of the madmen. Corben suffered a wound but kept to his feet. Teller landed an arrow through the thigh of another, but it only brought it into a frenzy, staying in the fight.
Zane and Teller peppered the last few remaining enemies, while Karl the Inquisitor landed a fatal blow on a wounded fiend. The Torchbearers stood breathing heavily taking stock of the slain around them. The company held the field victorious.
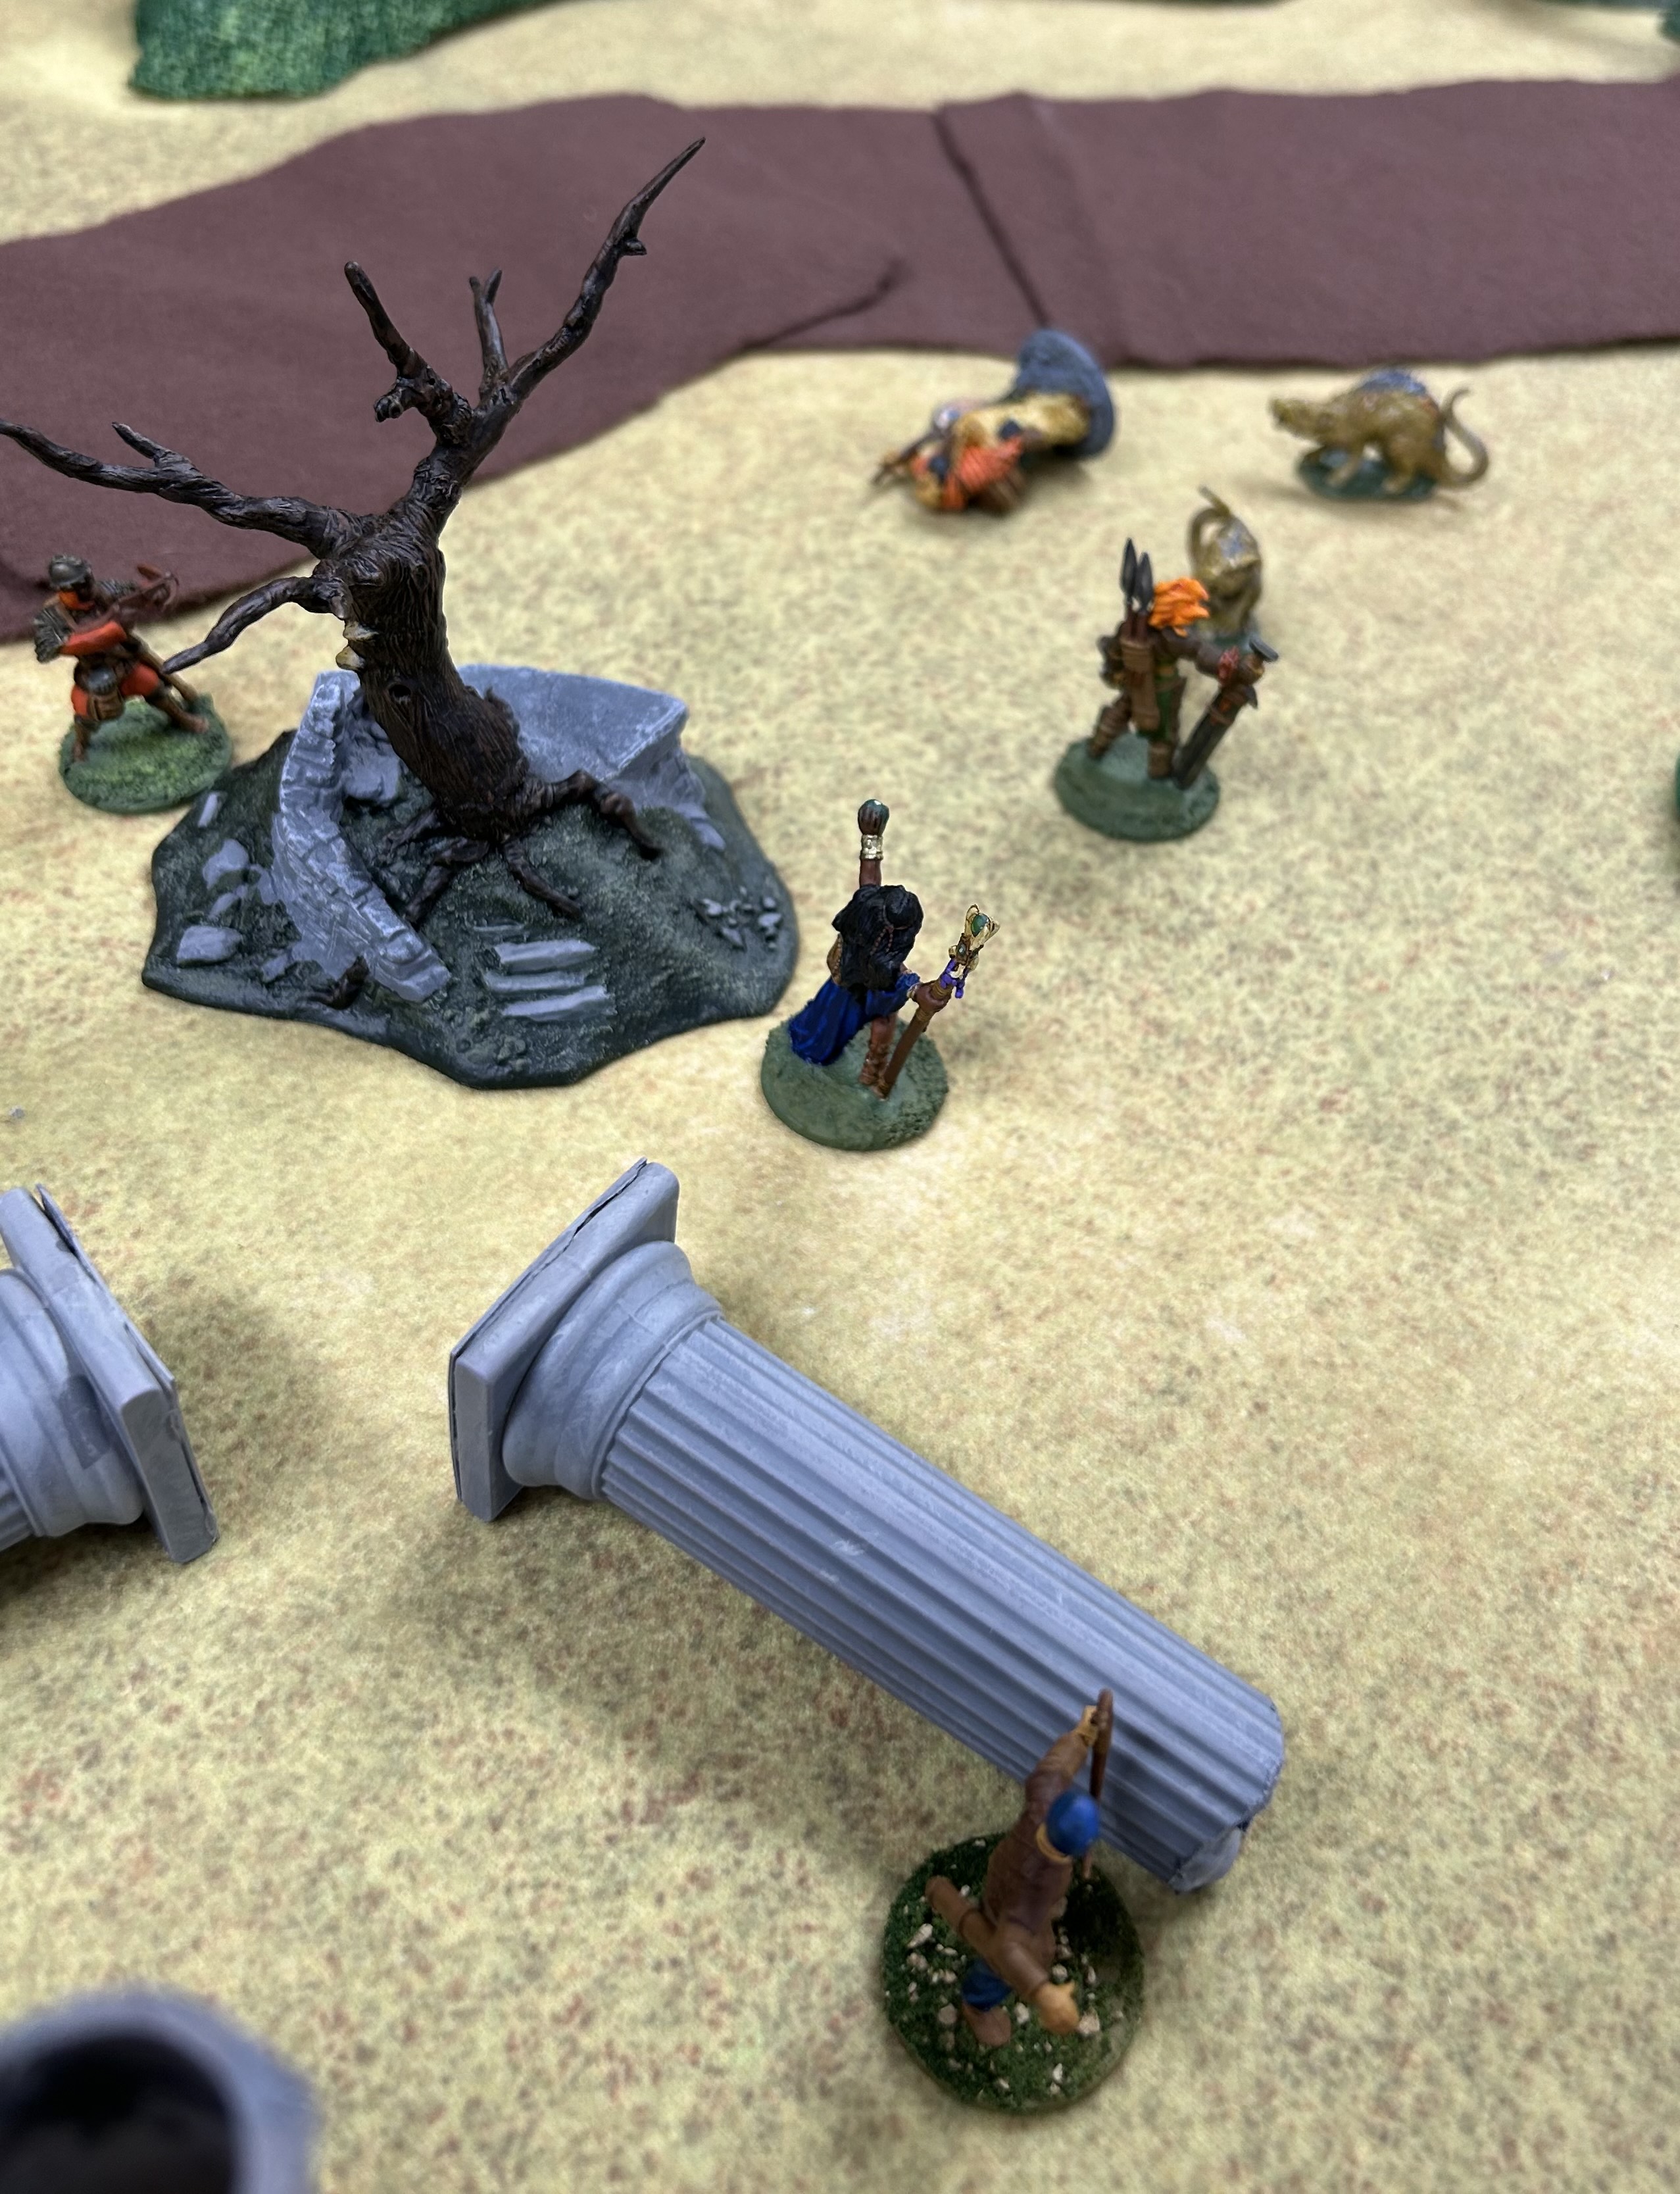
With Corben on the mend, the Torchbearers decided to conduct a patrol along the West Road. Slowly moving along the old, worn stonework they came across the remnants of what looked like an old temple. Hissing and barking alerted them. A pack of dust vermin scurried towards the company.
Teller fells one of the beasts while Karl seizes the imitative to rush another group. The creature snarls and snaps its jaws with ferocity and the ponderous swings of Karl’s warhammer result each breaking off the melee. Another closes in and quickly drops Karl. Tamari runs forward in an attempt to drive off the vermin.
Tamari screams a battle cry and slays one beast, only to have another lunge at her. Tamari and the monster circle each other and Druuna joins the fight. However neither of them can land a blow. They face off against each other while Teller and Zane try to strike the creature from afar.
Tamari throws caution to the wind and hurls herself at the dust vermin, killing it. However another unseen monster scurries forward from the woods.
Teller takes careful aim as the breast runs towards his companions and lets a fatal arrow fly. The creature dropped lifeless. The Torchbearers hold the field.
Fortunately Karl appeared to have just been bruised and bloodied,. However his armor was rended and scored, appearing heavily damaged. The company took stock of the situation and decided to press on towards Lake Crest by the end of the following day. The road seemed to grow more dangerous.
The Torchbearers wound their way up to the North Coast, following the West Road. On their way a peasant scrambled from the brush out of breath and frantically asked for their help. Teller, a local villager, said his family’s homestead had been overrun by shambling dead. The company took to the woods to see what aid they could offer. As they approached a clearing, the simple wooden house was surrounded by zombies.
Mumbling under her breath, Druuna closed her eyes and sensed an object which had drawn the rotting undead. She infused Corben, the stalwart follower, with magical energies and told Tamari the likely source of foul energy beckoning the walking dead was within the remains of an old tower.
The Torchbearers moved towards the tower. Teller unslung his simple bow and let an arrow fly, but in his haste the shot went wide. Zane as a more seasoned warrior had better luck with his crossbow. However the bolt lodged into the zombie’s chest with no apparent effect. The dead drew closer…
Corben and Karl the Inquisitor closed ranks and hacked into the undead. Corben struck deep but did not fell his foe, while Karl smashed the skull of another. Teller and Zane both took careful aim and dropped another two zombies.
Meanwhile Tamari under the eye of Druuna scrambled toward the ruined tower, digging through the crumbling masonry. Inside she found a stone tablet with a crude etched semblance of the North Coast. Odd arcane lettering bordered one side of the map, and markings of a ruin beneath the White Cliffs. A likely dungeon to explore and provide answers to the evil plaguing the region.
Corben soon found himself in a pitched melee. As another zombie closed in he panicked, losing his footing, and was quickly dragged down.
Karl the Inquisitor stepped forward bellowing a war cry. Wielding his warhammer he destroyed the head of a zombie, dragging his comrade away from the fray. To the Torchbearer’s horror, another zombie stumbled from the edge of the wood. Tamari whistled once and urged her companions for a hasty retreat.
Both Teller and Zane shot a final volley dropping two more, and the company made haste leaving the doomed homestead. Teller recognized some of his kin shambling haphazardly about as freshly raised walking dead, and the gory remains of others near the overrun farm. Tears welled in his eyes as he saw more undead come towards the house…
Teller gritted his teeth and right there threw his lot in with the Torchbearers, begging to allow him to join and seek vengeance on the evil responsible for his family’s demise. He led the company to a nearby buried cache of grain to add to the company coffers. The group will need it, as Corben appeared feverish with a festering wound.
About to jump into another campaign for 5 Leagues from the Borderland and decided to tread over old ground some with rolling up the warband. Loved the idea of a wild barbarian running the show, wrangling up an enigmatic mystic to help her cleanse the land of evil. So I stuck with that idea having Tamari and her mysterious spellcaster Druuna as the founding members of the Torchbearers. They were easily able to convince Karl the Inquisitor to join their company. The fervent zealot knew of a crafty crossbowman, Zane, through past dealings and were able to convince the rogue to join with promises of riches.
The group were charismatic enough to encourage a stout citizen guard, Corben, to accompany them north and he eagerly did so wielding his trusty sword and shield. The Torchbearers set out to the North Coast, set about to reach Lakes Crest first. Along the sparsely traveled West Road they came across a frantic peasant, Teller. His hovel was overrun by shambling dead, and he implored the company to help out his kin.