Category: Terrain
Toy Truck Terrain for Marvel Crisis Protocol
Walking around my local Target I saw some toy trucks that grabbed my eye. Battat Toys has the Driven Micro Fleet line that seemed the perfect scale for MCP. I snagged a box for about $20 USD and eagerly took it home to figure out how well they’d match up with my minis. I was happy to say they look pretty good.

There seems to be a few choices with one set being a road roller, truck, and platform crane. While another had a tow truck (with car), dump truck, and forklift truck. I wanted something to fit for some construction terrain I was working on, so I picked up a box with a dump truck, backhoe loader, and crane.

I took a few pics with a MCP car to give a comparative scale. Overall I think they look good with the truck and crane about size 4. The backhoe loader was maybe closer to size 3. Unfortunately the truck trailer section is open. I might think about having a removable debris pile so minis can properly plop on top of it.


The trucks have moveable parts which I’m going to have to glue together and/or shut. I’ll likely have to give it a good matte coat of varnish before trying to paint them too. Not going to try and give them a complete new coat of paint, but rather work on weathering up the trucks to make them look a little better on the tabletop. Regardless for 3 trucks a set and a steal of a price, a good purchase if wanting some options for beefy vehicles to add to your MCP terrain.
Terrain for Marvel Crisis Protocol – Atomic Laser Cut Designs
I’ve got a chunk of modern terrain for Zona Alfa and the core box for MCP has a slew of nice terrain, still I wanted to get a few options for terrain pieces. I stumbled across Atomic Laser Cut Designs looking mostly for my Zona Alfa and Country Road Z boards, but some of their modern building sets looked like they would also work for MCP.
I picked up a small, generic, single story shop from Amazon. The kit is flat packed. It is pretty simple to assemble with well cut holes and notches that easily fit together.

The building comes with a front and side door along with protruding window frames. I think it would be very easy to use cardboard to fill in open spaces if needed. The doors have an interesting design that allows the door to be removed or shifted open. With a small amount of Blu Tack you could keep the door secure and prop it open while playing. The roof section can easily be removed and sits securely using tabbed notches in the walls.


The storefront sign is nice allowing it to be removed and clips onto the roof easily. I’m already thinking of some simple designs to print out and mount with Blu Tack to reflect different games I could use it for. Possibly make it “Joe’s Guns and Ammo” for zombie games, to “Cosmic Comics” for MCP games.

As a size scale it’s a little harder to nail down. For 28mm it certainly hits that look of a single story building. You can see it’s larger than a MCP kiosk but I feel strictly height-wise would straddle between size 3 and 4. However looking at some other official MCP size 4 buildings, and given the overall footprint on the table, size 4 seems appropriate.

My complaints for this kit would be that the walls are pretty sparse on details. Also the roof fits great but the notches might be too glaring. You’d have to incorporate some paint scheme to work with the roof. Note there are other building sets in their modern terrain line that have more detail like distressed walls. In general the kits are for the Walking Dead miniature wargame and seem to match that setting and scale well. However, I wouldn’t get too wrapped up in their product line names. The “mean streets” sets have nice looking brick buildings and the 3 story one looks particularly good. It seems quite high and doesn’t appear to take up that much table space for a size 5 terrain piece.
Alien vegetation terrain using straws
I dabble in 15mm sci-fi gaming and lately been using my models as proxies for Beyond the Gates of Antares. Getting terrain together can always be a bit of a chore and at times heavy on the wallet. You can get lots of railroad, medieval, and WW2 terrain easily, but sci-fi stuff is somewhat of a niche market. So inevitably I get to tinkering around making my own.
Vegetation is always something tricky. A really good source is simply aquarium plastic plants, but I decided to try and go the full craft route and thought of working with straws. By melting them partially, they fold open and get this weird pitcher plant type of look. I used a lighter and carefully melted the plastic passing it over the flame. I would also put a little heat on sections of the straw and carefully bend it some to give them a few kinks. Be mindful not to apply too much heat, otherwise you’ll end up burning another hole into the main section of the straw. 
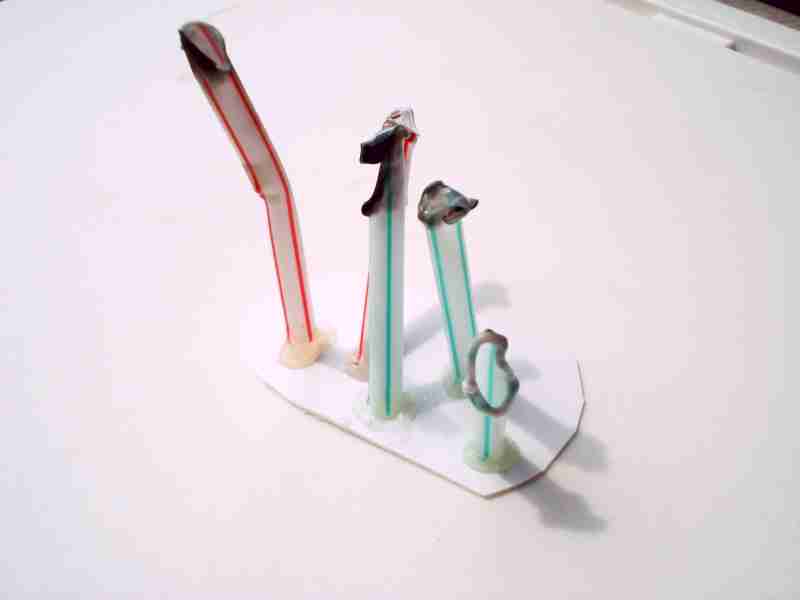
A word of warning, too much heat and your plastic straw will catch fire. Not to mention the fumes are toxic as hell, so do this in a well ventilated area (I also had a fan behind me blowing the air away). After melting the ends of the straws, I used hot glue to mount them to some plastic card as bases. I then gave them a coat of primer. I tend to have trees and the like on individual bases so I can move them around. When painting them up I used primarily a green base coat along with some highlights of bright colors to draw out a lot of contrast.
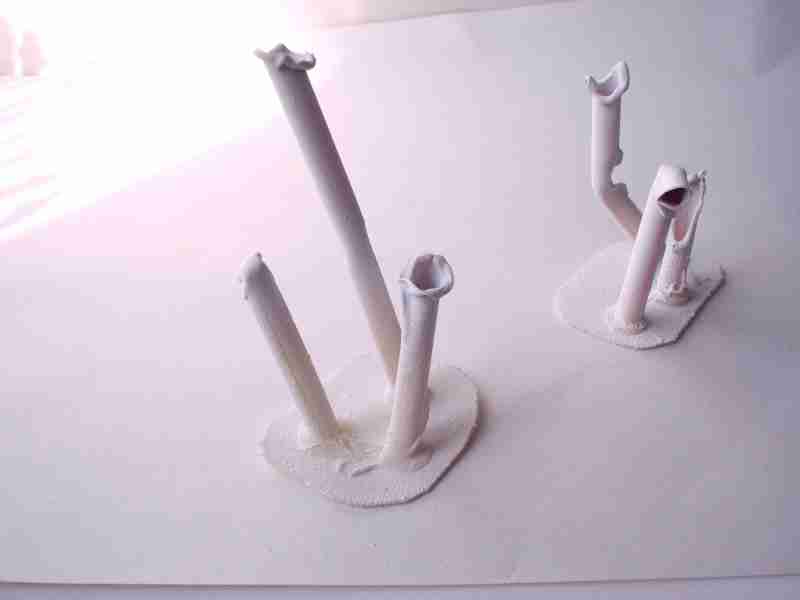
Thrown on some felt, they make for some decent vegetation that is a little different from your typical plant foliage. A pretty easy project and if given a more diligent paint job (compared to what I did), you can get some great looking plants.

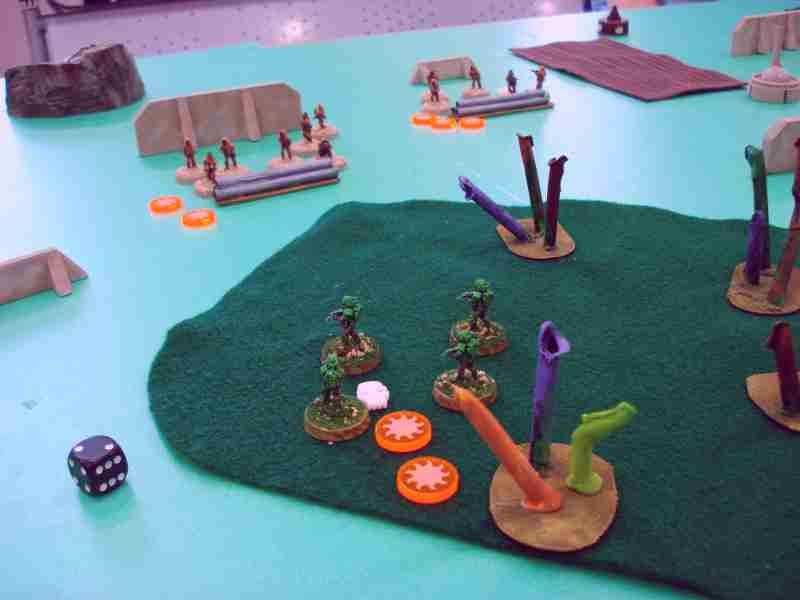
Side Note: For 15mm terrain, straws can make for some decent obstacles too. Stacked and lined up, they can serve as large metal or concrete culvert pipes.
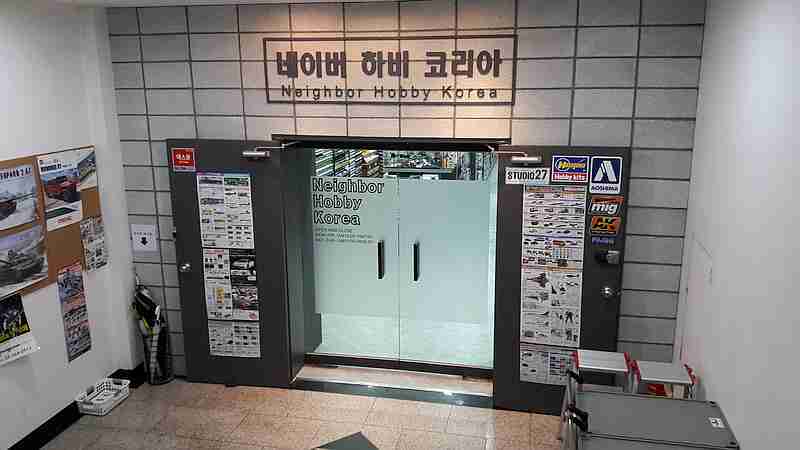
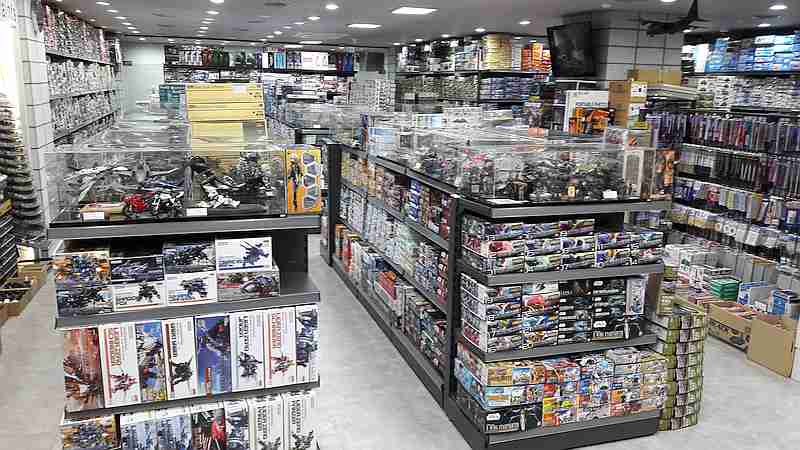
Wargaming supplies in Seoul: Neighbor Hobby
Scouring around for places to pick up paints and supplies I stumbled across likely the new Mecca for hobby supplies for me, Neighbor Hobby. It’s nestled away unassumingly in the lower floor of an office building. But despite it’s location, they have a pretty amazing stock of model kits of all sorts.
There is a great selection of military models. Unfortunately for fans of Bolt Action, they carry only Tamiya 1/48 kits, but they seem to have a full selection from that line. As 1/72 and 1/76 scale kits go though, they have a great choice of tanks, soldiers, and terrain. With buildings I usually use 20 mm, even for 28mm stuff as it keeps a smaller footprint on the table and looks okay. I find true 28mm scale buildings just a little too big and even the smallest 2 story house seems to dwarf the rest of the table terrain. So having a lot of building model kits for sale was a pleasant surprise.
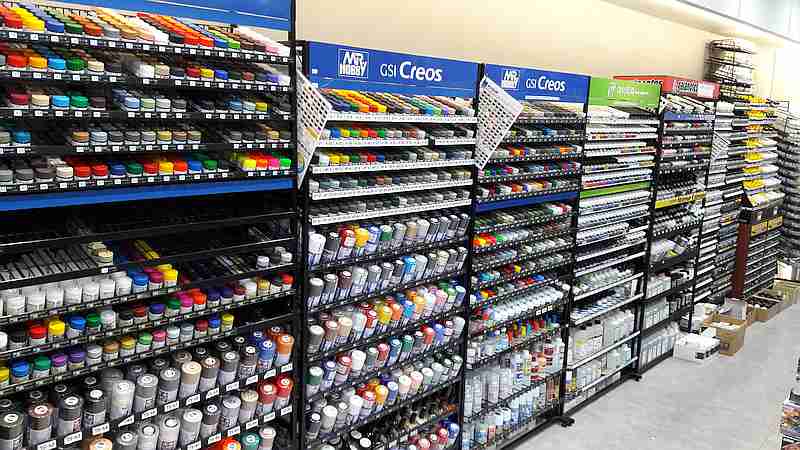
Now for paints, brushes, and other supplies you are set. There is a great selection of paints from Testors, Tamiya, AK Interactive, MIG, as well as my go to for painting, Vallejo. It’s a wonderful amount of choices and stock for both brush and airbrush painters. They also carry a complete selection of Testors and Tamiya sprays. Well worth checking out.
To get there isn’t too difficult. Take subway line 2 to Hongik University and get off exit number 3. You need to cross the street and footpath park and take a side street, then go right. Once you hit a main street go left and it will be in an office building.

Blue pin near the top marks the location.

The entrance is actually a bit odd. Going behind the building from the parking lot you enter on the first floor. You will follow a long hall towards the elevator, and can find the shop directly.

However if you enter the front of the building you are actually on the 2nd floor and have to take the lift down to the 1st floor.

All in all Neighbor Hobby is a fantastic place to pick up military models, paints, and modeling supplies. It certainly is one of the top places to get wargaming model supplies in the city. It’s also in the same neighborhood as Rolling Dice so a great stop to get a double scoop of geek supplies while in Seoul.
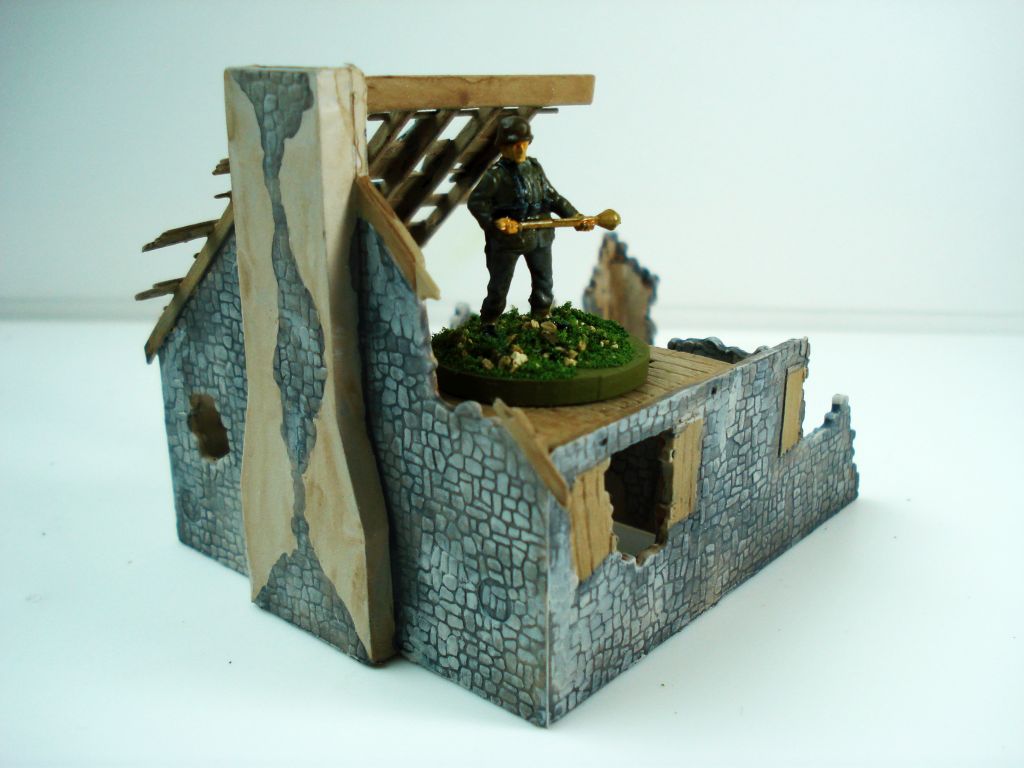
Building ruins for Frostgrave
I find Frostgrave fun especially with its low model count and small table space. However as it takes place in a ruined city, you certainly need a lot of terrain pieces. It does demand having a pretty cluttered layout too, so that was something I had to assemble for my games.
Over the years I’ve gotten a little lazy with terrain. I just don’t feel the need to put tons of time into building and painting it. I just need something serviceable and looking decent enough. I’d rather put more time into painting miniatures over building an awesome house. So I was looking for a quick and dirty way to whip up some building ruins.
I settled on hacking apart some old styrofoam I had horded from packaging material. Cut apart into sections and assembled with PVA glue and toothpicks as simple dowels, I got a few sections of walls put together. I also went ahead and got a few flat pieces with some odd chunks added to create some crumbled wall sections which would offer a little cover from ranged shots, yet not impede movement much.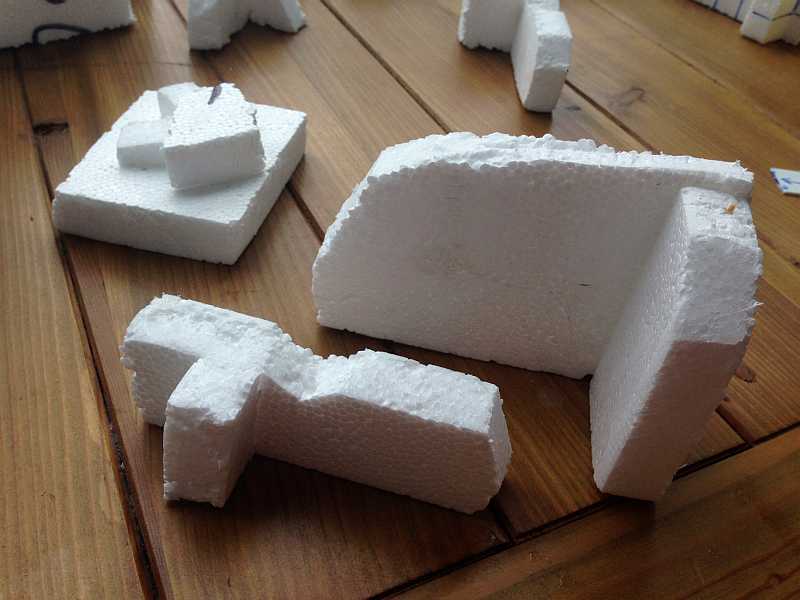
I had to try and work on adding some texture to the walls some. I decided I didn’t need to make an intricate pattern, just some large stones etched into the walls. As a super quick way of doing that I figured I’d need some guide lines. Using a small piece of plasticard about the width of the bricks I wanted, I quickly placed tick marks on as layers of bricks.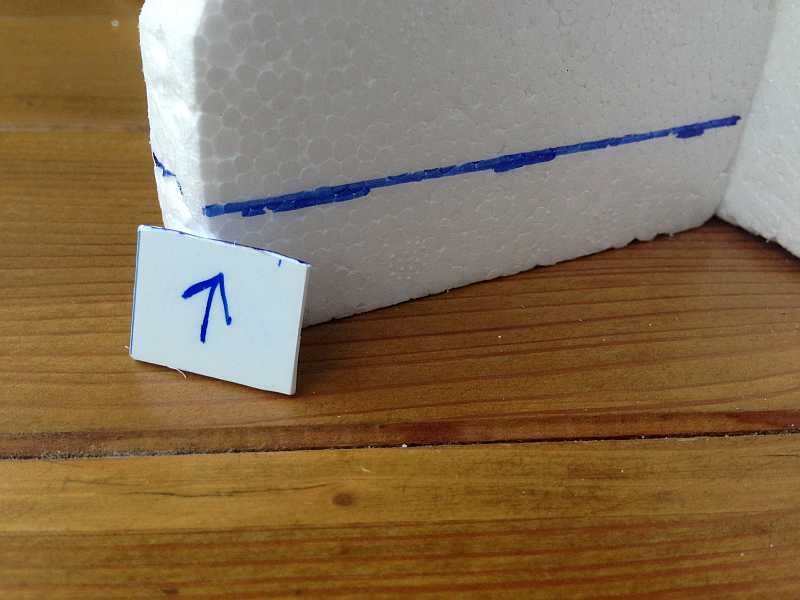
Then I connected everything using a straightedge and a marker to form horizontal lines. One key tip would be to make sure you had all the lines even around the corners. I would then go back and rather unevenly draw in vertical lines to make the brick pattern.
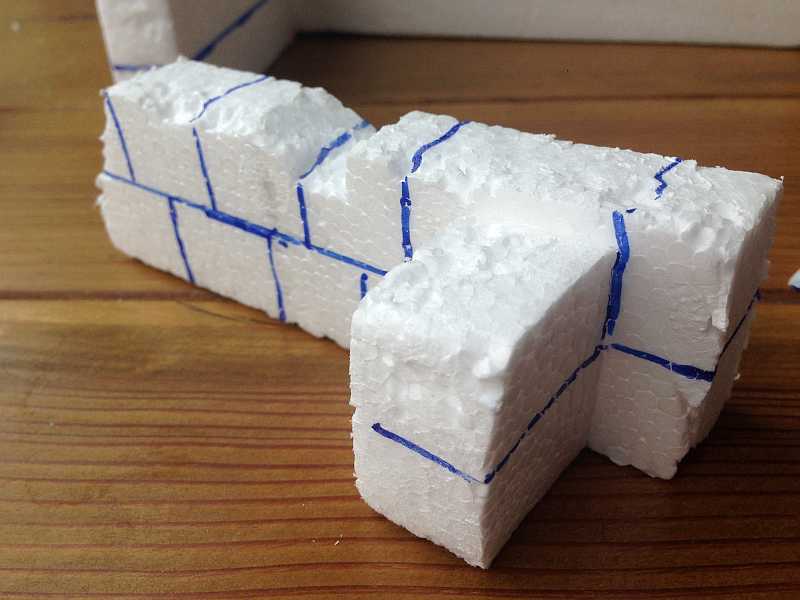 I needed some way to form some texture in the surface though. I could then go over each line with a knife, but figured that would take a lot of time. Not to mention I might end up gouging out larger chunks of styrofoam if the knife caught up on the material. Instead I used a soldering tool which would melt the styrofoam. Mind you this was tricky as you could easily go too deep into the material. Also, I would do this in an exceedingly well ventilated area (I also had a fan behind me blowing air away from me) as the fumes are pretty toxic. However the end result was pretty nice.
All of this worked fine and dandy for low walls but I also wanted to get some elevated pieces together. I had some second level wall corners made that used a chunk of foamcore board as the floor section. This looked okay but I also wanted to give the floor some texture. I ended up cutting out thin sections of cardboard and gluing them in as flagstones. I didn’t need to do the entire surface, just enough to give the appearance of a few stone pieces. With a wash and a bit of drybrushing, they really add some texture to what would look like a flat piece of foam board.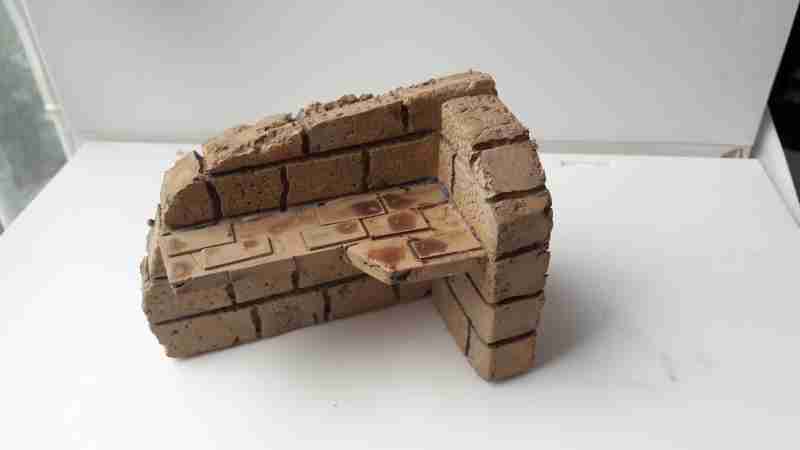
I’m pretty happy how they turned out. They look decent and are certainly cheap assemble and paint. Lastly, I was able to get a nice amount of terrain to put together for my Frostgrave games. Give it a try if you need a quick and dirty way to make a bunch of ruins. I’m doing a bit of a different setting for my games to match up with using current models, but these would look just fine on a snow battle mat.
Hotz Mats felt fields
A long while back I mentioned that I picked up some battemats from Hotz Mats and wasn’t that impressed with them. At the same time I made my order, I decided to pick up some flocked felt field sets from the same company. Despite me not being keen on the treated felt mats, I gotta say that I do like the flocked fields they offer.
I bought 2 sets of the 20-30mm range felt fields. The fields vary in sizes and colors that look pretty good for that scale. Seems they offer smaller scale mats for 6-15mm. The pics I have here are of 1/72 scale Germans. It does seem that smaller models would look a little off with the larger scale mats.

The felt fields are durable though and the flock is tightly adhered to the material. Mind you I keep them stored relatively flat tucked in a box of other terrain, so if tightly rolled up I’m not sure how they would hold up. But I have to say they’ve been through some heat and humidity and still look nice. Through normal gaming wear and tear you’d likely have some fields that would last for years.

The felt fields range in size having one large section, 2 smaller fields (a little over 6″ long), and a mid-sized field. A good mix for a set which looks nice. Throw in some small stone walls or bocage and you’d have a nice bit of rough terrain or light cover for your table. If looking to get some rural terrain and not too keen on modeling your own, they are a good option and worth picking up a set or two.

Jungle terrain using plastic plants
I’ve been slowly working on some more Pacific-themed terrain for Bolt Action. One stickler for me was getting some appropriate woods for a table together. I’ve got some decent trees that could work for deciduous forest, but really nothing that would work for jungle terrain.
Cruising through a small pet store I stumbled on some inspiration finding fish breeding bedding for aquariums. This lead me to also hitting up a local arts and crafts store to buy some plastic floral arrangements.
With a craft knife and a hot glue gun, I was able to remove sections of plastic plants and mount them on metal washers. A coat of plastic primer and flat green paint, along with a simple drybrush of a lighter green and I was able to whip up quite a few stands of jungle trees and overgrowth. I cut many sections at varying heights and mixed and matched them to provide a little more realistic look.
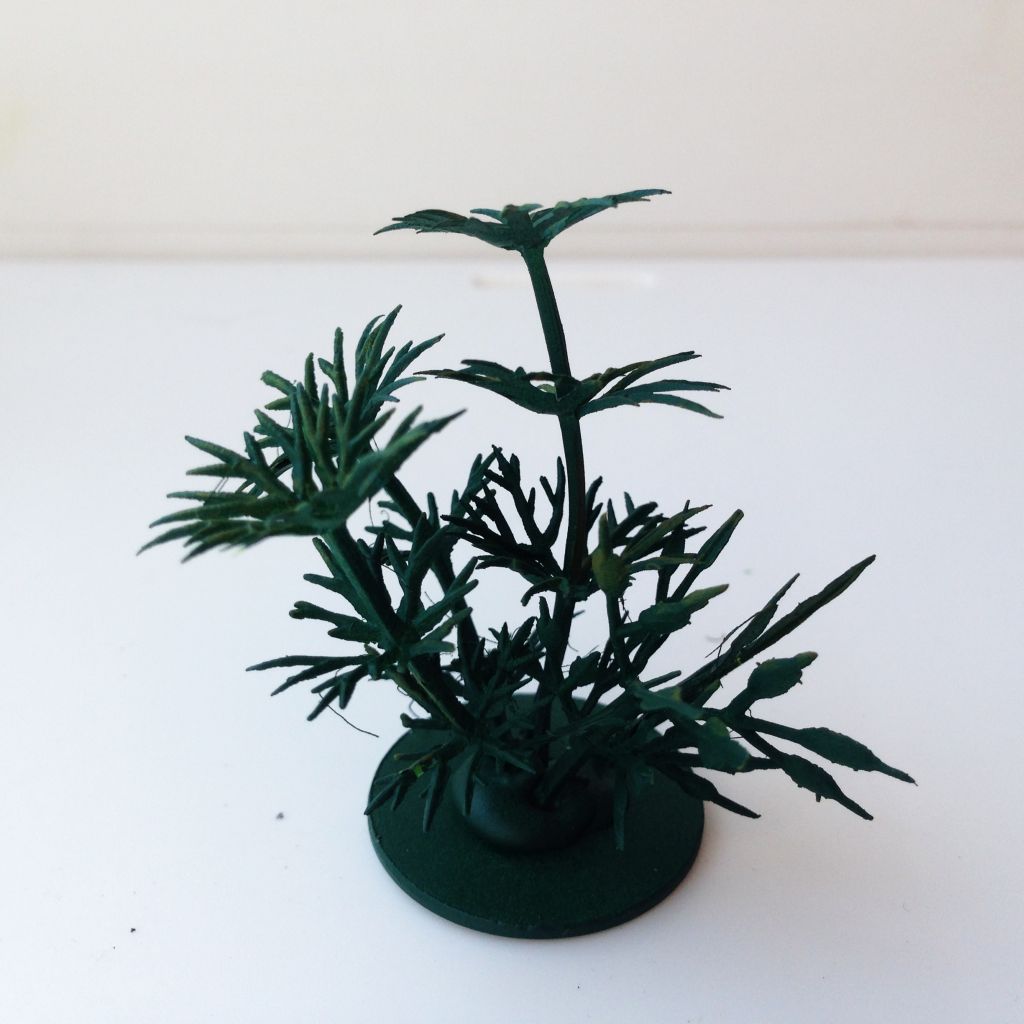
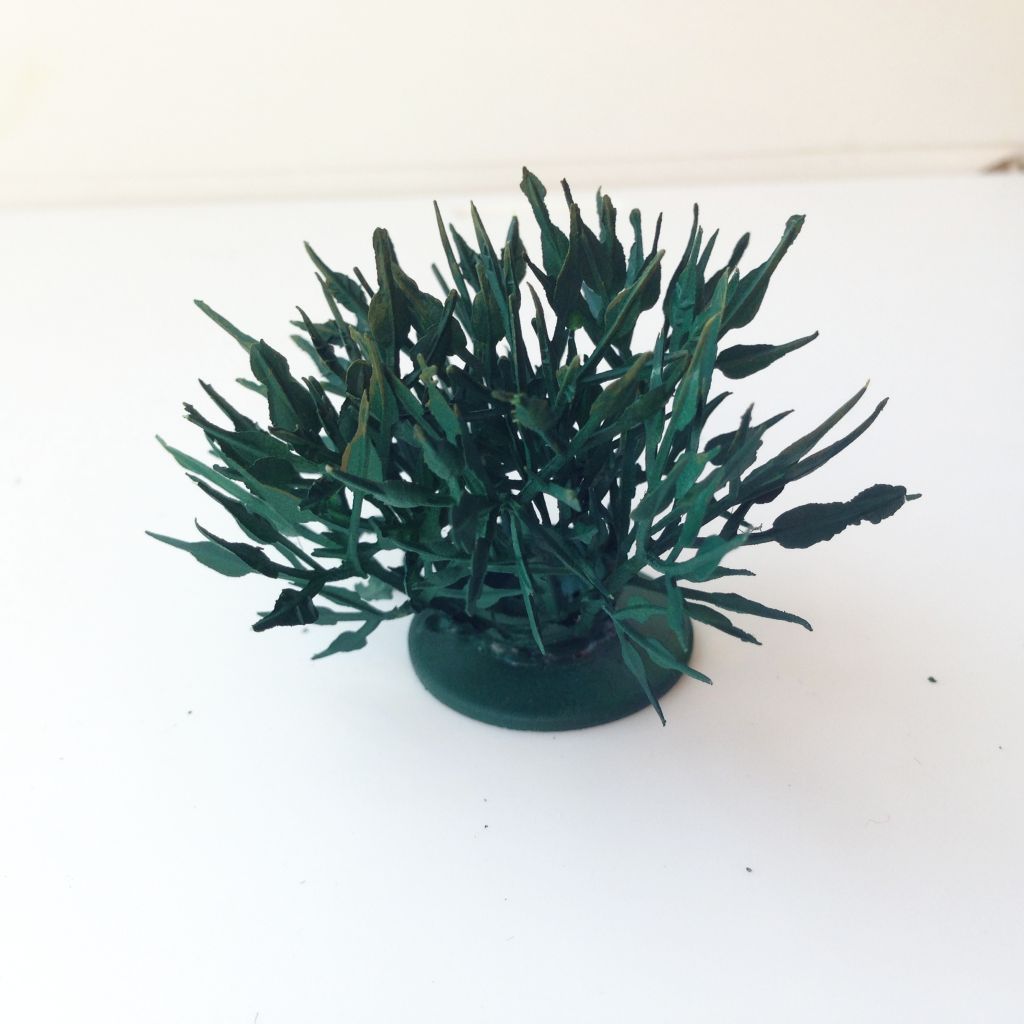
They really look pretty well and being on separate bases, I can move them around to accommodate larger teams and vehicles. Next to some 20mm Japanese troops I painted up, they’ve got an appropriate height and occupy a good chunk of area to offer cover. They were also a snap to get together. Certainly one of my more easier terrain projects to complete. Making trees and jungle terrain this way is easy and offer some decent terrain for your Pacific theater games.

Airfix forward command post
In my continuing quest for Bolt Action terrain, I’ve been slowly accumulating different model kits. One that stood out for me was the 1/76 scale Airfix forward command post. It’s a nice kit with a lot of little extra bits including a cool looking bombed out house.
One sticking point for me is I wanted to stretch out the usage for the model. There was a second floor to the house model, however the roof section was a little cramped to the point I couldn’t place a miniature in it. I opted to move the roof section to the other side, opening the second floor up. Perfect position for an arty observer or a sniper.
The kit assembles very well and paints up nicely. With a decent amount of detail and texture on the walls. It really is a diorama kit however. I had to shore up some of the wall angles with other bits of plastic.
As mentioned the kit comes with a fair amount of extra detail bits, including various signposts, wooden barricades, crates, fuel drums, coiled barbed wire. There are lots of nice details you can add to the house model, or throw them onto other figures for that extra touch.
One complaint I had was with the sandbag corner piece that was hollowed out and had no back section. I figure this was likely designed to go on a building corner, or be a detail part for a diorama (which would typically have a fixed point for viewing). So I had to plop mine onto some styrofoam and paint like it was built up earth.
The corrugated tin roof sections gave me a great idea using it as a possible objective. I placed mine on a section of styrofoam with it textured to look like an earth bunker of sorts. With a smattering of fuel drums and crates, it made for a nice little objective to plop down on the table.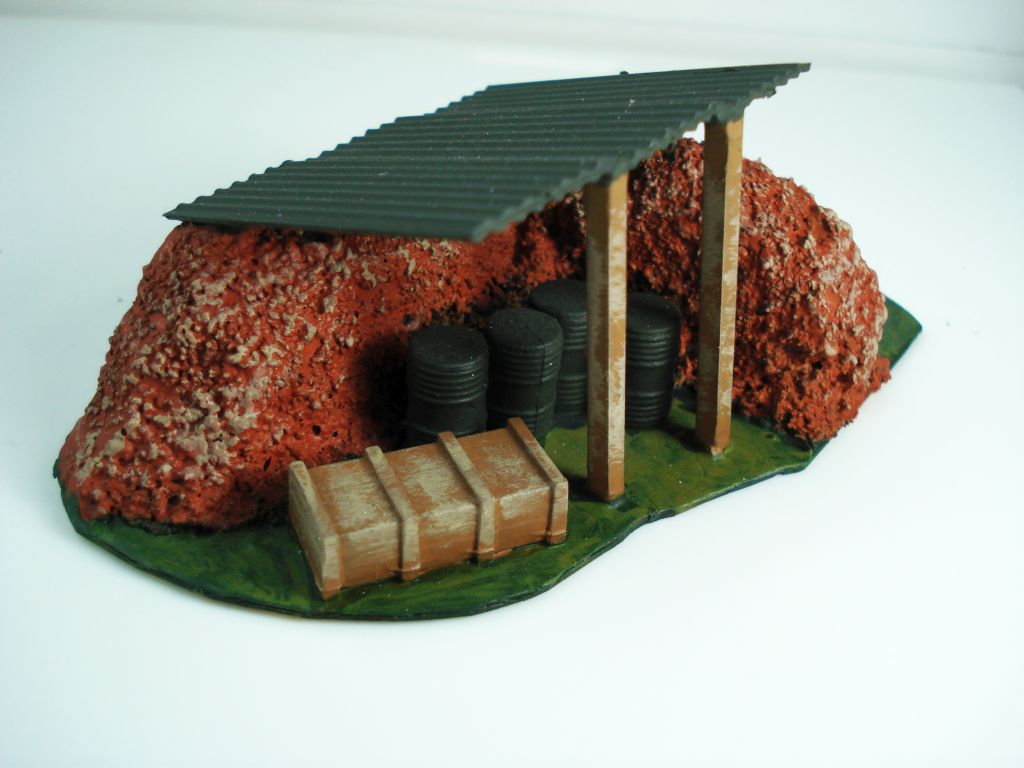
The kit is very good for 20mm troops, if being a little small for more bulkier figures like the Plastic Soldier Co. Germans I have pictured here. Unfortunately, unlike the Armourfast House I do not think this would work well with 1/48 figures. It’s simply too small. Airfix looks like it has the same model with less extra detail pieces at 1/32 scale which sadly might be a little too big for Warlord figures. However if you’ve got figures on a thicker plastic base, that’ll add about 3mm to the height and maybe not look too shabby compared to a larger scale house. It really is a nice model and might work well.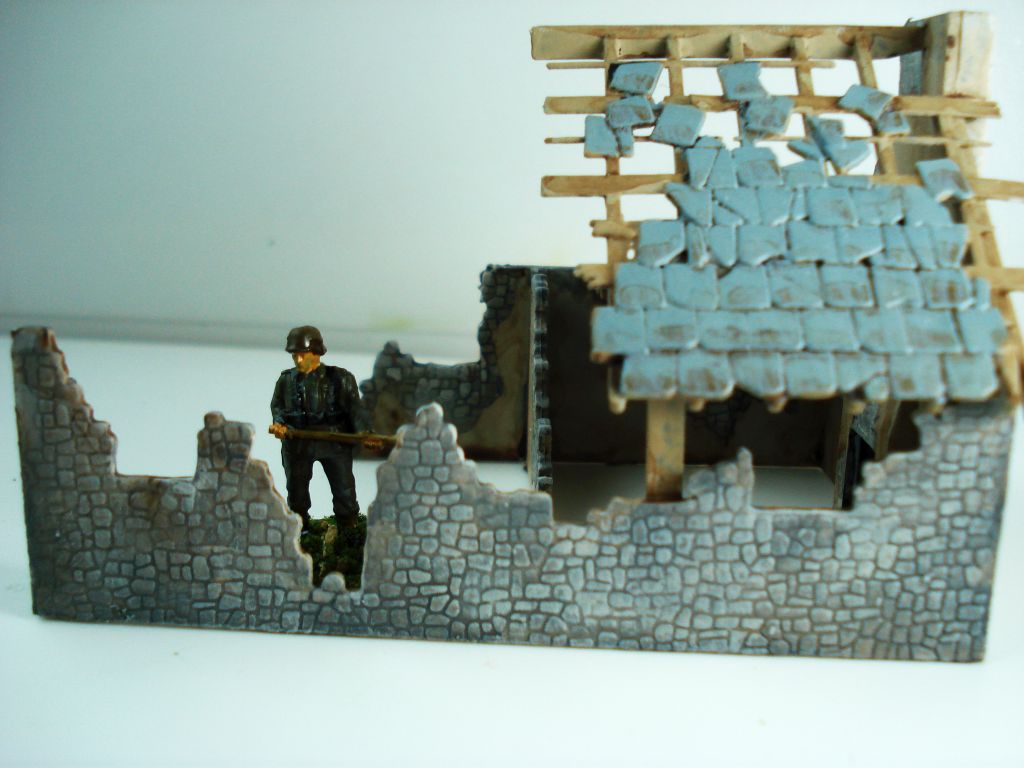
From a 20mm war gaming standpoint, while the kit is designed to serve as a centerpiece for a diorama, it can work very well as a terrain piece too. It’s got a lot of nice additional details you can add to flesh it out, or throw onto other models. All of which makes for a nice addition to add to your terrain collection.
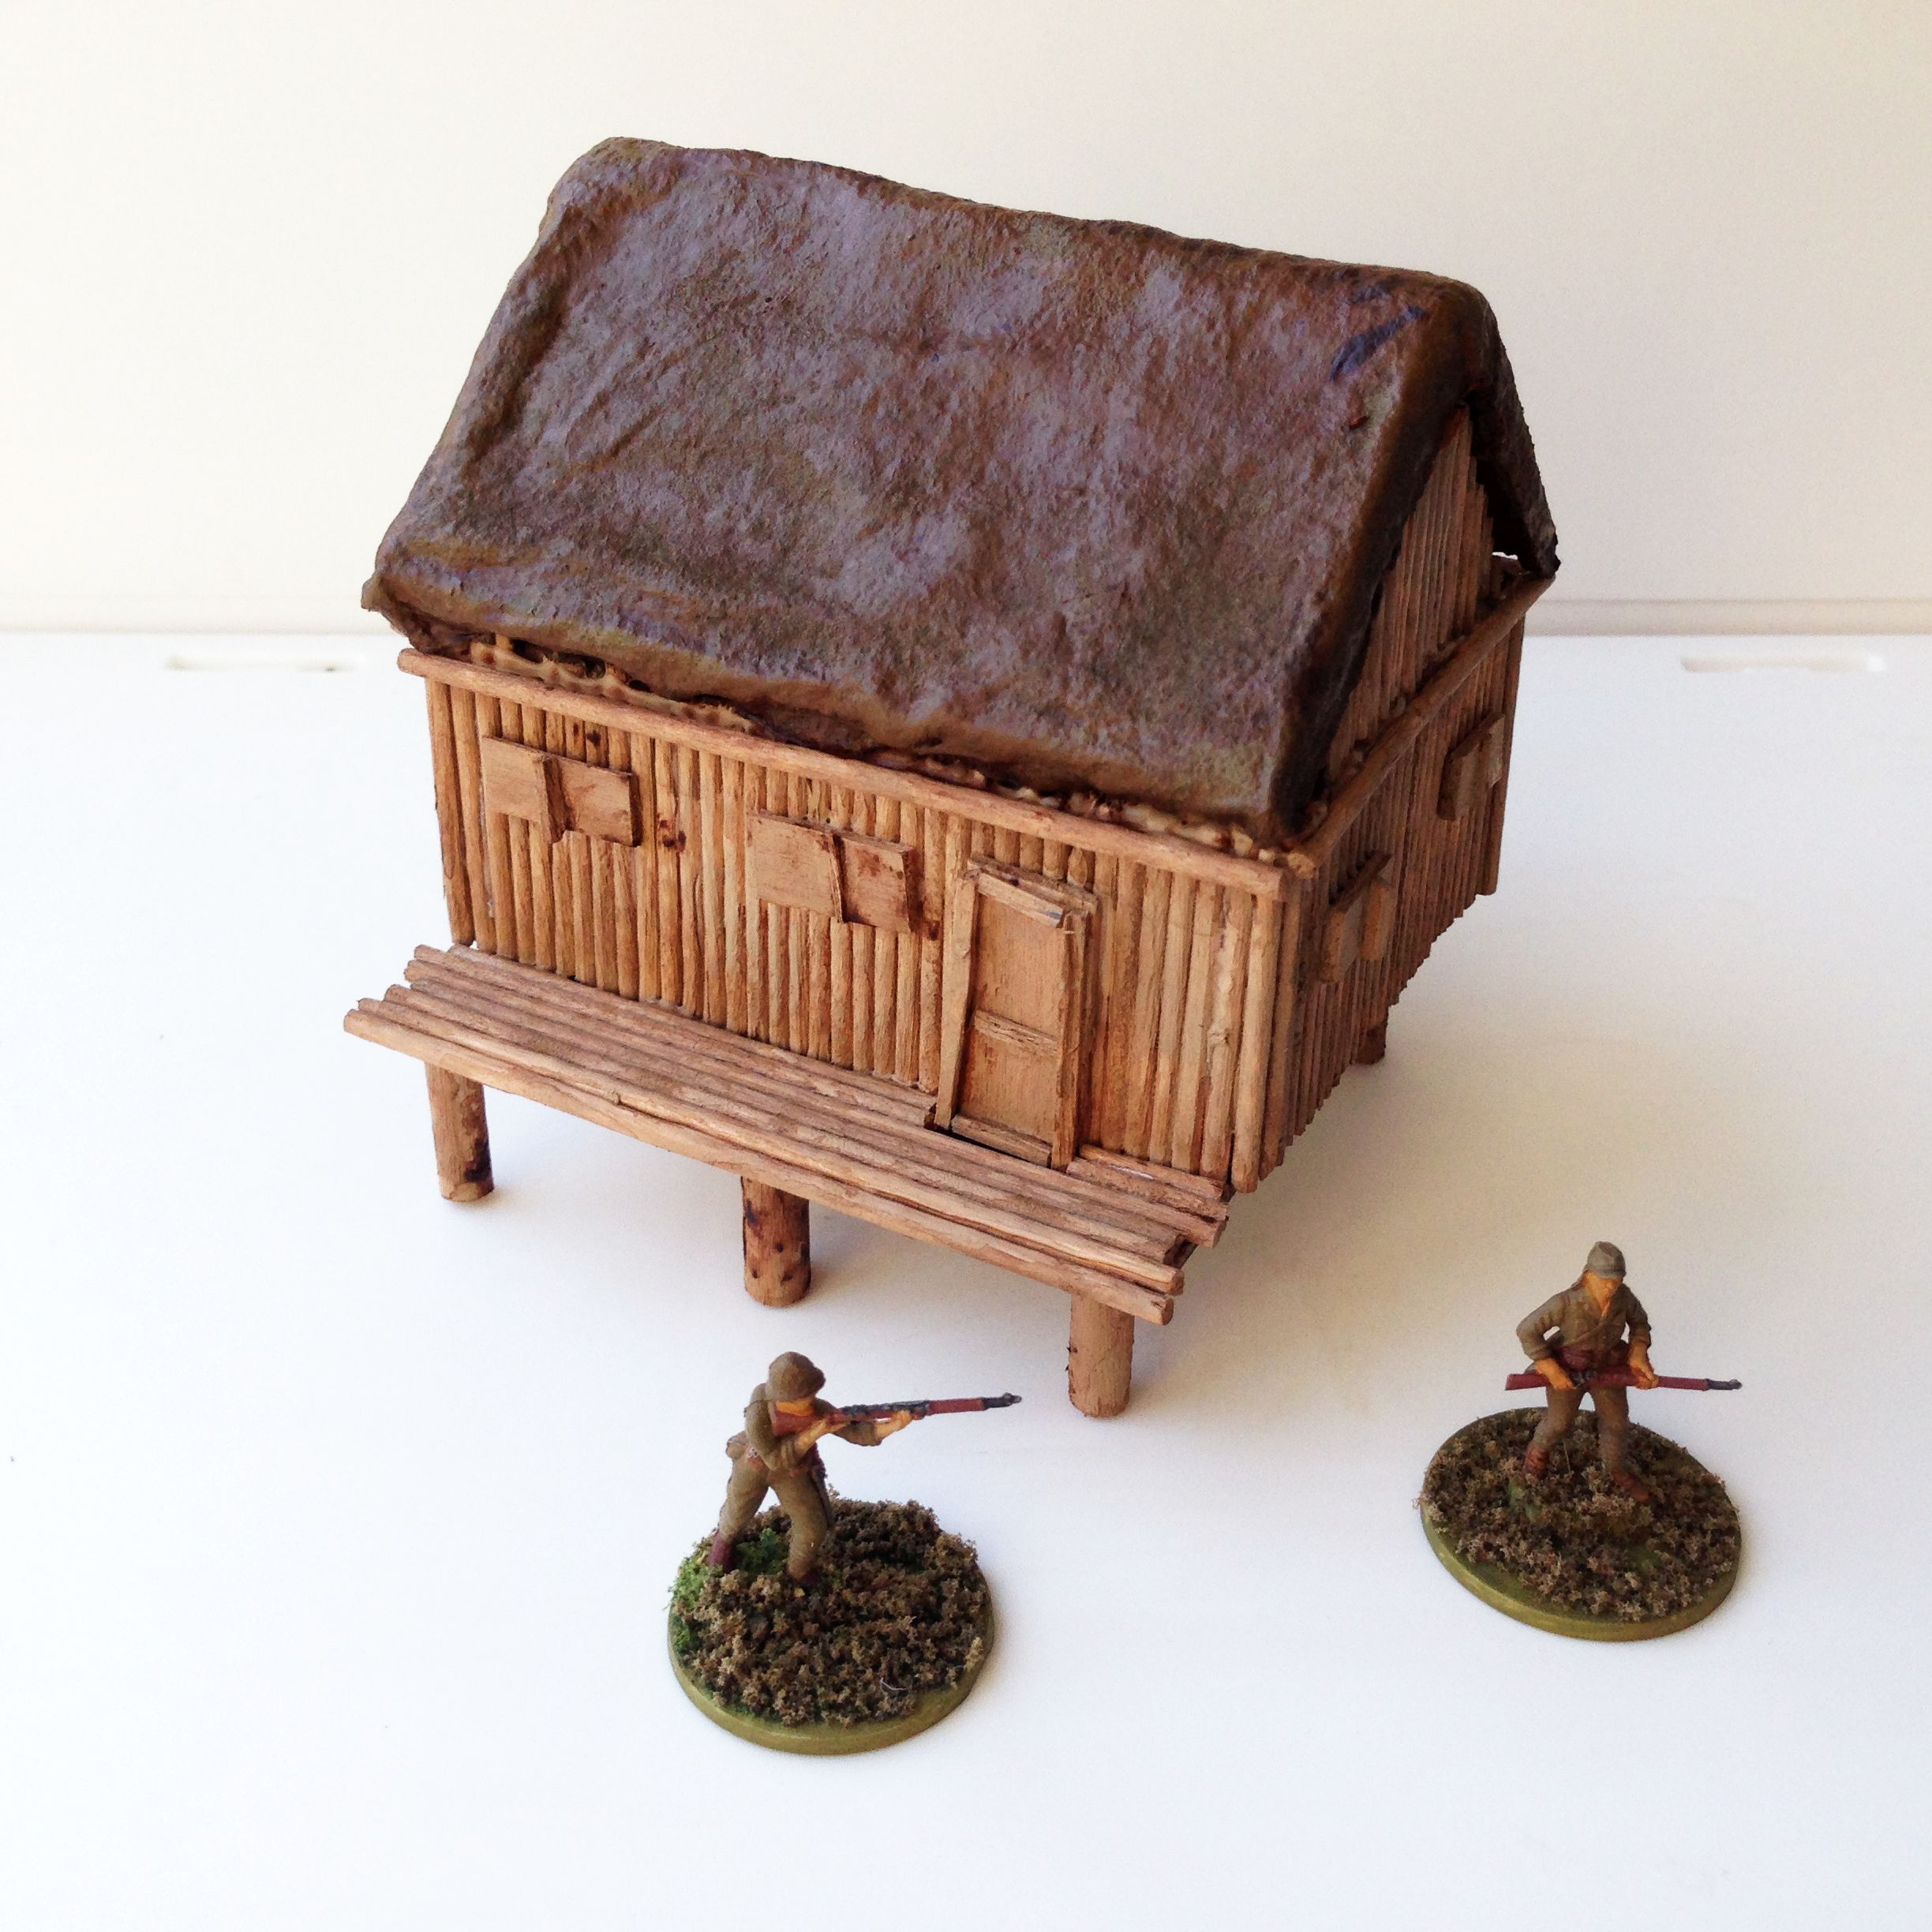
WW2 bamboo hut terrain
One thing I’ve discovered difficult for my Pacific Bolt Action games is finding some appropriate buildings. I simply cannot find anything in 20mm scale. There are some Quonset huts that I had gotten that will certainly be appropriate. However I wanted something a little more rustic
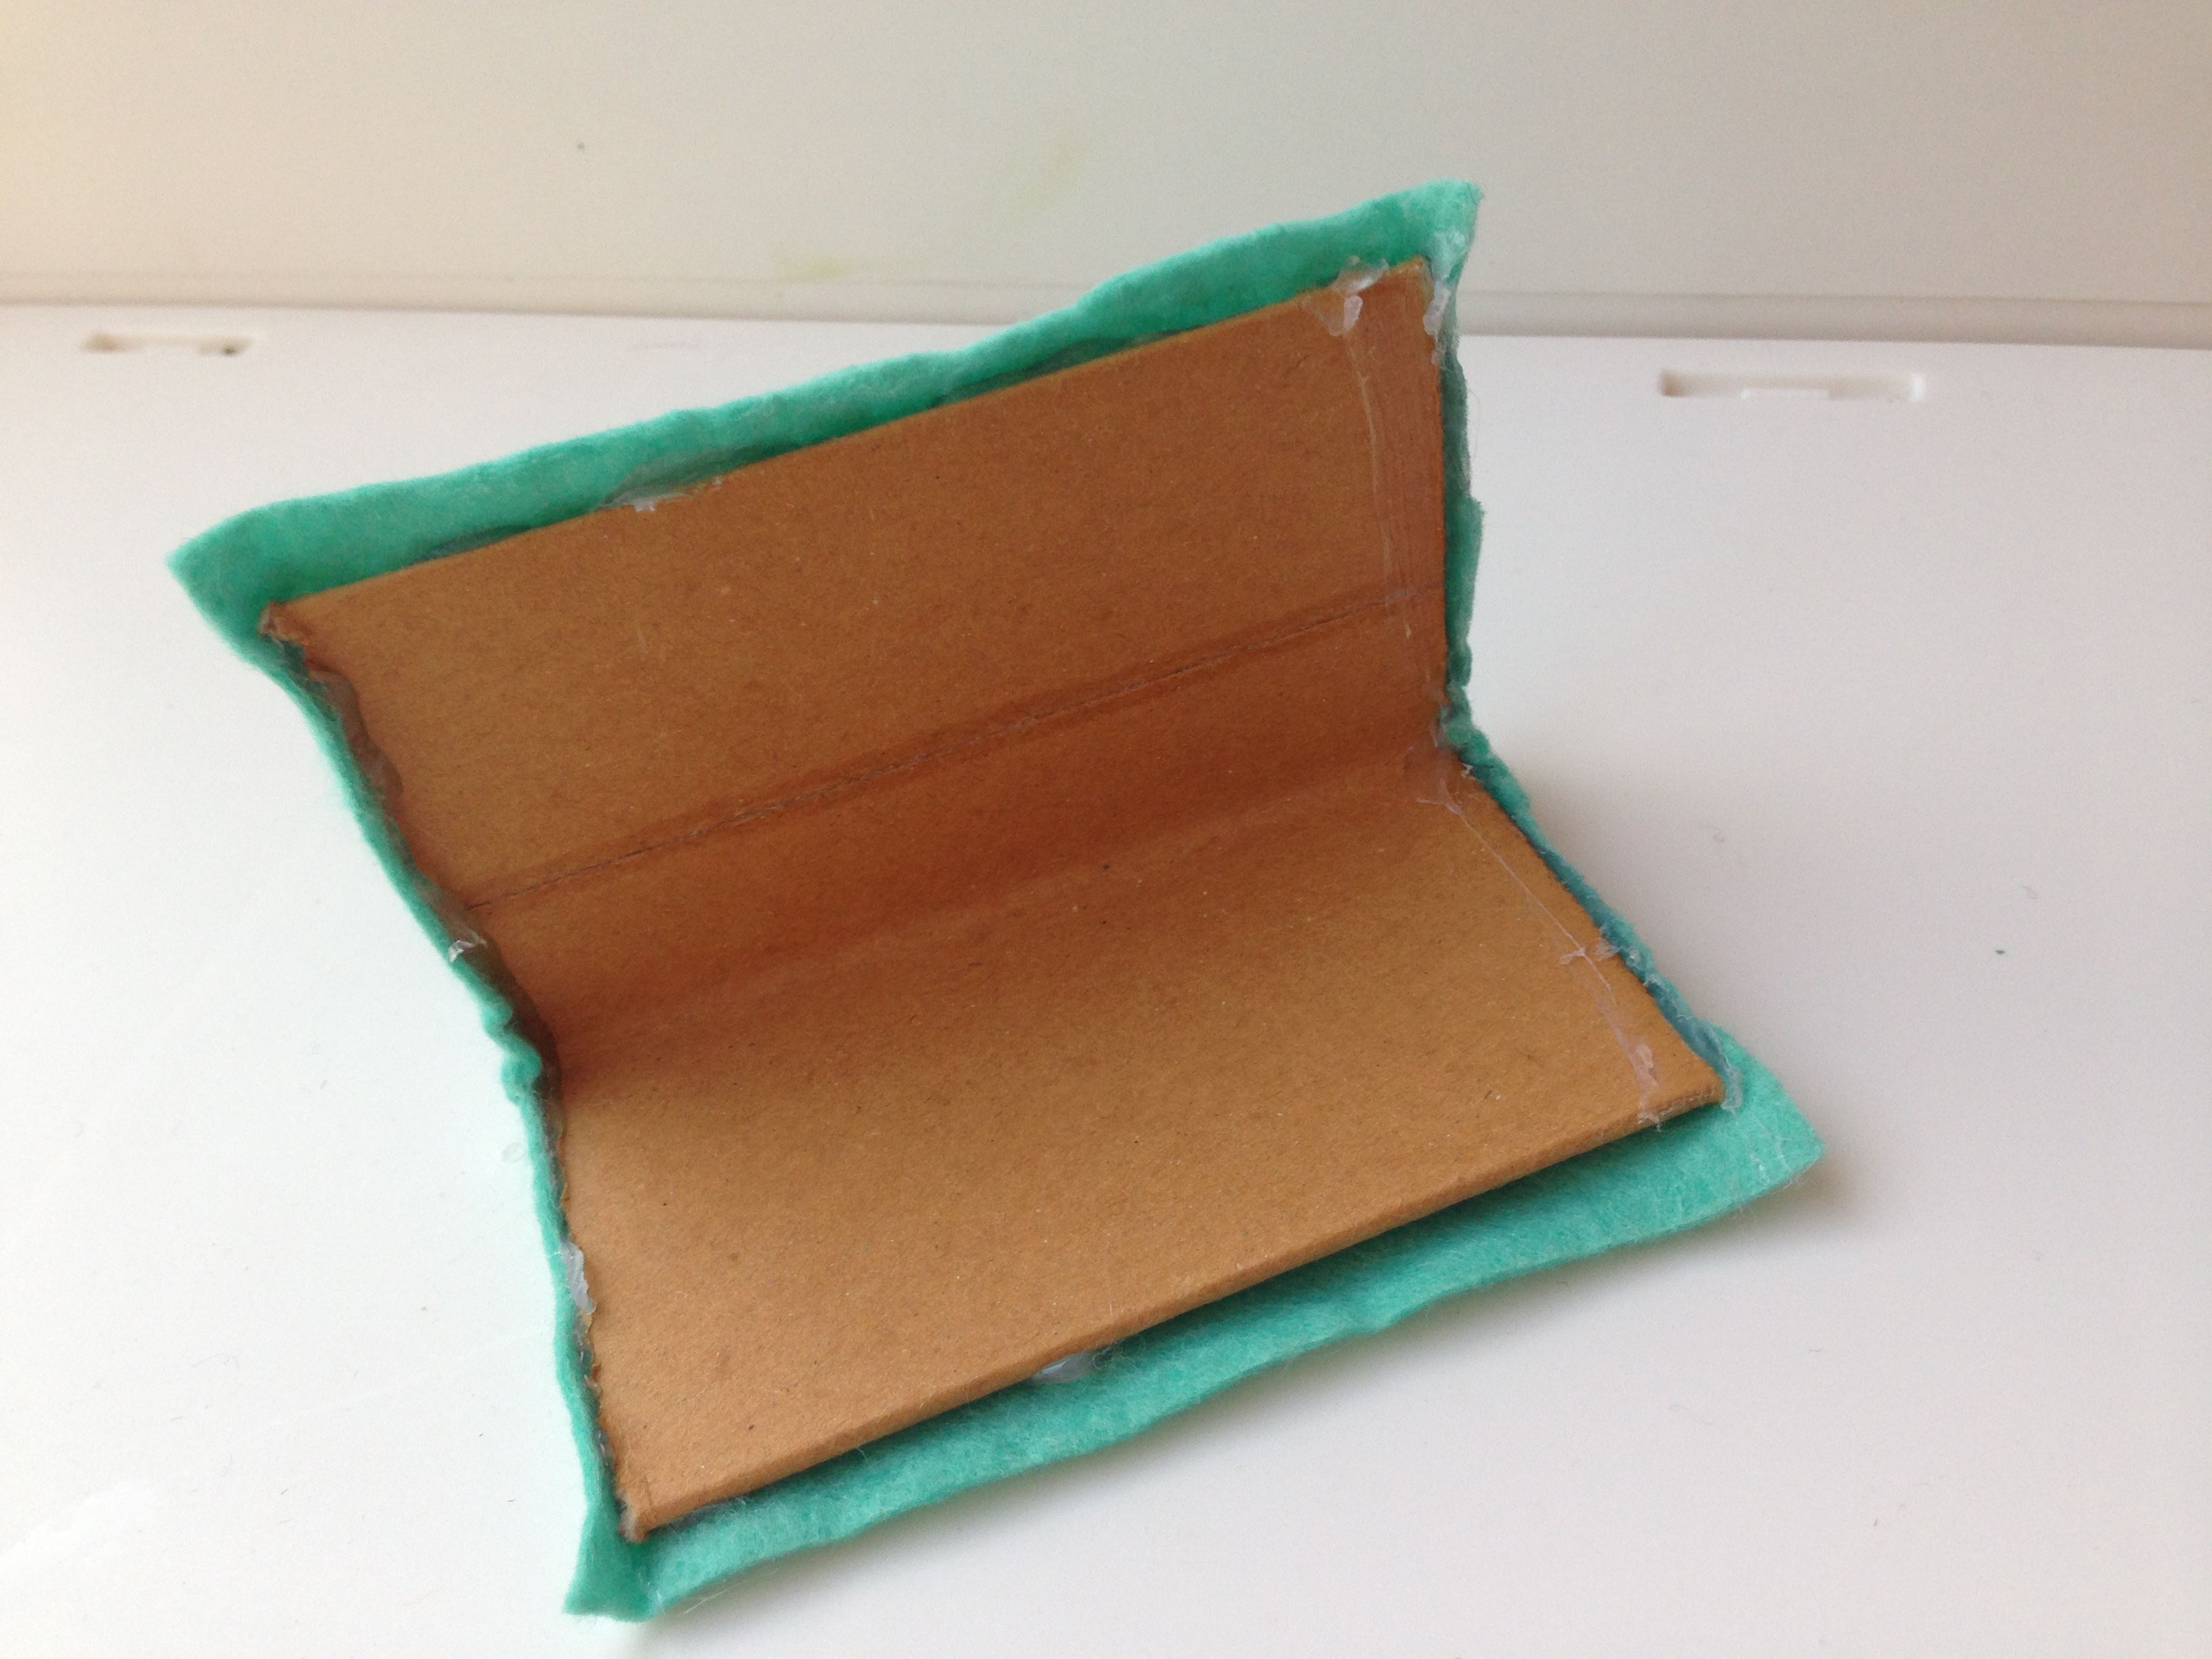
I opted to try my hand at building some structures myself. Using a frame of foam core board, I was able to get a simple structure assembled. I also lucked out and had gotten some thick cardboard at an angle which would work great as one piece roof sections.


One thing that stands out with these type of buildings is that they’re usually on raised platforms. Hanging onto some sticks I picked up from hitting a street food vendor (gotta love late night munchies after drinking soju in Korea), I was able to cut sections to simulate logs that a hut would stand on.
 This lead me to trying to figure out a way of making bamboo walls. I had gotten some wooden food skewers that were about the thickness of a toothpick. Cutting pieces of an appropriate length, I got a pile together to make up the outer walls of the hut.
The trick of course was gluing them to the foam board. I could do this gluing them individually using PVA glue, but I figured that would be tedious. Instead I lined them up side by side using a ruler to create an even edge at the base. Slathering hot glue onto the foamboard, I could then lay the base of the hut down even with the lower portion of the wooden skewers, and carefully press the entire wall section flat onto the wood pieces. They would then be firmly affixed to the foam core walls.
I did this for all four sections of the hut. To hide some of the uneven pieces, I framed the top of the walls with a single piece and was also done on the sides of the hut. This way, I could frame the entire hut with sections of wood with relatively the same length.
For the wall sections that were peaked however, I had to glue those one by one after cutting each section individually with a slight angle. This was a little time consuming but at least I only had two small sections to work on rather than the entire walls of the hut.
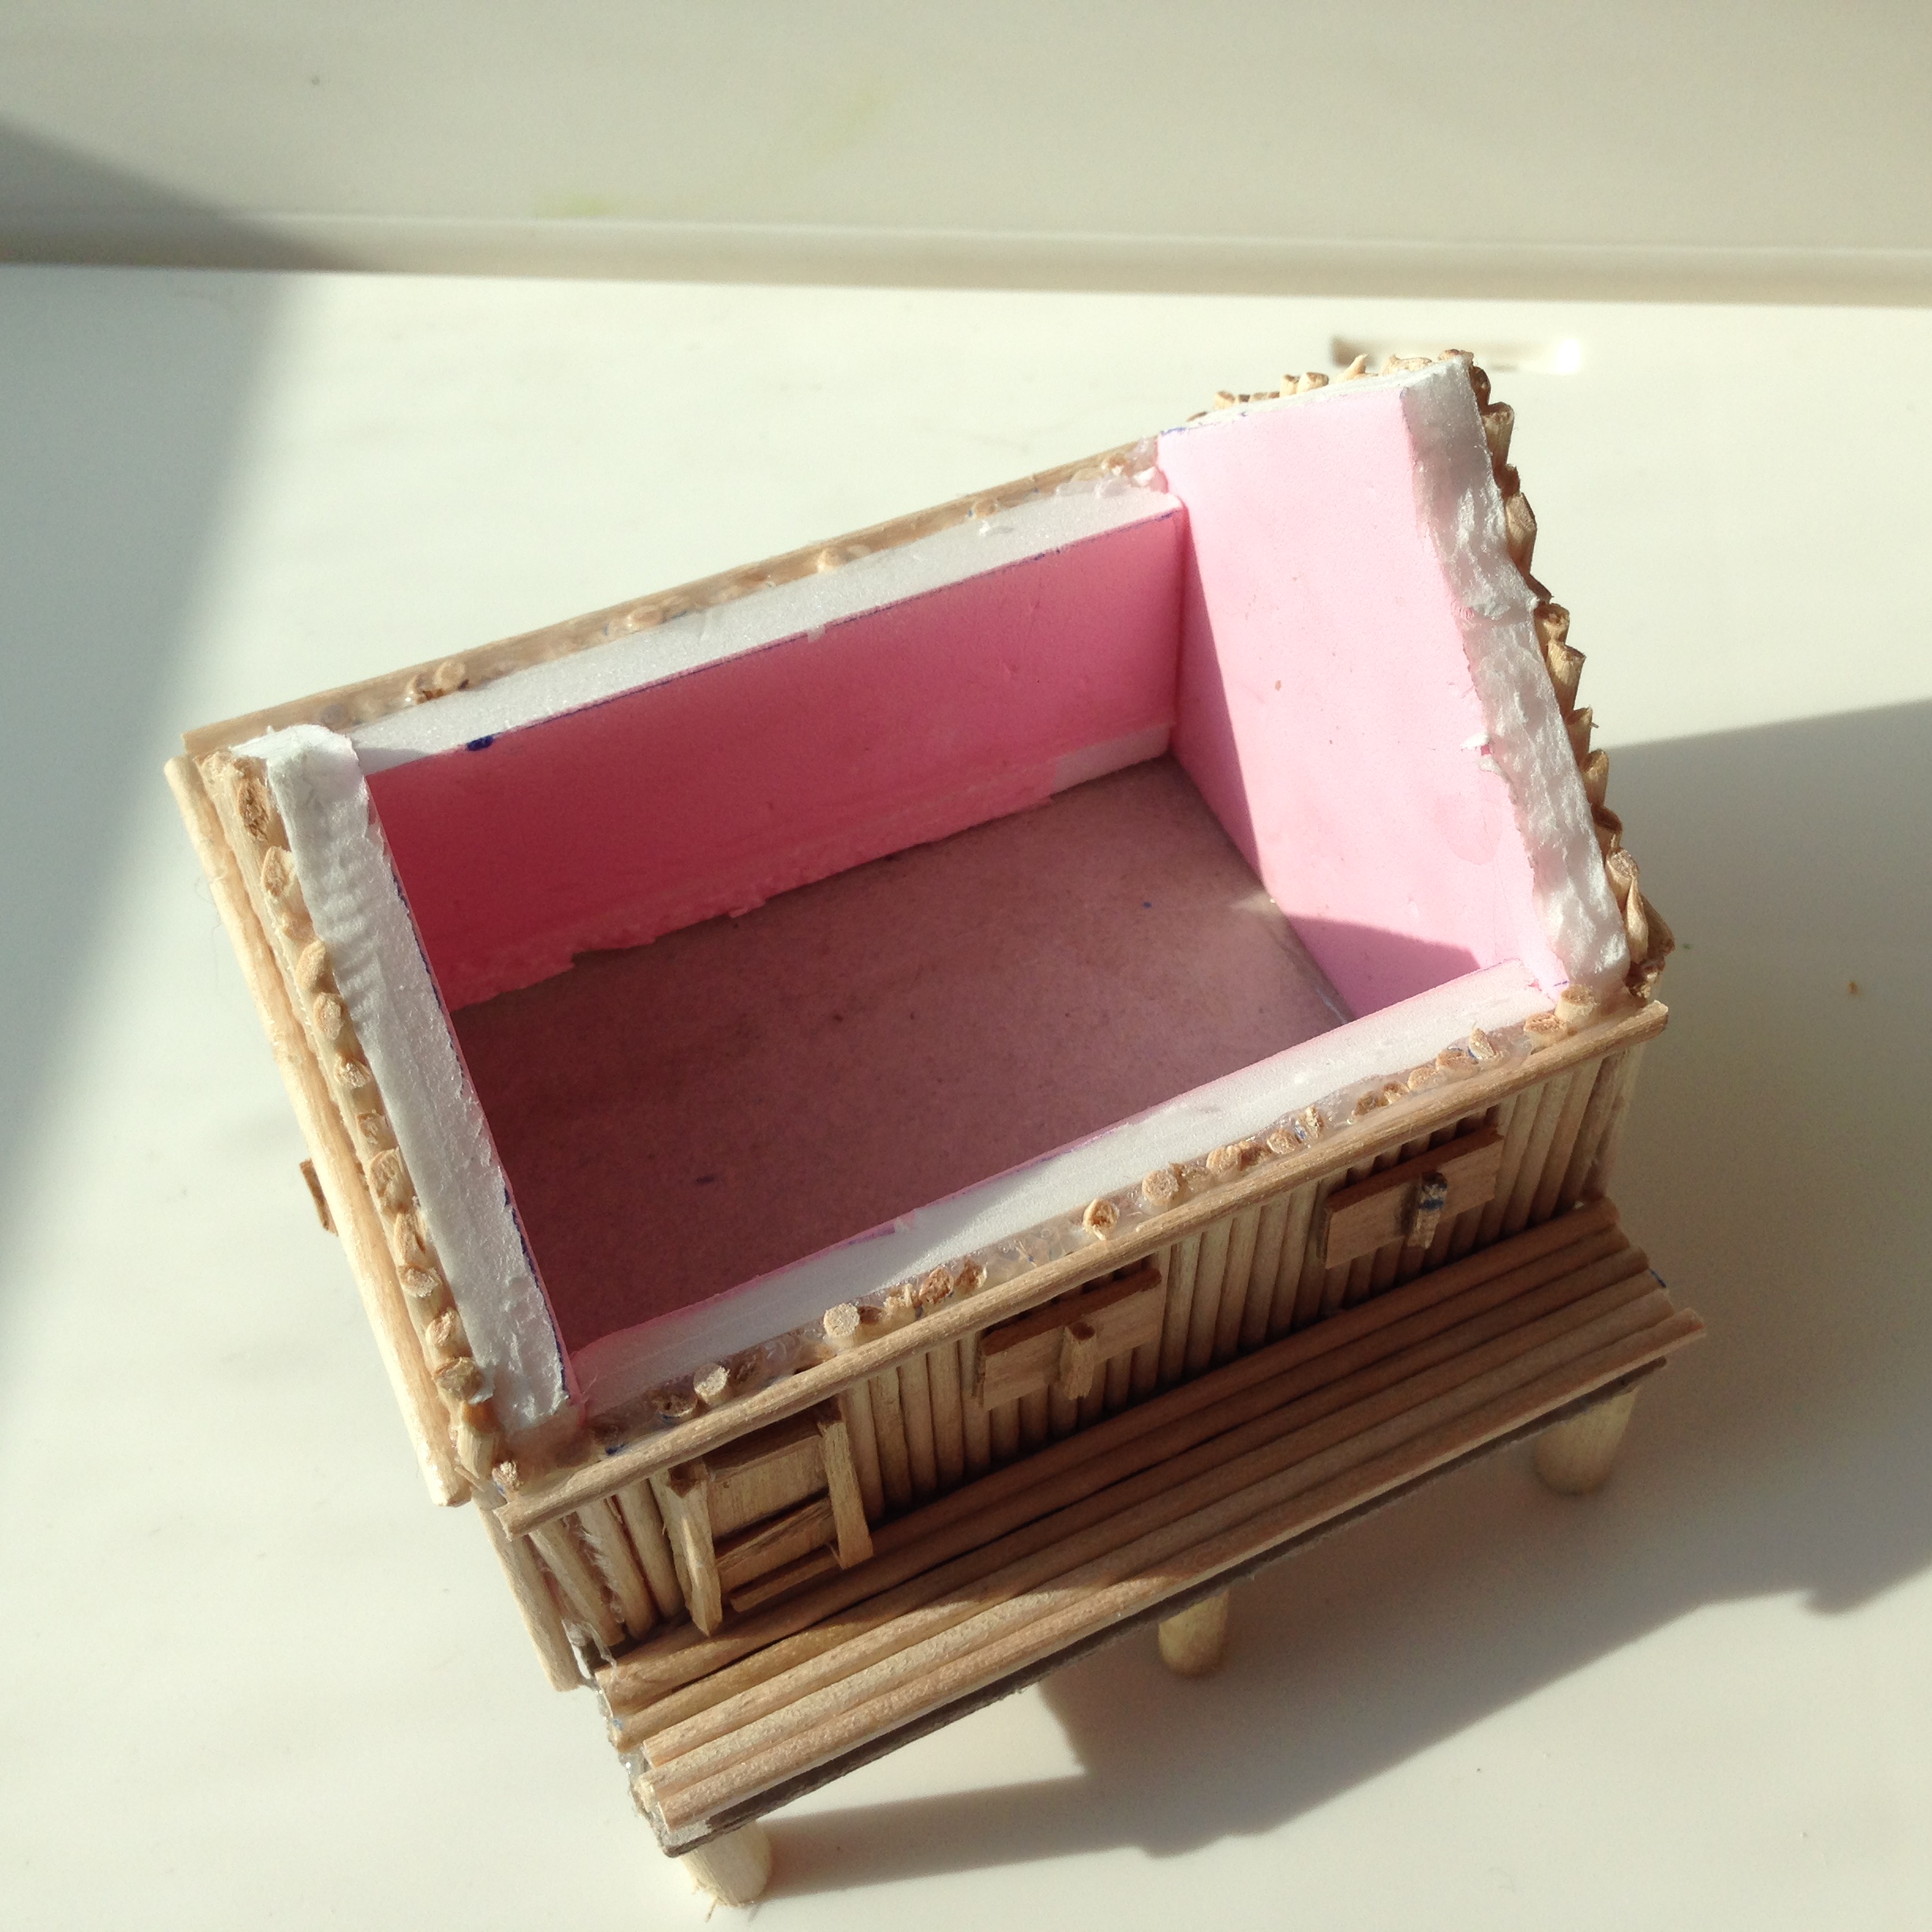
After completing the outer walls, I placed the hut onto a thick cardboard base. This base would be used to create the platform for the raised hut. One section was longer to simulate bamboo flooring for the front of the structure. Cutting out larger sections and gluing them individually, I was able to make the entry flooring easily. I then used PVA to adhere the wooden supports to the hut floor.

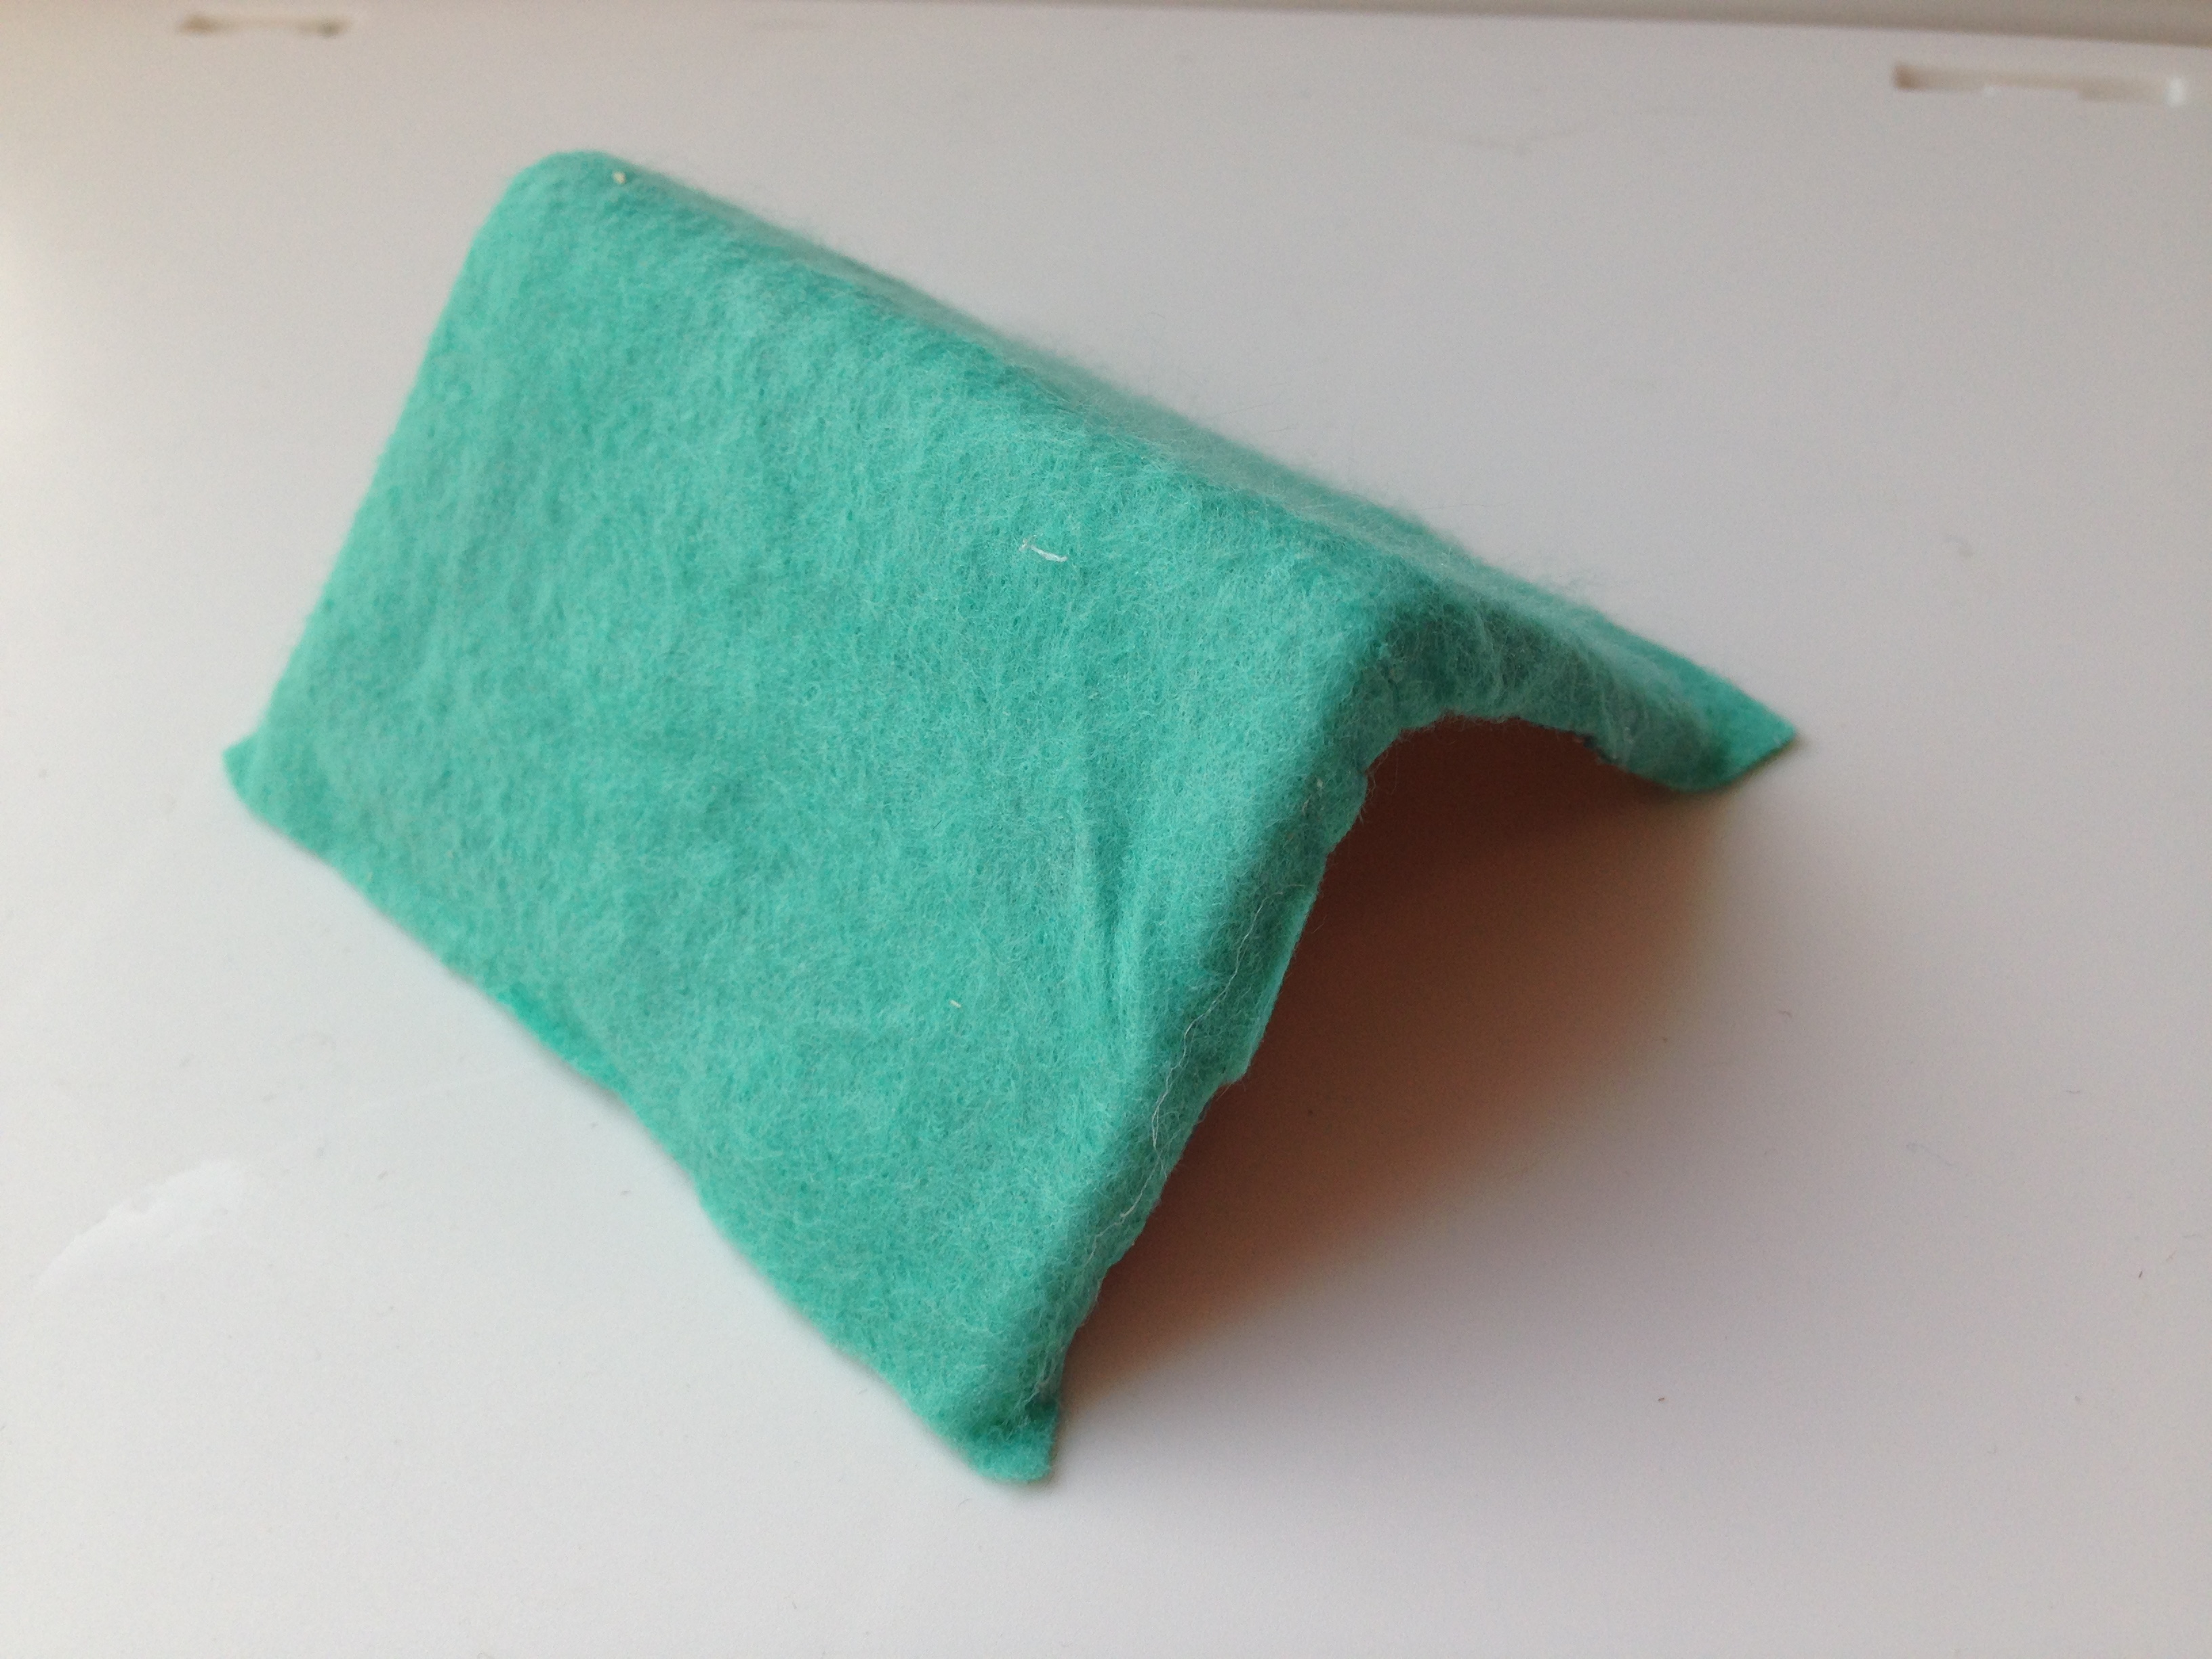
The roofs would need a little work. I decided to go for a grass look and glued a section of cleaning cloth onto the roof piece. Being cloth however, I would need to do something to seal up the surface, otherwise it would absorb all the paint. I gave the entire surface of the roof section a coat of watered down PVA glue. After drying, this created a coating all over the roof providing a simple barrier to prevent paint from being just soaked up.
I now needed to create some windows and entryways. If I had the gumption, I would have cut our sections in the foamboard. However this would also require me to cut and glue individual wooden pieces. Instead I cut sections of popsicle sticks with very thin sections to be used for the door frame and shutter supports. Gluing them onto the sides of the hut walls, they could provide openings for troops inside to shoot out of or mark the location of the building entrance.

 Some coats of paint and a basic wash, the hut was done. I opted to keep things simple with painting and gave the interior of the bamboo hut a simple black coat. I’m pretty happy with the results. The roofs fit okay and come off allowing me to place troops inside. The structure itself is pretty sturdy, however I think the real weak parts are the platform supports. Throwing the bamboo huts around in a plastic tub for storage and transportation seems like a great means to snap them off. I’ll have to be sure to keep them wrapped in some bubble wrap.
 I’ll also admit the windows and doors a little lacking. It would likely be far better looking if I had cut them out. Instead I opted to go the less fiddly route but the huts turned out okay. While I would love to give a lot of attention to the buildings, I am happy just getting something together that would look decent on the table. I’d much rather spend extra time modelling and painting miniatures than dedicating a lot of time towards terrain. So while my bamboo huts won’t win any awards, they do offer fair looking structures that are flexible enough to allow troops to be put inside, and also handle your typical gaming wear and tear.
15mm sci-fi habitat structure
 A short post today. As I’ve been dabbling in 15mm sci-fi models, I certainly needed to get some terrain built too. I’ve done plenty of fantasy and WWII stuff and it’s never been a real challenge to whip up something serviceable on the table. However for fair looking sci-fi terrain I’ve been a little at a loss.
Some of the model kits floating around are gorgeous, but not quite that cheap. Granted as 40K prices go much of it is a steal, but one thing I liked about running 15mm games was the low cost for picking up figures. I’d rather spend the money on another platoon of minis than just a cool looking building.
Slowly I’ve been picking up a lot of little plastic containers and odd packaging bits. For the most part I never quite figured out how to add small elements to make pieces stand out and avoid looking like a plastic tub. Then I stumbled across folks adding pieces of thin cardboard from cereal boxes to build up layers of material. Glued onto a plastic container, you can simulate doors and windows. Not to mention add additional layers in odd shapes to put on building details.

A bit of sandpaper was applied to the plastic to scuff up the surface and add some texture. I was able to add a few entrances and windows on a plastic food bin using thin cardboard. The bits of card were able to easily cover up your ubiquitous recycling symbol seen on most containers, and also could add some small detail to the building roof. Pretty easy modelling project to make a sci-fi structure.
I decided to just go with a simple base coat with a quick wash and drybrush. A very simple and quick alternate color for the windows with just a streak for highlights. Granted, it’s a very basic paint job and not too lovingly adorned for details. I think for other terrain I might try to put the effort in, but I’d rather save that for my minis. It’s serviceable, which is fine for now and I can always revisit it for a bit more color and detail later.
